New Garage Door Installed: A Complete How-To Guide
Learn how to plan, select, and install a new garage door with expert guidance from GarageDoorAdjust. This step-by-step guide covers materials, safety, permits, and maintenance for homeowners.

Planning a new garage door installed involves selecting a door type and insulation, confirming opening dimensions, budgeting for materials and labor, and coordinating permits if needed. This guide walks homeowners through essential steps, safety considerations, and timing to achieve a durable, efficient door with proper warranty coverage. Follow this approach to avoid common installation mistakes.
What to Expect When You Plan a New Garage Door Install
A new garage door installed is more than a curb-appeal upgrade; it can dramatically affect energy efficiency, security, and daily convenience. Homeowners often underestimate how entry height, track alignment, and weather seals influence long-term performance. At GarageDoorAdjust, we see that most successful installs begin with a clear plan: verify opening dimensions, choose materials that suit climate and budget, and ensure compatibility with any existing opener or smart-home features. A well-planned install also accounts for local codes and potential permits, which vary by region. By thinking through these factors early and documenting your measurements, you reduce surprises during delivery and installation. It’s a homeowner’s project with professional-quality outcomes when you follow a structured process and rely on trusted guidance.
Key takeaway: a successful new garage door installed starts with precise measurements, material choices, and safety planning.
Planning Essentials: Opening Size, Weather Seals, and Code Considerations
Before selecting a door, you must confirm the opening size and structural readiness. Measure width and height at multiple points, check for out-of-square jambs, and note any obstructions that could affect track placement. Weather seals, insulation options, and glazing (if any) should align with your climate and energy goals. Local regulations may require a permit for structural changes or door replacements; check with your city or county building department. If you’re unsure, consult with a local installer who understands permit workflows and code-compliant practices. A properly prepared opening reduces installation time and ensures the door operates smoothly. GarageDoorAdjust emphasizes documenting measurements and verifying compatibility with the existing opener when present.
What you’ll do next: finalize the door type, insulation rating, and panel style that best suit your home and budget.
Materials, Styles, and Energy Efficiency: Finding the Right Balance
Door construction comes in steel, aluminum, wood, and composite materials, each with its own maintenance profile and aesthetic. Insulated doors with a higher R-value improve energy efficiency and reduce heat loss in attached garages. The door’s thickness, panel configuration, and whether it includes windows will impact curb appeal and price. Steel doors offer durability with a modern look, while wood doors provide traditional warmth but require more maintenance. For extreme climates, vinyl or fiberglass options can resist warping and weathering better than older materials. When selecting a style, consider the overall architecture of your home, color-matching options, and hardware finishes that complement existing fixtures. GarageDoorAdjust guides homeowners to balance cost, longevity, and energy performance while keeping aesthetics in mind.
Pro tip: opt for insulation and weather seals that match your climate zone to maximize comfort and reduce energy bills over time.
Safety, Warranty, and Maintenance Considerations
A new garage door installed introduces multiple safety components: torsion springs or extension springs, track alignment, safety sensors, and proper spring tension. Improper setup can cause serious injury; professional installation is strongly recommended for spring systems. Check warranty terms for the door, hardware, and opener compatibility; many warranties require professional installation or specific maintenance routines. Plan for routine lubrication of moving parts, spring tension checks, and sensor tests every six months. If you choose to DIY, strictly follow manufacturer guidelines and local codes, and consider enlisting a pro for the spring system to avoid hazards. The GarageDoorAdjust team notes that honoring safety standards is crucial for long-term reliability and warranty validity.
Important safety reminder: never bypass safety devices or attempt to adjust springs without proper tools and training.
Budgeting, Timing, and Lead Time: What Drives Costs
Costs for a new garage door installed vary widely based on material, insulation, hardware, and whether you include a new opener or smart features. A basic non-insulated door will be less expensive than a fully insulated, weather-tight model with windows. The price range is influenced by panel design, decorative hardware, and brand. Labor costs depend on door weight, installation complexity, and whether any structural work is required to widen the opening. Lead times can stretch if custom colors or window inserts are chosen or during peak seasons. To avoid delays, plan ahead, confirm delivery windows, and schedule with a reputable installer early. GarageDoorAdjust research highlights that detailed planning reduces the risk of costly revisions later.
Tip: request written quotes that itemize materials, labor, and any disposal or permit fees to compare apples-to-apples.
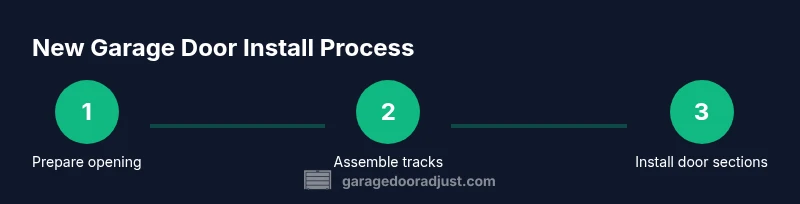
The Installation Timeline: What a Pro Completes in a Day
A professional installation typically progresses through a defined sequence: confirming measurements, preparing the opening, assembling and positioning tracks, installing the door sections, attaching the spring system and safety components, wiring and setting up the opener if included, and conducting a full functional test. Unexpected issues such as bent framing or misaligned jambs can require additional time, but experienced teams minimize downtime with pre-cut parts and precise tooling. Expect a thorough safety check at the end, including sensor calibration and balance testing. If you’re planning DIY, use this as a benchmark for scheduling—double the time estimate to account for learning curves and safety precautions. GarageDoorAdjust’s guidance emphasizes pacing work to avoid rushed, unsafe mistakes.
Note: never skip a balance test or sensor alignment; these are essential for safe operation and long-term reliability.
Aftercare, Maintenance, and Long-Term Care
Post-install maintenance keeps a new garage door performing reliably for years. Schedule semi-annual lubrication of rollers and hinges, check door balance by partial opening and manual release, and inspect weather seals for wear. Clean the tracks with a soft brush to remove debris without bending the rails. Test safety sensors monthly and replace worn weatherstripping to prevent drafts and moisture intrusion. Consider seasonal inspections after extreme weather; a quick check now can prevent expensive repairs later. The GarageDoorAdjust team recommends establishing a maintenance routine that aligns with your climate and usage patterns so you can enjoy a quiet, efficient door with minimal downtime.
Pro tip: keep a simple maintenance log to remind yourself of service intervals and parts replacements.
Tools & Materials
- Safety gear (ANSI-rated glasses, gloves)(Protect eyes and hands during cutting, handling hardware, and spring work)
- Measuring tape(Measure opening width, height, and diagonals at multiple points)
- Level and square(Ensure frame is plumb and tracks are true)
- Drill/driver with assorted bits(For screws, brackets, and fasteners)
- Hammer and pry bar(To prep jambs and adjust hardware as needed)
- Socket set and wrenches(Spring hardware and track mounting)
- Tape for chalk line(Help align track positions and level lines)
- Ladder or scaffolding(Reach overhead tracks safely)
- Door tracks and sections(Included in door kit; verify model compatibility)
- Springs, safety cables, and hardware(Part of the spring system kit; tensioned by pros if needed)
- Weather seals and insulation kit(Improve energy efficiency; choose based on climate)
- Electrical tester and sensors(Test opener wiring and safety sensor function)
- Waste container or tarp(Contain debris and packaging disposal)
- Puncture-resistant gloves(Extra protection when handling sharp hardware)
Steps
Estimated time: 3-6 hours
- 1
Prepare the opening and verify measurements
Clear the workspace and lay out all parts. Re-check opening width, height, and diagonals at several points to confirm square. Mark reference lines for track placement to ensure straight assembly.
Tip: Double-check the doorway diagonals (top-left to bottom-right and top-right to bottom-left) to confirm true square. - 2
Pre-fit tracks and door sections
Lay out door sections near the opening and dry-fit the tracks to avoid surprises. Assemble sections on the ground if the kit requires, taking care not to bend components.
Tip: Keep track components protected from bending; use friendly helpers to handle heavy sections. - 3
Install vertical tracks and horizontal jambs
Secure vertical tracks to the framing with brackets, ensuring they are perfectly plumb. Attach horizontal tracks and ensure all fasteners are tight but not over-torqued.
Tip: Use a level to confirm each track remains plumb during tightening. - 4
Attach the door sections and balance system
With a second person, lift door sections and attach to tracks. Install spring system or balance mechanism per the kit with caution and proper tensioning if you are experienced. Connect safety cables.
Tip: If you encounter stiff springs or unusual resistance, stop and consult a professional. - 5
Install the opener and sensors (if included)
Mount the opener on the ceiling, align it with the door, and connect the safety sensors on either side of the opening. Program any remotes or smart features as per the manual.
Tip: Test emergency release and sensor alignment before testing door movement. - 6
Test, adjust, and finalize
Cycle the door slowly to check balance and smooth operation. Make minor tension adjustments if needed and verify auto-reverse function of safety sensors.
Tip: Document adjustments and test in hot and cold conditions to ensure reliability.
Got Questions?
Do I need a professional to install a new garage door?
For most homeowners, hiring a professional is recommended due to the complexity of tracks, springs, and safety sensors. A pro can ensure proper balance, alignment, and warranty coverage. DIY is possible for basic parts, but spring and opener work should be handled by an experienced installer.
Most homeowners should hire a professional for a new garage door installation to ensure safety and warranty compliance. DIY is possible for non-spring components, but springs require expertise.
What permits are typically required for a new garage door installation?
Permit requirements vary by locality. Check with your city or county building department before starting. A permit helps ensure structural changes and electrical work meet safety standards.
Permits vary by location, so check with your local building department before you start installing. This protects you and ensures compliance.
How long does installation take with a pro?
Professional installation usually occurs within a single day, depending on the complexity of the opening and whether new wiring or openers are involved. Plan for a window that accounts for setup, testing, and adjustments.
Most installations take a day, but complex openings or new openers can extend that timeline.
Will a new insulated door save energy in an attached garage?
Yes. Insulated doors reduce heat transfer, helping maintain interior garage temperatures and reducing HVAC load for adjacent living spaces. The insulation level should match your climate and energy goals.
Insulated doors save energy by reducing heat transfer, especially in cold or hot climates.
Can I reuse my existing opener with a new door?
In many cases, the current opener can be reused if compatible with the door’s height and track layout. You may need sensor adjustments or a compatibility check. A pro can confirm safety and programming needs.
Your existing opener might work, but verify compatibility and sensor setup with a pro.
What maintenance is recommended after installation?
Lubricate moving parts twice a year, test auto-reverse sensors monthly, and inspect seals for wear. Keep tracks clean and adjust balance as needed to prevent uneven wear and ensure quiet operation.
Maintain the door by lubricating parts, testing sensors, and inspecting seals regularly.
What should I watch out for during installation?
Avoid forcing components, misaligning tracks, or loosening fasteners excessively. Work slowly and check each connection for perimeter gaps and level alignment. If anything feels off, pause and consult a professional.
Don’t force parts; check alignment and safety sensors, and seek help if anything seems off.
Watch Video
Quick Summary
- Measure opening accurately before buying.
- Choose insulation based on climate for energy savings.
- Safety and warranty depend on proper installation.