Carriage House Garage Door: Installation and Maintenance Guide
A complete how-to guide for carriage house garage doors—exploring design options, precise measuring, hardware choices, installation basics, maintenance, and common troubleshooting to boost curb appeal and reliability.

Learn how to diagnose, select, and install a carriage house garage door. This guide covers measuring openings, choosing materials and hardware, safety precautions, and a step-by-step installation process. You’ll find tools lists, tips to align doors with decorative hardware, and maintenance routines to keep your carriage house style functioning smoothly. Whether you’re replacing an old door or starting from scratch, the guidance prioritizes safety, durability, and curb appeal.
What is a carriage house garage door?
A carriage house garage door evokes the look of old carriage houses but uses modern materials for reliability. It typically features raised panels, decorative hinges, and sometimes windows. The main practical difference from a standard overhead door is the added depth and hardware that projects the door's style rather than only function. Key points:
- Style cues: arch tops, faux strap hinges, and antique handles.
- Materials: wood, steel, aluminum-clad wood, or fiberglass.
- Insulation: available in R-values similar to standard insulated doors.
- Installation: heavier doors may require reinforced framing and careful hardware mounting.
- Maintenance: older-looking doors benefit from seasonal finishes to protect wood.
When installed correctly, a carriage house door blends timeless curb appeal with dependable performance. The GarageDoorAdjust team notes that a well-executed design can improve home value while maintaining modern safety standards.
Design options and materials
A strong selection impacts curb appeal and durability. Options include:
- Wood doors: authentic warmth; weather-sensitive, require finishes.
- Steel doors: low maintenance, high security; can be made to resemble wood with embossed panels.
- Wood-clad steel: best of both worlds.
- Fiberglass: resistant to moisture, low maintenance, accepts decorative hardware well.
- Insulated cores: improve energy efficiency and reduce noise.
- Windows: grille patterns, sizes, and glass types to suit style.
Hardware style matters: decorative strap hinges, handles, and live hinges; lighting should complement the design. For best results, match the hardware finish to the home's exterior hardware (bronze, matte black, brushed nickel).
Measuring and ordering the right door
Accurate measurements are essential. Steps:
- Measure the width of the opening at the top, middle, and bottom; record the smallest measurement.
- Measure the opening height at left, center, and right; record the smallest height.
- Check track height clearance and headroom; ensure ceiling clearance matches door height plus hardware.
- Assess the jamb condition; repair any rot or gaps before installation.
- Photograph the opening and note any obstructions (lights, outlets).
- Confirm panel count, window placement, and hinge spacing with the manufacturer.
Ordering tip: provide multiple photos and exact measurements; request a door model designed for your exact opening with the same track configuration.
Matching hardware and weather sealing
To keep the look cohesive and weather-tight:
- Choose hardware that mirrors period style while using modern corrosion-resistant materials.
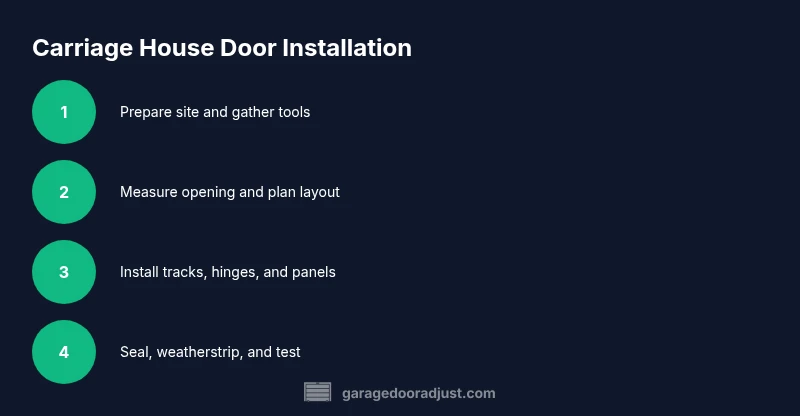
- Ensure seals are compatible with a raised-panel design; install bottom and side weatherstripping.
- Use sill gaskets or threshold seals to block drafts.
- Verify the door's balance and alignment after installation, and check for air leaks around the frame.
Lastly, verify compatibility with door openers and safety sensors if you plan to integrate an automatic opener.
Maintenance and care
Regular maintenance keeps the door looking great and operating smoothly:
- Wipe down surfaces to remove dust and grime; reseal wooden surfaces every 2-3 years.
- Lubricate rollers, hinges, and tracks with light machine oil every 6 months.
- Inspect weatherstripping for wear; replace worn seals to prevent moisture.
- Tighten loose screws and hardware; check hinge pins for cracks.
- Test the balance and auto-reverse safety feature monthly. Tips: never skip safety checks for springs; call a pro if you hear grinding or see misalignment.
Troubleshooting common issues
Common problems and quick checks:
- Sticking or binding: inspect tracks and rollers; ensure tracks are not bent and are aligned.
- Noisy operation: lubricate, tighten hardware, and replace worn rollers.
- Poor insulation: inspect weather seals and insulated panel condition; potential draughts around frame.
- Door not closing fully: check alignment and sensor alignment; ensure no obstruction at floor.
- If springs feel heavy or if you must adjust tension, contact a licensed technician; torsion springs are dangerous.
If you're ever unsure, err on the side of safety and consult a professional installer.
Tools & Materials
- Measuring tape(25 ft or longer for precise openings)
- Level(To verify vertical and horizontal alignment)
- Drill/driver(Bits for wood and metal)
- Screwdrivers set(Phillips and flat-head included)
- Pry bar(For removing trim or stubborn fasteners)
- Hammer(General use and adjustments)
- Wood shims(To plumb and level the door frame)
- Ladder(Stable access to upper tracks)
- Caulk/sealant(Weatherproofing around frame)
- Weatherstripping(Remnants or replacement for door edges)
- Door hardware kit(Includes hinges, rollers, and tracks as needed for carriage style)
- Safety gear(Gloves and eye protection)
- Caulk gun(Optional for sealant application)
- Tools for masonry anchors(Only if mounting into masonry)
Steps
Estimated time: 4-6 hours
- 1
Prepare the workspace
Clear the area around the doorway, protect flooring, and lay out tools. Create a safe work zone to handle heavy door panels and hardware. Establish a stable support for the door sections if you’re laying them down for assembly.
Tip: Keep a helper nearby to manage heavy panels and avoid pinched fingers. - 2
Measure the opening and plan the fit
Take precise width/height measurements at multiple points and document headroom. Confirm the track layout matches your chosen carriage design. Share measurements with the manufacturer or installer to prevent ordering errors.
Tip: Double-check measurements before ordering to avoid costly returns. - 3
Prepare the opening and remove old components
If replacing an existing door, remove old hardware, detach the opener if present, and repair any framing issues. Ensure rough opening is square and clean before new sections arrive.
Tip: Do not force components through a misaligned opening—adjust the frame first. - 4
Hang door sections and attach hinges
With a helper, position the uppermost door panel and secure hinges. Install subsequent panels, ensuring each aligns with the jamb and tracks. Keep the door panels level as you go.
Tip: Avoid over-tightening screws on fragile decorative panels. - 5
Install tracks, rollers, and weather seals
Mount vertical tracks plumb to the framing, attach rollers, and fit weatherstripping around the perimeter. Check alignment across both sides and ensure smooth roll/slide movement.
Tip: If tracks don’t align, stop and re-check plumb before finishing. - 6
Test operation and safety check
If using an opener, reinstall it and test auto-reverse and force limits. Inspect for binding, unusual noises, and proper sealing. For springs, consult a licensed technician; do not attempt tension adjustments yourself.
Tip: Always prioritize safety around springs and high-tension hardware.
Got Questions?
What is a carriage house garage door?
A carriage house garage door mimics historic carriage-house styling while using modern materials for reliability. It features raised panels and decorative hardware, blending timeless charm with everyday practicality.
Carriage house doors imitate historic styling with modern materials for reliability.
Are carriage house doors more expensive than standard doors?
They often cost more due to decorative hardware and design details, plus potential higher material quality. Prices vary widely based on material, insulation, and whether windows are included.
They typically cost more because of design details and materials.
Can I install a carriage house door myself?
Do-it-yourself installation is possible for non-spring components and simple openings. If your door uses torsion springs or heavy panels, hire a professional for safety.
You can DIY parts of the install, but springs should be handled by a pro.
What maintenance is required for carriage house doors?
Regular cleaning, resealing wooden surfaces, lubricating moving parts, and inspecting seals are recommended. Refinish wood periodically to maintain appearance and weather resistance.
Keep the door clean, lubricated, and seals intact to extend life.
What opener compatibility should I consider?
Most carriage house doors can be opened with standard openers, but ensure the opener is sized for the door weight and that safety sensors are compatible.
Most openers work, but check weight and safety sensor compatibility.
How long does installation typically take?
A full installation usually takes several hours depending on the door size, opening condition, and whether you’re replacing an opener as well.
It can take a few hours, depending on the specifics of the project.
Watch Video
Quick Summary
- Measure openings accurately before ordering
- Choose material and hardware to match climate and style
- Prioritize safety; hire pros for spring-related work
- Seal and insulate to maximize energy efficiency