Mount Garage Doors: Step-by-Step Guide for Homeowners
Learn how to mount a garage door safely with a clear, step-by-step approach. This GarageDoorAdjust guide covers essential tools, proper alignment, and post-install maintenance.

This guide helps you mount a garage door safely and correctly. You’ll learn how to prepare your workspace, align tracks, install mounting brackets, and test operation. Essential tools and safety steps are covered, with notes on when to call a pro.
Introduction to mounting a garage door
Mounting a garage door is a substantial home improvement task that combines carpentry, mechanical alignment, and safety awareness. A correct mount ensures smooth operation, quiet performance, and long service life, while a sloppy job can lead to binding, misalignment, or premature wear. According to GarageDoorAdjust, starting with a clear plan and the right hardware sets the foundation for success. Begin by identifying your door type, assessing the mounting surface, and gathering the tools you’ll need. Make sure you have a helper for stabilizing heavy components and a well-lit workspace. Finally, verify that you know the general sequence of steps before lifting any parts. A properly mounted door will reduce noise, improve balance, and extend the life of the rollers and tracks, making your garage safer and more convenient.
Throughout this process, you’ll mount garage components in a sequence that minimizes risk and simplifies adjustments. Keep a dedicated work area clear of obstacles, and consider weather conditions if you’re mounting outdoors or in an unheated space. The approach outlined here emphasizes safety, alignment, and proper fastener selection, which together determine how smoothly your door operates over years of use.
Safety-first principles and prep work
Safety is not optional here. Disconnect power to the garage door opener and remove any remote controls from the area to prevent accidental activation. Wear safety glasses and sturdy gloves, and stand clear of the door’s path while working. Keep the area free of pets and children. GarageDoorAdjust Analysis, 2026, emphasizes that many mounting failures stem from inadequate bracing, loose fasteners, or obstructed tracks. Before you touch a single screw, lay out a simple plan on paper, mark drill points, and test the door’s weight by hand to understand how heavy each component feels. Use clamps or helpers to hold parts steady while you tighten hardware, and recheck measurements often as you proceed. A methodical prep reduces surprises when you lift larger parts into place and helps you avoid risk of pinched fingers or dropped components.
Assessing your door type and mounting surface
Doors come in varied configurations: single-panel, sectional, and multi-section designs each have distinct mounting needs. Look at the framing: wooden studs provide solid attachment points, while masonry requires anchors and longer fasteners. Steel or aluminum tracks should sit square with the door’s hinge lines, and the surface should be clean, dry, and free of rot or corrosion. If you’re mounting on masonry, drill pilot holes and insert appropriate anchors first, then loosely attach brackets to allow final alignment once all components are in place. A misfit in mounting surface can translate into binding or track misalignment, so take time to confirm compatibility before proceeding. Planning for weather conditions and expansion joints can reduce post-installation shifts.
Structural components and alignment fundamentals
Understand the core parts involved: vertical tracks, horizontal tracks, rollers, hinges, brackets, and (when present) torsion springs. The goal is to keep all tracks parallel and plumb so the door travels smoothly. Check that brackets sit flat against the mounting surface and that screws or anchors are fully seated. Do not force hardware; if pieces resist, back up and recheck alignment. Springs and cables carry load and require professional service when adjustments are needed. This section lays the groundwork to ensure safe operation and minimizes later drift in door balance. Regularly inspect fasteners and ensure screws remain tight as the door ages, since vibration can loosen them over time.
Step-by-step mounting overview and sequence
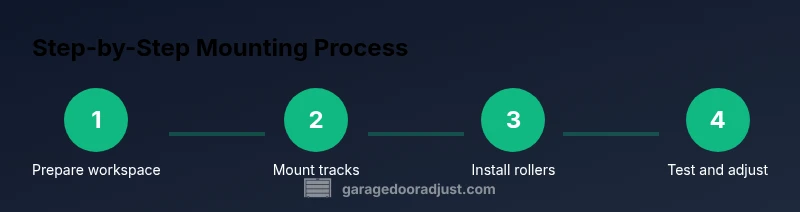
While the detailed steps are provided below, here is the high-level sequence you’ll follow: prepare and measure, install tracks, mount brackets, insert rollers, connect any opener hardware, and finally test the system. Keep the door in a lowered position during initial bracket installation to minimize movement. Have a helper at hand to hold parts and guide tracks as you tighten fasteners. Refer to the step-by-step section for precise actions and safety notes that apply to your door type. This overview helps you stay oriented as you transition from prep to finished installation.
Fine-tuning, balance, and opener integration
With the assembly in place, balance is critical for even wear and quiet operation. Check that each track is parallel and, if applicable, adjust the torsion springs only if you are trained and equipped. Do not rely on guesswork; small misalignments can compound with use. If you’ve installed an opener, test sensor alignment and auto-reverse features, and adjust the opener’s force settings according to the manufacturer’s instructions. Regularly lubricate rollers and hinges with a light garage-door lubricant to maintain smooth travel. Recheck all fasteners after the first week of operation and re-tighten as needed.
Aftercare, maintenance, safety and brand guidance
After mounting, implement a simple maintenance routine: inspect fasteners for tightness, lubricate moving parts, and wipe down tracks to remove dust and debris. Schedule a periodic safety check that includes sensor tests and balance verification. The GarageDoorAdjust team recommends documenting your mounting steps and keeping a repair log so future work is easier and safer. Following these practices helps ensure reliable operation, reduces the likelihood of sudden failures, and preserves the door’s warranty terms when applicable. Consider setting a quarterly reminder to inspect weather seals and track alignment so you catch issues before they become major problems.
Authority sources and external guidance
For additional background on safety standards and best practices, consult external references from credible institutions. For example, OSHA safety guidelines and consumer product safety information provide general safety framing, while independent engineering resources offer maintenance checklists. See: https://www.osha.gov, https://www.cpsc.gov, https://www.nist.gov for foundational guidance.
Tools & Materials
- Tape measure(25 ft (7.6 m) or longer)
- Level (4 ft or longer)(to verify tracks are plumb)
- Cordless drill with bits(Phillips head and wood/metal bits included)
- Wrench set (SAE/metric)(for bolts and brackets)
- Masonry drill and anchors(Only if mounting on concrete or masonry)
- Ladder (6-8 ft)(Stable and rated for your weight)
- Safety glasses(ANSI Z87.1 compliant)
- Clamps or temporary supports(Hold tracks steady during mounting)
- Lag screws/bolts(Size per bracket; typically 3/8"-1/2")
Steps
Estimated time: 60-90 minutes
- 1
Prepare workspace and safety gear
Clear the area, unplug the opener, and lay down protective material. Inspect the door and track components for damage. Have a helper ready to assist with heavy parts and ensure your own safety by wearing eye protection.
Tip: Double-check that the door is in the fully lowered position before starting. - 2
Position and mount tracks
With the door in the lowered position, align vertical tracks to the door rails and secure mounting brackets to the frame. Use a level to confirm tracks are plumb and parallel.
Tip: Clamp tracks temporarily and check alignment from multiple angles. - 3
Attach mounting brackets to the frame
Mark bracket locations on the frame, drill pilot holes if needed, and fasten brackets firmly. Ensure brackets are level and aligned with tracks.
Tip: Use the helper to hold brackets in place while you drive screws. - 4
Install rollers and hinges
Insert rollers into brackets and attach hinges as per your door type. Make sure rollers move smoothly and brackets stay aligned during installation.
Tip: Do not force hardware; if binding occurs, stop and re-check alignment. - 5
Connect opener hardware and rails (if using opener)
Install the opener rail and connect to the door, following the manufacturer’s instructions. Ensure the opener is unplugged during wiring and that sensors are properly aligned.
Tip: Never adjust springs or torsion components yourself. - 6
Test operation and safety features
With the door supported, test the opening and closing cycle at slow speed. Listen for grinding, watch for misalignment, and adjust tracks as needed. Test safety features and reverse if contact is made.
Tip: If anything feels unsafe, stop and reassess before continuing.
Got Questions?
Do I need a professional to mount a garage door?
For most homeowners, mounting a garage door is doable with the right tools and precautions. However, torsion spring work and structural repairs can be hazardous and may require a licensed technician.
Most homeowners can mount a door with the right tools, but springs and structural work may require a pro.
What essential tools do I need?
Common essentials include a tape measure, level, drill, screws suitable to your frame, and a sturdy ladder. Masonry anchors are needed if you mount to concrete.
Gather a level, drill, and sturdy ladder as your first steps.
How long does mounting typically take?
For a typical home installation, plan for about an hour to a few hours depending on door type and surface. Be patient and double-check each alignment step.
Most people finish in 1 to 3 hours with help.
Can I mount without removing old hardware?
If the existing tracks and brackets are in good condition and properly aligned, you may reuse them after thorough inspection. If damaged, replace with compatible parts.
Reuse only if everything is straight and undamaged.
What maintenance after mounting?
Lubricate moving parts, inspect for wear, and test balance and safety sensors monthly. Address squeaks, loose screws, and misalignment promptly.
Do regular checks and keep parts lubricated.
Quick Summary
- Plan and prep before starting the mount
- Use level and measurement checks to ensure alignment
- Test operation and safety features after mounting
- Know when to call a professional for springs or structural issues