Garage Door Remote WiFi: Step-by-Step Guide for Homeowners
Learn how to connect your garage door to WiFi, select a compatible remote, secure your network, and control your door remotely with expert step-by-step guidance and practical tips.

Using garage door remote wifi lets you open, close, and monitor your garage from your phone or smart hub. Step-by-step, you’ll verify compatibility, install a wifi-enabled module, connect to your home network, and pair your devices for remote access. According to GarageDoorAdjust, a secure setup hinges on strong passwords, firmware updates, and properly segmented networks.
What is garage door remote wifi and why it matters
The term garage door remote wifi describes a setup where your garage door opener is connected to your home wifi network, allowing control via a smartphone app or smart home hub. Instead of a simple handheld remote, you gain remote access, status updates, and automation potential. This technology is especially useful for households with multiple drivers, shared access, or frequent forgetfulness about whether the door is closed. When you use garage door remote wifi, you can close the door from the office, check status while running errands, or schedule daily closing routines. For peace of mind, ensure your wifi network is secure and that your devices run current firmware. The GarageDoorAdjust team notes that reliability hinges on the compatibility of your opener with wifi modules and on a stable internet connection, not merely an app choice. In 2026, many garage door systems offer built-in wifi or retrofit kits that integrate with major platforms (Apple HomeKit, Google Home, Amazon Alexa) for voice and automation. The most practical path starts with understanding how data travels: a small module talks to your router, which then communicates with your cloud account or local app, translating your taps into door movement. Remember that this is a convenience, not a bypass of safety rules.
Compatibility and prerequisites
Before you buy anything, verify that your current garage door opener supports wifi connectivity either directly or via a retrofit kit. Check model numbers and manufacturer recommendations, and ensure your home network uses 2.4 GHz bands or a compatible dual-band router. A stable internet connection and a dedicated device profile for smart-home devices reduce interference. According to GarageDoorAdjust Analysis, most widely supported wifi-enabled openers operate on 2.4 GHz, with firmware updates critical for security and performance. If you have a newer opener with built-in wifi, follow the manufacturer’s app setup; if not, plan for a retrofit module that plugs into the opener’s control panel. Consider age, warranty, and compatibility with your preferred smart home ecosystems. This stage prevents wasted purchases and sets up a smooth installation path.
Choosing hardware: wifi-enabled opener vs retrofit kit
You have two main routes to garage door remote wifi: a wifi-enabled opener with native app support or a retrofit kit that adds wifi to an existing opener. Built-in wifi is often simpler and cleaner, but retrofit kits offer flexibility and lower cost for older doors. When evaluating options, look for: ease of integration with your current app ecosystem, how the system handles authentication, and the quality of the cloud service or local hub. Retrofit kits typically communicate via a bridge or module that attaches to the opener’s logic board, while wifi-enabled openers integrate directly with your existing system. Budget ranges vary by brand and features, but expect a broad spectrum from inexpensive modules to feature-rich hubs with geofencing and shared access. Read reviews for reliability and check compatibility with your door size, track style, and mounting space.
Security and privacy considerations for wifi garage door
Security is non-negotiable with any wifi-enabled door system. Use a strong, unique password for your app and router, enable two-factor authentication where available, and keep firmware up to date. Segment IoT devices on a guest network to limit cross-access, and avoid exposing the device to the public internet unless you know how to configure secure remote access through the app. The GarageDoorAdjust Team emphasizes that remote access should be treated like any other smart-home device: apply least-privilege access, monitor activity logs, and disable features you don’t use. If you enable geofencing, be mindful of how the app uses your location data and consider turning off always-on location sharing. Regularly review connected devices and revoke access for unused accounts.
Setup overview: from router to remote access
Setting up garage door remote wifi starts with selecting compatible hardware, then connecting the device to your home network. Install the app on your phone, create a secure account, and follow the pairing steps to link the wifi hub with your opener. After pairing, configure notifications for door activity, set access permissions for household members, and test both local and remote operation. Expect a small initial learning curve, especially if you’re new to home networks. Over time, the benefits include convenience, better security via real-time alerts, and the ability to integrate with other smart devices like voice assistants or smart lighting. Be patient with initial pairing, as some hubs require firmware updates during the first setup.
Troubleshooting common issues and maintenance
If the remote wifi setup isn’t responding, check the wifi signal at the opener, ensure the hub is online, and re-pair the device in the app. If the door opens but app commands lag, inspect network congestion or router settings, and consider relocating the hub closer to the opener. Always verify that the door is safe to operate manually in case of a complete system failure. Regular maintenance includes testing backup power, updating firmware, and reviewing access logs for unfamiliar activity. In the end, a well-tuned wifi garage door system offers reliable control and better peace of mind. The GarageDoorAdjust Team stresses ongoing maintenance as essential for long-term performance.
Authority sources and safety reminders
For readers seeking formal guidance on safety and best practices, consult authoritative sources such as government and university resources. These materials emphasize safe mechanical operation, electrical safety, and cybersecurity best practices for connected devices. Always follow local codes when mounting or wiring retrofit hardware and consider professional help for complex installations. A smart-home setup should enhance security, not introduce new risks.
Authority sources
- OSHA: Safety guidelines for mechanical systems and electrical work: https://www.osha.gov
- U.S. Department of Energy: Energy efficient and safe home systems: https://www.energy.gov/energysaver/
- Federal Trade Commission: Smart home security and consumer protection tips: https://www.consumer.ftc.gov/articles/smart-home-security
Tools & Materials
- Smartphone with compatible app (iOS or Android)(Ensure app is latest version; secure login)
- WiFi router that supports 2.4 GHz (and 5 GHz if available)(2.4 GHz recommended for compatibility with most hubs)
- WiFi-enabled garage door opener or retrofit kit(Check model compatibility with your opener and wall control wiring)
- Basic toolkit (screwdrivers, ruler, level)(Used for mounting hub and any small adjustments)
- Ladder or step stool(Needed for ceiling-mounted sensors or mounting a module near the opener)
- Power source near the opener(USB power or accessible outlet for the hub)
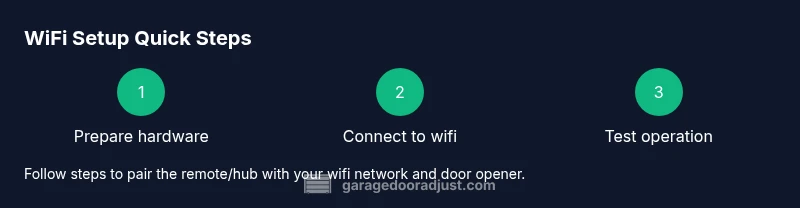
Steps
Estimated time: 60-90 minutes
- 1
Check compatibility and prerequisites
Review your opener model and confirm it supports wifi or can be paired with a retrofit kit. Verify your home network supports the device and has 2.4 GHz access. This prevents buying incompatible hardware and speeds up installation.
Tip: Take close-up photos of model numbers and any labels on the opener for quick lookups. - 2
Choose hardware: built-in wifi vs retrofit
Decide whether to upgrade to a wifi-enabled opener or retrofit the existing unit with a compatible bridge. Compare setup complexity, cost, and ecosystem compatibility to ensure a smooth experience.
Tip: If your opener is over 10-12 years old, a retrofit kit often saves time and effort. - 3
Install the hardware hub
Mount the wifi hub near the opener, connect power, and attach any sensors per the manufacturer’s instructions. Ensure the hub has a stable power source and reasonable clearance from metal surfaces that could interfere with signal.
Tip: Use a wall mount or shelf with easy access for future maintenance. - 4
Connect the hub to your home wifi
Open the app and follow the prompts to join your home network. Enter the wifi password carefully and verify the hub gains a stable connection before proceeding.
Tip: Prefer a dedicated IoT network with a strong password for security. - 5
Pair the opener with the hub
Using the app, initiate pairing mode on the hub and the opener. Wait for a successful link status and check that door status reports correctly in the app.
Tip: If pairing fails, reset the hub’s wifi settings and retry. - 6
Configure security and access
Set up user accounts, permissions, and two-factor authentication if available. Enable push notifications for open/close events and review privacy settings.
Tip: Limit access to trusted family members and disable guest access if unnecessary. - 7
Test local and remote control
Operate the door from the app while on the same network and then via a remote connection. Confirm response times, and ensure safety sensors trigger correctly.
Tip: Test a manual backup method in case network access is unavailable. - 8
Set up automations and geofencing
Create routines like closing the door at a set time or when you leave home. If supported, enable geofencing to auto-close when you depart. Review privacy implications first.
Tip: Start with simple automations to avoid unexpected door operations. - 9
Maintenance and updates
Regularly update device firmware, review access logs, and test the system monthly. Keep a spare battery for any wireless sensors and verify the physical door alignment annually.
Tip: Schedule quarterly checks to maintain reliability and safety.
Got Questions?
What is garage door remote wifi and what does it do?
Wifi-enabled remote lets you open/close your garage door from a smartphone app or smart hub, anywhere with internet. It relies on a wifi module or retrofit kit connected to your opener.
Wifi-enabled remotes let you operate your garage door from your phone or hub, anywhere with internet.
Do I need a new opener to use wifi remote access?
Not always. Many retrofit kits work with older openers; some older models may require upgrading to a wifi-enabled unit.
Often you can retrofit an older opener, but some units require replacement.
Is it secure to expose my garage door to wifi?
Remote access is generally secure when you use a strong unique password, enable two-factor authentication, keep firmware updated, and avoid port-forwarding. Follow security best practices.
Security hinges on strong passwords, updates, and limiting direct internet exposure.
Can multiple devices control the same wifi garage door?
Yes, you can authorize multiple smartphones or hubs via the app. Some hubs support family access with notifications.
You can add family members but manage their access in the app.
What should I do if the door won’t respond to wifi?
Check wifi signal at the garage, verify the hub is online, re-pair the device, and test the physical opener for jams. If needed, reset the module.
First check signal and re-pair, then test the physical opener.
Are there ongoing costs for wifi garage door control?
Most systems have no monthly fee for basic remote control; some advanced features or cloud backups may have optional subscriptions.
Most features are free; check the manufacturer’s terms for premium options.
Watch Video
Quick Summary
- Choose hardware compatible with wifi and your ecosystem
- Secure your network with a strong password and MFA
- Test door operation during setup and after changes
- Regularly update firmware and review access permissions