Garage Door 32x80: A Complete Step-by-Step Guide
A complete, step-by-step guide for planning, measuring, installing, and maintaining a garage door 32x80. Learn how to choose panels, tracks, insulation, openers, and safety practices that ensure reliable operation and long-term value.

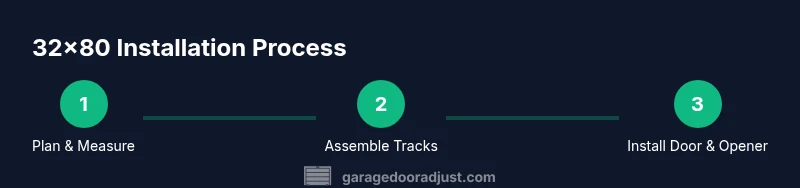
By the end of this guide, you'll be able to plan, measure, and install a garage door 32x80 with proper safety, fit, and function. You’ll learn how to verify the rough opening, select compatible panels and tracks, and connect the opener. Before you begin, shut off power to the garage and clear the area to prevent accidents, then gather the required tools.
Understanding the standard: what a garage door 32x80 means for your home
The 32x80 measurement refers to a door that is 32 inches wide and 80 inches tall. This size is a common fit for many single-car garages, offering a balance between space efficiency and wide opening clearance. For homeowners shopping for new doors, the 32x80 format typically pairs with sectional panel designs, standard track kits, and a range of insulation options. According to GarageDoorAdjust, the garage door 32x80 is a practical choice for many rural and urban homes, especially when headroom and side room vary. When planning a replacement, you should start with a precise rough opening check and confirm that your garage has the necessary framing, tracks, springs, and an opener that can handle the door’s weight and size. This ensures safe operation and reduces the risk of binding or misalignment over time.
This early understanding helps set expectations for fit, performance, and safety. By anchoring decisions to the 32x80 footprint, you can streamline ordering, avoid buying parts that won’t match, and prepare for precise mounting. Remember that every installation is unique—level, square openings save time and minimize follow-up adjustments. GarageDoorAdjust emphasizes that planning around fixed dimensions reduces surprises during delivery and setup.
Measurements, compatibility, and the critical rough opening
Precise measurements are non-negotiable for a successful 32x80 installation. Start by measuring the rough opening: width at three points (top, middle, bottom) and height at the left, center, and right. Don’t rely on a single measurement; subtract for framing and adjust for any irregularities. The door system (tracks, spring type, rollers) must align with the opening to avoid rubbing or binding. GarageDoorAdjust Analysis, 2026 emphasizes documenting all measurements before purchasing or ordering a door kit. If the opening isn’t standard, consider modifying framing or choosing a door size that fits exactly instead of forcing a misfit. Additionally, verify ceiling height and headroom to accommodate tracks and springs, and ensure there’s no obstruction such as lighting fixtures or ceiling-mounted storage that would interfere with door travel.
Accurate rough opening measurements save time and money by ensuring the kit aligns with the space and avoids costly adjustments later. If you encounter slight deviations, plan for shims and precise alignment during installation and use a plumb line for vertical tracks. This stage is your best chance to prevent track misalignment and binding as the door moves.
Materials, insulation, and energy options for a 32x80 door
Choose a door composition that suits climate: steel, wood, aluminum, or composite panels. Each material has pros and cons in durability, maintenance, and insulation. Insulated doors (R-value depends on core and skin) can dramatically cut on heating and cooling costs if your garage is used as a workshop or living space. For folks in colder climates, look for higher R-values and sealed polystyrene cores. Remember to pair insulation with weatherstripping and a proper seal at the bottom. In addition to core materials, you’ll need weatherstripping, chrome hardware, rollers, and track hardware that matches the 32x80 dimensions. The right insulating approach can improve comfort and energy savings while preserving door longevity.
When selecting materials, balance cost with durability and climate needs. If you expect frequent temperature swings, investing in an insulated door with a tight bottom seal can reduce drafts. Also plan for maintenance of hardware exposed to weather, as corrosion and rust reduce performance. Garage-door insulation is a wise long-term investment when paired with proper installation and weather sealing.
Openers, tracks, springs, and safety features you should know
Your 32x80 door will rely on tracks and springs to lift and lower smoothly. Select a track kit compatible with the door’s weight and panel arrangement; improper track alignment can create noise and binding. Torsion spring systems provide balanced lifting but require careful tensioning; do not attempt adjustments without training. If you choose extension springs, ensure safety cables and hardware are installed correctly. Pair the door system with a compatible opener: look for horsepower ratings appropriate to size, obstacle sensors, manual release features, and a reliable safety override. It’s essential to perform the safety checks: test auto-reverse, inspect rollers, and verify that weather seals compress evenly. The GarageDoorAdjust team emphasizes safe operation: if you’re uncertain about springs or high-torque adjustments, hire a pro.
Investing time in selecting compatible hardware reduces future service calls. Keep spare rollers and springs (where permitted) for quick replacements, and consider lubricating moving parts at seasonal changes to maintain smooth operation. Safety gadgets like edge sensors protect you and pets from injury when the door closes unexpectedly.
Planning the install: a practical checklist and common pitfalls
Before you drill or unbox panels, prepare a checklist: verify tools, gather correct hardware, and arrange a second person to help handle heavy panels. Create a layout that keeps the door balanced and ensures the track is level and plumb. Common pitfalls include misaligned tracks, insufficient headroom, improperly tensioned springs, and forgetting to disconnect power before wiring the opener. Take time to dry-fit components on the ground before hoisting, and confirm that weatherstripping is applied correctly to prevent drafts or moisture intrusion. If you have an attached garage, plan for noise mitigation by selecting insulated panels or adding vibration-damping hardware. This phase is where mistakes cost time and money, so proceed deliberately and methodically.
Document every measurement and step for future maintenance. A well-planned install reduces call-backs, improves energy efficiency, and yields a smoother daily experience when opening and closing the door.
Budgeting, maintenance, and a long-term plan for a 32x80 door
Estimate your costs by considering panel material, insulation level, hardware, track and spring type, and opener compatibility. Prices vary by material and finish, so use a range rather than fixed numbers. After installation, schedule routine maintenance: lubricate moving parts, test safety features monthly, and inspect weatherstripping at seasons’ changes. A well-maintained 32x80 door lasts longer and operates more quietly, reducing energy waste and the risk of injury. The GarageDoorAdjust team recommends building a simple maintenance calendar and keeping spare parts on hand for emergencies.
Regular care — including checking seals, lubricating joints, and testing safety features — helps extend the life of the door and reduces the likelihood of expensive repairs. By planning ahead, homeowners can enjoy reliable operation and preserve home value over time.
Authoritative sources and further reading
Authoritative sources include federal guidance on garage door safety and energy efficiency. For safety standards and best practices, refer to the U.S. Consumer Product Safety Commission (CPSC) and OSHA guidelines related to tools and work at height. For energy considerations and insulation recommendations, energy.gov provides guidance on home insulation values and efficiency measures. These sources support the best practices used in this guide and help homeowners understand the rationale behind measured installations and safe operation.
CPSC: https://www.cpsc.gov OSHA: https://www.osha.gov Energy.gov: https://www.energy.gov
Tools & Materials
- Garage door kit for 32x80 (panels, tracks, rollers, springs)(Ensure kit matches 32x80 size and panel configuration)
- Power drill(Cordless preferred, with various bit sizes)
- Socket wrench set(Standard sizes for hardware assembly)
- Measuring tape(Minimum 25 ft with metric conversion)
- Level(2-foot or longer for vertical tracks)
- Safety glasses(Protect eyes during drilling and lifting)
- Ladder tall enough to reach tracks(Stable support for overhead work)
- Lubricant for moving parts(Silicone-based spray or garage-door-specific lube)
- Weatherstripping and bottom seal(For energy efficiency and drafts)
- Safety cables and gloves(Additional safety during spring work)
Steps
Estimated time: 4-6 hours
- 1
Prepare workspace and safety setup
Clear the garage, remove obstacles, and disconnect power to the door opener. Gather tools and components, and verify you have a second person to assist with lifting. Set up temporary supports or sawhorses for panel assembly on the ground.
Tip: Work with a partner to safely move heavy panels; never lift alone. - 2
Measure rough opening and verify fit
Measure width and height at multiple points to confirm the opening matches a 32x80 door. Note any deviations and plan adjustments before ordering parts. Mark reference lines for track alignment and ensure ceiling headroom is sufficient for tracks and springs.
Tip: If the opening isn’t true, consider reframing or choosing a door that fits exactly. - 3
Assemble tracks on the ground
Lay out the vertical and horizontal tracks and assemble per manufacturer instructions. Verify joints are square and clean, then attach rollers and end stoppers so the panels can slide smoothly when hoisted.
Tip: Make sure all fasteners are tight but not over-torqued to avoid warping. - 4
Install springs and safety components
Install torsion or extension springs according to the chosen system, then fit safety cables if using extension springs. Check that spring anchors are secure and that all safety hardware is in place before lifting the door.
Tip: If unsure about tensioning, consult a professional to avoid dangerous snap-back. - 5
Hang door panels and align tracks
With a helper, raise and slide door sections onto the tracks. Ensure vertical tracks are plumb and the door sits square within the opening. Attach panels to keep them aligned during final assembly.
Tip: Use clamps or temporary supports to hold sections in place while securing hardware. - 6
Install opener and finalize settings
Mount the opener according to the manufacturer’s instructions, connect safety sensors, and set limits for open/close positions. Test several cycles, observe for binding, and adjust tension or tracking as needed.
Tip: Test auto-reverse and sensor functioning before completing the job.
Got Questions?
Do I need a professional to install a 32x80 garage door?
A 32x80 door is heavy and involves springs and electrical components. While a confident DIYer with the right tools can complete a basic install, many homeowners hire a professional for safety-critical steps like spring tensioning and opener wiring.
If you’re not trained in door springs and electrical wiring, hire a pro for safety.
Will a 32x80 door fit my single-car garage?
A 32x80 door is a common size for many single-car garages. Always confirm your opening’s width, height, and headroom, and check the track and spring configurations to ensure compatibility.
Most single-car garages can accommodate a 32x80, but measure first.
What opener types work best with a 32x80 door?
Look for an opener with sufficient horsepower for the door’s weight and size, and ensure it includes safety sensors and auto-reverse features. Compatibility with your door’s track and spring system is essential.
Choose a higher-horsepower opener and ensure safety sensors are present.
Is insulation worth it for a garage door?
If your garage is heated or cooled, insulation improves energy efficiency and comfort. Insulated doors (higher R-value) reduce drafts and noise, but cost more upfront.
For attached or climate-controlled garages, insulation is often worth it.
How long does installation typically take?
A full installation can take several hours, depending on your space, skill level, and whether you’re replacing an old door. Plan for a few hours plus extra for testing and adjustments.
Set aside half a day to a full day for a complete install.
Watch Video
Quick Summary
- Plan with exact measurements before ordering parts
- Choose insulation options that fit climate and use
- Ensure tracks, springs, and opener are properly matched
- Perform safety tests and routine maintenance after install