How to Choose and Install the Easiest Garage Door Opener (YouTube Guide)
Learn the easiest garage door opener to install with DIY-friendly features, belt-drive clarity, and step-by-step guidance from GarageDoorAdjust. This guide helps homeowners pick a model, follow safe installation videos, and complete a reliable setup.

For DIYers, the easiest garage door opener to install youtube videos is a belt-drive unit labeled 'easy install' with pre-assembled rails and clear in-video steps. Look for tutorials that show mounting, trolley attachment, and wiring the wall control together, plus built-in safety sensors. Always follow manufacturer safety instructions.
Why DIY-friendly Openers Matter for YouTube Helpers
When you want the easiest garage door opener to install youtube videos, belt-drive models promoted as DIY-friendly are the best starting point. These units come with pre-assembled rails, simple ceiling-mount hardware, and plug-and-play safety features. According to GarageDoorAdjust, these layouts reduce on-site confusion and miswiring. You’ll find that clear, step-by-step demonstrations in reputable videos help homeowners confirm compatibility with their doors.
What to Look for in YouTube Install Tutorials
Not every video will guide you to a successful install. Focus on tutorials that break the process into discrete, observable steps and show the exact hardware that comes in the box. GarageDoorAdjust analysis shows that viewers benefit from videos that highlight rail length, mounting brackets, and safe sensor alignment, and that clearly label prerequisites such as ceiling height and door weight. Avoid videos that rush through steps or skip safety warnings.
Key Features of DIY-Friendly Openers
The easiest garage door opener to install youtube tutorials usually feature belt-drive operation for quiet performance, a modular rail system that reduces on-site cutting, and built-in safety features like auto-reverse and safety eyes. Look for models with pre-wired wall control and a straightforward wiring harness that minimizes splices. These features make the install process more predictable and less prone to mistakes for homeowners with basic tools.
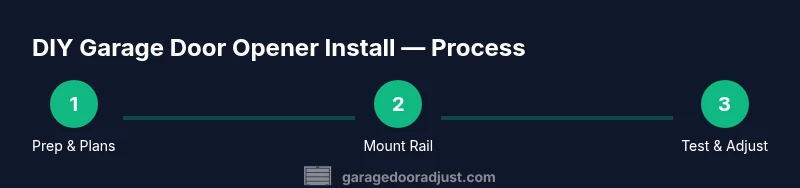
Step-by-Step Overview for a Successful Install
A typical install follows a logical sequence: prepare the workspace, remove the old opener, assemble and install the rail system, mount the motor unit, attach the trolley to the door, connect the belt or chain drive, wire the safety sensors, connect the wall control and power, test the operation, and finally tune torsion balance if needed. This overview helps you validate compatibility before you begin. If your door is heavier or unusually tall, consult a professional or choose a model with higher capacity.
Safety Warnings and Common Pitfalls
Garage doors are heavy and move quickly; improper installation can cause injury or property damage. Always disconnect power before handling any wiring, never place fingers near moving parts, and double-check door balance after installation. Common mistakes include mis-aligned safety sensors, loose fasteners, and skipping the door-reversal test. Following step-by-step videos from reputable channels reduces risk significantly.
Authoritative Sources and Practical Safety Tips
For homeowners, safety standards matter. Use trusted sources to supplement your install videos. The following sources provide safety guidance and best practices for garage door installations and related measurements. Keep these in mind as you plan and execute your project.
Tools & Materials
- Cordless drill(1/4-inch bit; ensure battery charged)
- Screwdrivers (Phillips and flathead)(Assorted sizes)
- Wrench set(Open-end wrenches and a crescent wrench)
- Tape measure(Minimum 8 feet preferable)
- Level(Accuracy matters for rails)
- Pliers(Needle-nose preferred)
- Safety glasses(Eye protection at all times)
- Voltage tester(Check power before wiring)
- Wire nuts(Color-matched; spare connectors)
- Ladder or stepped stool(Reach overhead mounting area)
- Carpenter's pencil(Mark mounting points)
- Wire stripper(If wiring isn’t pre-terminated)
Steps
Estimated time: 60-90 minutes
- 1
Prepare workspace and safety setup
Clear the garage, unplug power, and wear safety glasses. Inspect the door, tracks, and surrounding area for obstructions. Confirm the ceiling space and mounting surface match the opener’s installation requirements.
Tip: Have a second person nearby to assist with heavy components and to pull wires taut during mounting. - 2
Disconnect power and remove old hardware
If replacing an old opener, unplug and disconnect all electrical connections. Remove the old rail and motor housing carefully, leaving the door and torsion springs intact unless you know how to safely handle them.
Tip: Take photos during disassembly to guide reassembly and for reference during wiring. - 3
Assemble rail and mount brackets
Follow the manufacturer’s rail assembly instructions. Attach mounting brackets to the ceiling joists aligned with the door’s centerline. Use a level to ensure the rail is perfectly horizontal to avoid binding.
Tip: Pre-tighten mounting screws loosely to allow fine alignment before final tightening. - 4
Mount the opener motor and rail assembly
Raise the motor unit to the ceiling and connect it to the rail per the video instructions. Secure the unit with the provided hardware, ensuring the housing sits flush and stable.
Tip: Have a helper hold the rail while you fasten to prevent wobble. - 5
Attach the trolley and belt/chain drive
Install the trolley onto the rail and thread the belt or chain according to the manual. Ensure the drive engages with the door’s carriage without binding.
Tip: Double-check that the belt tension is within the recommended range for smooth operation. - 6
Wire safety sensors and wall control
Mount safety eyes on each side of the door near the floor and connect to the control box. Wire the wall control to the provided terminals and mount the panel at a reachable height.
Tip: Test sensor alignment by placing an obstacle in the path to confirm auto-reverse functionality. - 7
Connect power and program limits
Plug in the opener and program the travel limits per the manual. Make sure the door travels smoothly to fully open and close without binding.
Tip: If your model supports auto-seek or light settings, enable them after confirming safe operation. - 8
Test door operation manually
Operate the door using the wall control and remote to verify opening, stopping, and reversing as intended. Listen for unusual noises or grinding.
Tip: Do a full cycle test at least twice at different ride heights. - 9
Fine-tune balance and reversing test
If the door is heavy or drags, adjust torsion balance if applicable or re-check track alignment. Run a reversal test from the floor to ensure safety sensors trigger promptly.
Tip: Keep hands clear of hinge areas during testing. - 10
Secure wiring and tidy up
Wrap loose wires with clips and secure to avoid snagging. Recheck all fasteners for tightness and ensure the installation area is clean.
Tip: Label wires for future maintenance and service. - 11
Program remotes and lockout the opener
Program any remotes and keypad or smart features per the manual. Set a temporary security code if your opener supports it.
Tip: Test the remote from at least 20 feet away for consistent signal. - 12
Final safety review and documentation
Review safety features, read the installation manual again, and keep all warranty and safety documents in a known place. Record the model number for future support.
Tip: Take a quick video of the completed install for personal records.
Got Questions?
What is the easiest garage door opener to install?
Typically belt-drive, DIY-friendly openers labeled as easy-install with pre-assembled rails and clear in-video steps. These options simplify mounting, wiring, and safety checks.
Typically belt-drive DIY-friendly openers labeled easy-install are the simplest to set up. Look for clear video steps and pre-assembled rails.
Do I need a professional to install a new opener?
If you have basic DIY skills and follow safety guidance, you can install a standard opener. If the door is heavy, uses a torsion system, or you’re unsure about wiring, hire a professional.
For standard setups, DIY is often feasible. For heavy doors or uncertain wiring, consider a professional.
What tools are essential for installation?
Common essentials include a cordless drill, screwdriver set, level, tape measure, pliers, a ladder, safety glasses, and a voltage tester. Some models may include specific hardware you must use.
You’ll need basic power tools, level, safety gear, and testing equipment.
How long does installation typically take?
Time varies by model and space, but most DIY-friendly installs fit within a few hours for experienced hobbyists. If you’re new, expect a longer session and take breaks as needed.
It commonly takes a few hours, depending on your space and model.
What safety features should I verify?
Verify auto-reverse, safety eyes alignment, secure mounting, and that the door reverses when obstructed. Test the opener’s sensors and keep the area clear during operation.
Check auto-reverse and sensor alignment, then test with a small obstruction.
Can I reuse my existing door tracks?
In many cases you can reuse tracks if they are in good condition and compatible with the new opener. Verify mounting compatibility and that rail lengths match your door height.
Reusing tracks is possible if they’re compatible and undamaged.
Watch Video
Quick Summary
- Choose a DIY-friendly belt-drive opener for easier install.
- Follow a clear video that shows rail assembly and wiring step-by-step.
- Prioritize safety: sensor alignment, door balance, and reversal tests.
- Keep tools organized and document the process for future service.