Cat Door for Garage Door: A Step-by-Step DIY Install Guide
Learn how to install a cat door in a garage door with a clear, safe, step-by-step approach. This guide covers measuring, selecting the right door, tools, techniques, and safety tips from the GarageDoorAdjust team.

You can install a cat door in your garage door to give your pet easy access while keeping weather sealing intact. This quick answer outlines the key steps, from selecting the right door type and measuring properly to mounting and testing for safety. Follow the step-by-step guide below for a clean, secure installation with proper weatherproofing and door balance checks.
Why a cat door for garage door is a smart project
According to GarageDoorAdjust, adding a cat door to your garage door can improve your pet's independence and reduce daily wear on exterior doors. A well-chosen cat door helps you keep your garage space warm in winter and cool in summer, while preventing drafts from creeping into the living area. The GarageDoorAdjust team found that homeowners who plan for weather sealing, door movement, and pet training are far more likely to enjoy a smooth, durable installation. This article walks you through choosing the right type of cat door, measuring accurately, and performing a safe installation that preserves the structural integrity of your garage door.
Types of cat doors for garage doors
There are several viable options for a cat door in a garage door, each with its own pros and cons. Through-panel cat doors install directly into the garage door panel and maintain a clean exterior look, but require precise cutting and weather sealing. Overlay doors sit over a cutout in the door and can be easier to install on some door styles, yet they may be bulkier and affect balance if not correctly sized. Flexible flap doors with magnetic or weighted edges offer good insulation but can wear faster with heavy use. When selecting a type, consider your door material (steel, aluminum, or wood), climate, and how often your cat will use it. The goal is a snug fit that minimizes drafts while allowing unobstructed entry and exit for your pet. GarageDoorAdjust recommends choosing a model with good weather stripping and a secure frame to prevent wobble or air leaks.
Planning and measurements before you cut
Accurate measurements are the foundation of a successful cat door installation. Start by checking your garage door’s thickness and the available space around the chosen cutout. Use a chalk line to mark a centered outline that matches the doorway dimensions of your cat door kit. Plan for mounting hardware, edge sealing, and clearance for the door to open and close without binding. If you’re unsure about the best location (height or side placement), test with painter’s tape to simulate movement and ensure your cat can pass through comfortably without hitting the opening with its tail or body. Safety and precision here reduce post-install problems and warranty concerns.
Safety considerations and prep work
Before cutting, disconnect any auxiliary devices that could move the door unexpectedly and secure the area to prevent injury. Wear eye protection and gloves when cutting metal or composite panels. Ensure you have a stable ladder if you must work above ground, and keep pets and children away from the work zone. Check that cutting the door won’t interfere with torsion springs, tracks, or safety filers. After installation, verify that the door’s balance remains correct so the opener does not strain the motor or misalign the door. Planning for safety minimizes risk and protects your home infrastructure.
Tools, materials, and prep (quick guide)
Gather the essential tools and materials before you start. A cat door kit designed for garage doors is essential, along with a power drill, hole saw or jig saw, measuring tape, pencil, level, square, clamps, and caulk or weather sealant. Use a straightedge or template from the kit to trace the cut precisely. Have safety gear on hand (glasses, gloves) and a helper nearby if the door is heavy or tall. Preparing your workspace and materials reduces mistakes and speeds up the install.
Step-by-step overview of installation (high level)
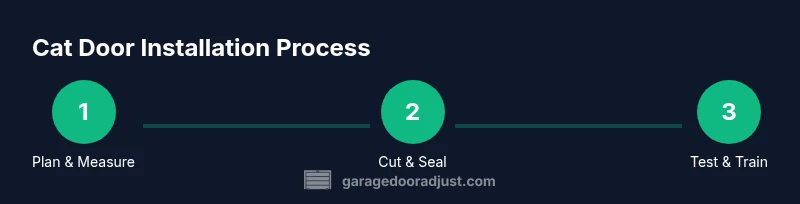
This section provides a high-level view of the process so you know what to expect. Step 1: verify compatibility and read the cat door kit instructions carefully. Step 2: mark the cut line and prepare the area. Step 3: cut the door following the template, then deburr edges. Step 4: install mounting flange and weather seal. Step 5: test the door’s movement with the garage closed and open. Step 6: train your cat to use the door and adjust for comfort. The goal is a secure, well-sealed opening that won’t impact door balance or energy efficiency.
Training your cat and post-installation checks
Introduce your cat to the new door gradually. Leave the flap slightly ajar at first and reward successful passes. Monitor for drafts or sounds that might intimidate your pet, and adjust the flap tension or magnetic seal as needed. Periodically inspect the door’s frame for looseness, check weather stripping for wear, and ensure the seals remain effective across seasons. Regular maintenance helps prevent energy loss and keeps the door functioning smoothly for years.
Tools & Materials
- Cat door kit compatible with garage doors(Choose a kit with a durable mounting frame and weather seal.)
- Measuring tape(Accurate to 1/16 inch.)
- Pencil and masking tape(For marking the cut line.)
- Jigsaw or hole saw (metal/wood depending on door)(Ensure blade is appropriate for your door material.)
- Drill with drill bits(Hole starter bit and a bit sized to screws.)
- Level and framing square(Keep opening perfectly square.)
- Safety glasses and gloves(Personal protective gear.)
- Caulk or weather sealant(Seal edges to prevent drafts.)
- Clamps(Hold pieces steady during cutting.)
- Vacuum or brush(Clean debris from cut line.)
Steps
Estimated time: 60-90 minutes
- 1
Verify compatibility and kit fit
Read the cat door kit instructions and confirm your garage door thickness and material match the kit’s supported range. If not, choose a kit designed for your door type or consult a pro. This ensures a secure fit and preserves warranty coverage.
Tip: Double-check the kit’s maximum opening height to accommodate your cat's shoulder width. - 2
Mark the cut line precisely
Place the template on the door, align it with the door panel seams, and secure with masking tape. Use a level to ensure the template is square. Mark the outline clearly so your cut stays within the intended area.
Tip: Use a center punch on the corners to prevent the drill from wandering when starting holes. - 3
Cut the door opening
Set up the jigsaw or hole saw, start at a drilled starter hole, and cut along the marked line. Deburr edges with a file or sandpaper to prevent injuries or snags. Clean the cut area before proceeding.
Tip: Cut slowly and let the blade do the work; forcing the blade can distort the opening. - 4
Install mounting flange and seal
Position the mounting flange, insert screws, and tighten evenly. Apply weather sealant around the edges and fit the gasket to minimize drafts. Check that the flap moves freely without catching on the frame.
Tip: Apply sealant in a continuous bead to avoid gaps; cross-check from both inside and outside. - 5
Test door balance and function
Close and open the door to confirm the opener still tracks smoothly. If the door feels heavy or unbalanced, adjust spring tension or consult a professional. Ensure the door’s safety sensors still function after modification.
Tip: Test with your car in the driveway; a misbalanced door increases motor wear. - 6
Train your cat and finalize setup
Introduce your cat to the new opening, gradually encouraging use with treats. Monitor for drafts and adjust the flap or seal as needed. Keep cleaning supplies nearby to maintain a clean, functional entry.
Tip: Place a familiar mat under the flap to guide your cat’s entry and exit path.
Got Questions?
Do I need to remove the garage door panel to install a cat door?
In many cases, you will cut through the interior panel and may need to temporarily detach a section. Follow the kit instructions and avoid tampering with torsion springs or tracks. If in doubt, consult a professional.
Most installations require cutting the interior panel, not the exterior skin. Avoid springs and tracks; follow the kit instructions and call a pro if uncertain.
Will a cat door affect insulation or energy efficiency?
A poorly sealed opening can create drafts, so use a well-sealed frame and weather stripping. Choose a model with good insulation and ensure the seal is continuous around all edges.
Yes, drafts are possible if you don’t seal properly. Use a weather-tight frame and seal all edges.
What size cat door should I get?
Measure your cat’s shoulder width and torso thickness when standing. Choose a door with a flap height that allows a comfortable stride and leaves at least a couple of inches clearance on all sides.
Measure your cat, then pick a door that leaves a little room around the sides for comfort.
Can I install the door myself or should I hire a pro?
If you have basic carpentry and electrical safety knowledge, a DIY install is feasible with a kit designed for garage doors. Complex doors or uncertain surroundings may warrant professional help to maintain warranty and safety.
A capable DIYer can do it with the right kit; otherwise, a pro is a safer option.
Will this void my garage door warranty?
Some warranties require professional installation or prohibit modifications. Check your door’s warranty and the kit’s terms before cutting. Always document the process in case you need to reference it later.
Check the warranty terms first; modifications can affect coverage.
How do I weatherproof the cat door opening?
Use high-quality weather sealant around the frame and select a kit with a tight-fitting flap. Consider adding an external weather door or trim to prevent drafts from above or around the flap.
Seal edges well and use a tight flap; add trim if needed for extra protection.
Watch Video
Quick Summary
- Plan for weather sealing and door balance before cutting.
- Choose a cat door kit compatible with door material and thickness.
- Measure precisely, deburr edges, and seal thoroughly.
- Test operation and train your cat for a smooth transition.