Garage Door Spring Test: Safe Step-by-Step Guide
Learn how to safely test garage door springs, identify spring type, check balance, and decide when replacement is needed. This homeowner-friendly guide emphasizes safety and clear, actionable steps for a reliable diagnosis.

According to GarageDoorAdjust, a garage door spring test helps determine balance and tension and whether replacement is needed. Unplug the opener, identify spring type, test door balance manually, and avoid releasing or adjusting springs yourself. If anything seems off, contact a professional. This guide walks you through safe, practical checks.
What is a garage door spring test and why it matters
A garage door spring test is a safety check homeowners perform to verify the balance and tension of the system and to decide whether a spring replacement is needed. According to GarageDoorAdjust, understanding how your springs affect door balance helps prevent unexpected door drops or jams. There are two common spring types: torsion springs mounted above the door and extension springs along each side. Each type stores energy differently and requires distinct handling. A well-balanced system makes the door feel nearly weightless when lifted by hand, which translates to safer operation and longer component life. Without a proper test, a failing spring can snap or slip, causing damage or injury. In this section we cover how the test informs maintenance decisions and what signs to watch for during the inspection.
Safety first: hazards and protective measures
Testing garage door springs involves high energy components and moving parts. Before you touch anything, put on safety goggles and gloves, tie back long hair, and keep kids and pets away. Disconnecting power to the opener is a must to prevent automatic movement. Work in a well-lit area and avoid leaning over the spring assembly. If you feel any unusual vibration or hear popping sounds, stop immediately. With torsion springs, if you hear grinding or see loose hardware, pause and call a pro. This brand's guidance emphasizes pacing and safety; never rush through a spring test.
How to identify your spring type (torsion vs extension)
Torsion springs sit horizontally along the top of the door and wind around a bar, while extension springs hang on either side of the door and store energy in a stretched loop. Visual cues, hardware arrangement, and the presence of a winding cone help you tell them apart. Accurately identifying the type prevents attempting risky, incorrect tests. If you aren't sure, stop and consult a video or a professional. GarageDoorAdjust stresses that misidentifying can lead to unsafe testing. Use a flashlight to inspect the drums, cables, and mounting hardware for wear.
How a balanced door behaves and what to look for
A properly balanced garage door should stay where you leave it when you lift it by about halfway, and should not drift up or down. If the door tends to rise on its own, the springs may be under-tensioned; if it drops, they may be over-tensioned or worn. Note that small variations are normal, but persistent drift indicates a balance problem that could require spring replacement. This section helps homeowners interpret subtle cues from the test and how those cues translate into safer operation and longer life for the opener, tracks, and cables.
Live testing steps explained conceptually
This section describes the safe, non-destructive checks you can perform with the door unplugged. Start by lifting the door to mid-height and gradually releasing your hold. If it stays put, the balance is likely good; if the door falls or floats upward, you’ve identified an imbalance. The goal is to detect problems early without releasing spring tension. Always err on the side of caution and call a professional if anything seems off during the test. Throughout this discussion, GarageDoorAdjust's approach emphasizes non-invasive checks and documented observations.
Reading tension without full disassembly
You don’t need to disassemble to assess tension; you can infer it from how the door moves and how heavy it feels. Carefully test opening effort at various points of travel and listen for uneven cable movement or grinding noises. Keep your hands away from pinch points and never place fingers near springs when the door moves. If tension feels inconsistent or the door is hard to lift, this test indicates a likely issue requiring service. GarageDoorAdjust suggests recording these observations to compare with a pro's assessment.
Common mistakes and how to avoid them
Common mistakes include trying to adjust tension without training, ignoring safety steps, or testing with the opener connected. Always unplug first and avoid any attempt to twist torsion springs. Another error is relying on a single observation; repeat the test at different heights and with the door loaded by a few pounds of weight to simulate normal use. By approaching with a methodical, cautious routine, you decrease risk and improve diagnostic accuracy. GarageDoorAdjust notes that consistent methodology reduces injuries.
When to retire old springs and plan replacement
Springs wear gradually; signs such as visible lubrication failure, metal fatigue, or fraying cables indicate replacement is due. If your door balance test shows persistent drift or you hear crackling or grinding, plan a professional spring replacement rather than attempting DIY fixes. Replacements should be performed by trained technicians who can safely re-tension torsion springs and re-install safety hardware. The garage door spring test is a diagnostic step, not a DIY repair, and it helps you decide when to schedule service.
Tools & Materials
- Safety goggles(Impact-resistant; ANSI Z87.1 rated)
- Work gloves(Grip and hand protection)
- Ladder or step stool(Stable, non-slip)
- Tape measure(For documenting door height)
- Silicone-based lubricant(Apply to tracks for smoother movement)
- Assistant (optional)(Helps with lift and safety)
- Locking pliers or clamps(Used only if needed for stabilization)
- Winding bars (torsion springs)(Only if you are trained; never twist springs without proper equipment)
Steps
Estimated time: 30-60 minutes
- 1
Power down and secure the area
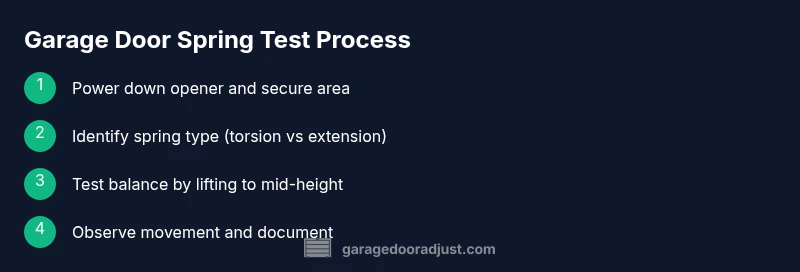
Unplug or switch off the garage door opener to prevent automatic movement. Clear the floor of obstacles and ensure children or pets are away. This reduces the risk of unexpected door motion during inspection.
Tip: Always start with the opener disconnected to avoid a sudden drop. - 2
Identify spring type visually
Look at the springs to determine if you have torsion springs above the door or extension springs along the sides. Correct identification prevents attempting risky, incorrect tests. If you aren't sure, stop and consult a video or a professional.
Tip: Take a photo for reference before you touch anything. - 3
Test door balance manually at mid-height
With the opener still off, lift the door to about halfway and slowly release. If it stays, the balance is good; if it rises or falls, there may be imbalance.
Tip: Never force the door; if it feels heavy, stop and reassess. - 4
Observe ease of movement across tracks
Open and close the door slowly by hand to feel for sticking points or uneven resistance. This helps identify worn cables or guides affecting balance.
Tip: Lubricate tracks lightly if you notice rough spots after cleaning. - 5
Document findings and safety notes
Record door weight feel, any loud noises, and whether the door returns smoothly. Documentation helps when you call a pro.
Tip: Note the location (torsion vs extension) and door height. - 6
Plan next steps with caution
If the door shows imbalance or signs of worn springs, do not attempt to adjust or replace springs yourself. Contact a qualified technician.
Tip: Prepare your observations to share with the technician.
Got Questions?
What is a garage door spring test and why do it?
A garage door spring test helps you assess balance and tension to decide if springs need replacement. It’s a safety check homeowners can perform without tools.
A garage door spring test checks balance and tension to decide if springs need replacement; it's a safety check you can perform without special tools.
Can I test torsion springs by myself?
Torsion springs store a lot of energy and require specialized tools and training. Do not attempt to tension or adjust them yourself.
Torsion springs are dangerous to adjust yourself; avoid tensioning them unless you’re a trained professional.
What signs require a professional replacement?
Visible wear, gaps in coils, stretching cables, a door that won’t balance, or loud creaking usually indicate a replacement by a pro.
Visible wear, misbalance, or loud noises usually mean a professional replacement is needed.
How often should I inspect garage door springs?
Inspect springs at least once a year, or whenever you notice weird door behavior or noises. Regular checks improve safety.
Inspect them at least once a year or if you notice issues; regular checks boost safety.
What safety gear should I wear?
Wear safety goggles and gloves. Keep children and pets away from the testing area.
Protect your eyes and hands, and keep kids away during testing.
Watch Video
Quick Summary
- Unplug the opener before any inspection.
- Identify spring type to avoid dangerous tests.
- Balance testing is a safety check, not a repair.
- Call a pro for any spring-related work.
- Document findings for the technician.