How to Safely Adjust Garage Door Spring Tension
Learn how to safely test and adjust garage door spring tension. This step-by-step guide covers torsion vs extension springs, proper tooling, safety precautions, and maintenance tips to keep your door balanced and reliable.

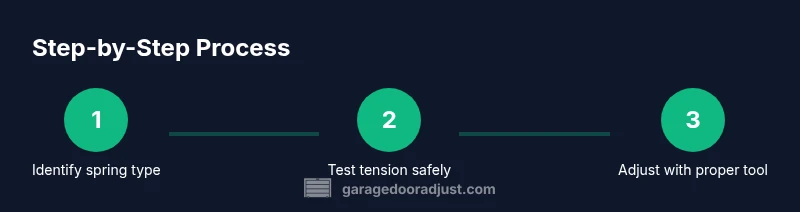
Goal: safely assess and adjust garage door spring tension to restore balance and smooth operation. You’ll identify spring type (torsion or extension), measure current tension, and perform controlled adjustments using the proper tools (tension bars, winding bars, or a spring tension gauge). Before you start, unplug the opener, block the door, wear eye protection, and work with a partner if possible.
Understanding garage door spring tension
According to GarageDoorAdjust, spring tension is the stored energy that balances the door's weight and enables smooth movement. There are two common types: torsion springs mounted above the door and extension springs along the tracks. Torsion springs wind to store energy, while extension springs stretch with the door's motion. The right tension matches the door's weight, height, and hardware for balanced lifting. If tension is too high, the door can slam open or feel abrupt; if too low, the door may sag, drift, or fail to stay closed. Over time, wear and temperature shifts alter stiffness, which is why periodic checks matter. The GarageDoorAdjust analysis shows most issues come from gradual changes rather than dramatic failures, highlighting the value of regular inspection. When inspecting, look for worn cables, misaligned tracks, loose mounts, or damaged drums, as these can mask tension problems. If you notice cracks or significant wear in the winding cone or brackets, seek professional help. Proper tension yields a smooth lift, stable position, and longer life for the entire system. Remember to reference your spring’s manufacturer guidance for safe levels, and never exceed the recommended tension range. By staying vigilant, homeowners can detect subtle signs early and avoid costly repairs.
Tools and safety prerequisites
Before touching a spring, assemble a safe, well-lit workspace and gather the correct tools. The work is strenuous and hazardous, so protective gear and careful planning are essential. Start with personal protective equipment: safety glasses (eye protection), sturdy gloves, and non-slip footwear. Have a partner available to assist or act as an observer, especially when winding or unwinding torsion springs. Next, assemble and inspect the primary tools. You will need winding bars (two), a ladder or stable platform, a space to block the door in place, and a spring tension gauge or a method recommended by the manufacturer for estimating tension. Keep a set of hex wrenches or the appropriate wrench for your door’s set screws, plus a sturdy helper clamp or locking pliers if your setup requires stabilization. A chalk or marker helps you note the current setting and increment changes. Finally, ensure the door is unpowered by unplugging the opener and disconnecting the trolley to prevent accidental operation. Safety steps: never stand directly in front of the spring when adjustments are being made, and never loosen a spring while the door is fully supported by an active opener. Use a balanced approach: perform checks with the door parked and supported by stopper blocks. If any component shows wear—cracked drums, frayed cables, or bent brackets—stop and consult a pro. Remember that tooling compatibility matters: use bars and gauges designed for your spring type and avoid makeshift devices.
How to test tension safely
The first test is a simple hand balance check. With the door closed, unplug the opener, block the door at the bottom, and attempt to lift it manually. It should lift with modest effort and stay in place when you stop supporting it. If the door rises on its own, the springs may be under-tension; if it falls quickly or feels excessively heavy, the tension is insufficient. For a more objective assessment, use a spring tension gauge or follow the manufacturer’s described method for estimating tension. When using a gauge, ensure the tool is compatible with your spring type and read the measurement at the spring’s center or winding cone according to the instructions. Throughout testing, move slowly and keep your hands and face clear of the spring and hardware. GarageDoorAdjust analysis shows that many homeowners misread a balance test, mistaking a normal variation for a fault. Take multiple readings at different door positions (fully closed, half-open, and fully open) to understand how tension changes with door position. If any part of the system looks worn or damaged, stop and call a professional. Once the door balances across positions, reset the opener and re-test with the automatic function to confirm consistent performance.
Estimating tension range and performance indicators
Estimating the correct tension range requires comparing the door’s balance across positions and listening for unusual noises. A properly tensioned door should move smoothly with minimal sticking or jerking and should hold its position without drifting when supported. If the door dips or shoots up when released, the balance is off and tension needs adjustment. Signs of excessive tension include a noisier operation, harder manual lift, and a tendency to snap open. Signs of too little tension include a door that feels heavy, drifts downward, or won’t stay closed. Always correlate your observations with the spring type; torsion and extension springs behave differently under load. When adjusting, work in small increments—usually a quarter-turn at a time for torsion springs—and re-test after each adjustment. Keep a log of turns, directions, and observations so you can revert if needed. As you monitor tension, verify the door’s balance at multiple points in its travel to ensure consistent performance. The goal is a balanced system where the door lifts and lowers with control and remains in the desired position without overpowering the opener. GarageDoorAdjust analysis notes that most homeowners benefit from documenting changes and avoiding large, rapid adjustments. If the door’s behavior is unpredictable or if the spring shows wear, stop and seek professional assistance. The right approach minimizes risk and extends the life of the entire assembly.
Safety-first steps before making adjustments
Preparation is everything when working with garage door springs. Begin by clearing the area of obstacles and ensuring the door is fully supported by sturdy stopper blocks. If you use a ladder, ensure it is stable and on a flat surface. Confirm that the door opener is unplugged and the emergency release is engaged so the door cannot move unexpectedly. Inspect hardware for wear: check cables for fraying, tracks for alignment, and brackets for integrity. If any component is damaged, do not proceed with tension adjustments. Having a second person near you provides an extra layer of safety, especially when handling torsion springs. Plan your adjustments in short, controlled steps and avoid rushing. Keep your hands out of spring zones and never attempt to “feel” the tension with your fingers. Remember to pause and reassess after every small adjustment. If the door’s balance does not improve after a cautious attempt, stop and consult a licensed technician. For ongoing maintenance, create a simple quarterly check routine and review the manufacturer’s guidelines for your specific spring model. The GarageDoorAdjust team emphasizes that safety and accuracy trump speed when dealing with garage door springs, and they recommend professional help for any uncertainty or signs of damage.
Authority sources and next steps
To ensure your approach aligns with safety standards, consult these reliable sources: OSHA guidelines on safe operation and maintenance practices for household equipment; University extension service materials on door maintenance and hardware safety; and reputable national safety agencies for general mechanical energy safety. These sources provide foundational safety principles and context for tasks like spring tension adjustments. Always cross-check your door’s manufacturer documentation for model-specific instructions. If any doubt remains about the state or operation of your spring system, do not proceed and contact a qualified technician. The goal is to maintain a safe, balanced garage door system that performs reliably over time. For ongoing education, follow GarageDoorAdjust’s recommended safety checklist and maintenance schedule, and remember that every home setup can vary based on spring type and door weight.
Authority Sources
- https://www.osha.gov
- https://extension.illinois.edu
- https://www.nist.gov
Quick-start recap and next steps
If you’re new to DIY spring tension work, take your time and follow manufacturer guidance precisely. Use the correct winding bars for torsion springs, never force a bar into a winding cone, and keep hands clear of the coils. If your door’s balance remains uncertain after careful testing and small adjustments, schedule a professional inspection. Regular checks and cautious operation protect your home and your family while extending the life of the door system. GarageDoorAdjust analysis suggests that safe, incremental adjustments with proper tools yield the best long-term results.
Tools & Materials
- Winding bars (tension bars) for spring adjustment(Two bars of the correct width for your winding cone; never use substitutes)
- Safety glasses(Impact-resistant; protect eyes from possible snaps)
- Work gloves(Grip protection and hand safety)
- Ladder or stable platform(Ensure it is on a flat, non-slip surface)
- Spring tension gauge or manufacturer-recommended method(Used to estimate or verify tension during adjustments)
- Hex wrenches or driver for set screws(Use the size specified by your spring hardware)
- Chalk or marker(Record initial settings and any changes)
Steps
Estimated time: 30-60 minutes
- 1
Prepare and secure the workspace
Clear the area around the door, remove loose items, and set stopper blocks under the door. Verify that the area is well-lit and free from bystanders. Put on safety glasses and gloves, and ensure the ladder is stable before any adjustment begins.
Tip: Having a second person nearby can help stabilize the door and hand you tools without harsh twists. - 2
Disconnect power and block the door
Unplug the door opener or disconnect the trolley so the door cannot operate. Place the door in a fully closed position and firmly block it with commercial wedges. This prevents accidental movement during tension adjustments.
Tip: Always double-check that the opener is unplugged before touching the spring area. - 3
Identify spring type and evaluation points
Determine whether your system uses torsion springs or extension springs. Locate the winding cones, tracks, and cables. Note the current setting on the winding cone if present, and identify which holes or slots are currently engaged for reference.
Tip: Refer to your door’s manual for exact winding cone configurations and allowable turns. - 4
Test the door balance manually
With the door closed, try lifting manually; it should rise with effort and hold its position when released. If it springs back up or falls, the tension requires adjustment. This check gives you a baseline before any changes.
Tip: Keep fingers away from spring zones and never attempt to measure tension with bare hands. - 5
Make cautious wind adjustments (torsion springs)
Insert the winding bar into the winding cone holes. Turn the bar in small increments (usually 1/4-turn) and pause to recheck balance after each adjustment. Do not force wind beyond manufacturer limits, and ensure set screws remain snug after turning.
Tip: Work slowly and maintain control; a single rough adjustment can cause a rapid spring release. - 6
Re-test tension and door balance
Once you’ve adjusted, re-test the balance at multiple door positions. If the door behaves inconsistently, revisit the tension in smaller increments. Reconnect the power to test the automatic operation and listen for unusual noises.
Tip: Document the number of quarter-turns and the resulting balance to guide future maintenance. - 7
Document settings and schedule maintenance
Record the final turns, the door’s behavior, and the date of adjustment. Set a routine inspection cadence (seasonal or quarterly) and note any parts that show wear. If you encounter persistent imbalance or damaged components, schedule a professional inspection.
Tip: A simple log helps catch gradual changes before they escalate.
Got Questions?
Can I adjust the garage door springs myself?
DIY spring adjustments carry significant safety risks. If you lack experience or lack the correct tools, consult a licensed technician. Always follow manufacturer instructions and use proper safety equipment.
DIY spring adjustments can be dangerous. If you’re unsure, hire a professional and follow the manufacturer’s guidelines for safety.
What’s the difference between torsion and extension springs?
Torsion springs use a torsion tube and winding cones to store energy; extension springs stretch along the tracks. Each type requires different tools and procedures. Identify the type before any adjustment and follow the specific safety steps for that system.
Torsion springs twist to store energy while extension springs stretch along the tracks; use the correct method for your system.
Why might my door feel heavy after an adjustment?
A heavy-feeling door usually indicates under-tension or improper balance after an adjustment. Recheck the number of turns and verify that all components are in good condition. Avoid large changes in one step and test at multiple door positions.
If it feels heavy, recheck the balance and look for worn components—don’t push beyond manufacturer limits.
How long do garage door springs last?
Spring lifespan depends on usage and quality. If you notice frequent tension changes, noises, or wear, plan a replacement with a professional. Regular inspection helps catch wear before it causes failure.
Springs wear with use; if you hear noise or see wear, consider expert inspection and possible replacement.
When should I call a professional?
Call a professional whenever you see damaged springs, severe imbalance, or if you cannot confidently perform safe adjustments. A licensed technician can confirm spring type, verify tension, and safely complete replacements.
If you’re unsure at any step or see damage, it’s safest to call a professional for an inspection.
Watch Video
Quick Summary
- Identify spring type before adjusting
- Use proper winding bars and safety gear
- Make small, incremental adjustments and test balance
- Document changes and consult a professional for damage