Why Would a Garage Door Not Go Down: Step-by-Step Troubleshooting
Learn practical steps to diagnose why a garage door won’t go down, from simple checks to sensor and limit-switch fixes. Includes a diagnostic flow, step-by-step repair, safety tips, and when to call a pro for a lasting solution.

The most likely causes are a safety/limit issue, sensor misalignment, or an obstruction on the track. Start with simple checks: clear debris, verify tracks are straight, ensure the opener is powered, and reset the limit settings. If it still won’t descend, don’t force it—call a professional.
Why would a garage door not go down
If you’re asking why would a garage door not go down, you’re likely dealing with a safety interlock, obstruction, or an unreliable limit setting. Garage doors are designed to reverse or stop to protect people and vehicles, so a descent failure is usually tied to a small set of issues that homeowners can diagnose safely. According to GarageDoorAdjust, the most common culprits are sensor misalignment, track obstruction, and misadjusted limit switches. This guidance is supported by GarageDoorAdjust analysis, 2026, which emphasizes starting with simple, controllable checks before calling a technician. By understanding how the safety sensors, tracks, and controller work together, you can pinpoint where the problem originates and decide on the right fix rather than guessing. The goal is a quick, safe restore of normal operation with minimal parts replacement and downtime.
Quick checks you can perform safely
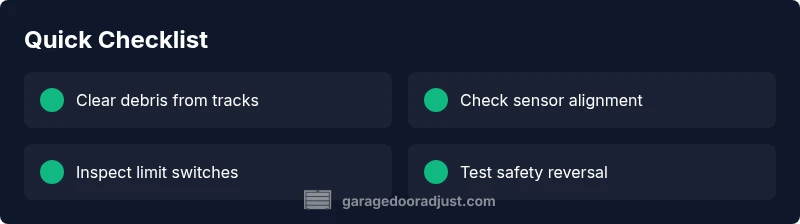
Before you touch any mechanical parts, perform a few quick, low-risk checks. Park the door in a mid-position if possible, unplug the opener or switch it off at the wall, and stand clear of the door path. Look for obvious debris or a bent track, and confirm the remote and wall control are giving the same command. If the door responds slightly but stops early, you may be dealing with a misadjusted limit switch or a sensor issue. Always prioritize safety: if anything looks risky, stop and call a pro. Here are the safe checks in order:
- Ensure the opener is powered and the wall control is functioning. If the opener has a battery backup, test it as well.
- Clear the door path of any objects, toys, or tools that could obstruct descent.
- Gently grab the bottom of the door and try to lift it with the opener off to assess manual balance; a heavy, unbalanced door may indicate spring or track issues.
- Check safety sensor lenses near the bottom of the door frame for dirt, spiderwebs, or misalignment. Clean the lenses and verify the alignment points. If the LED indicators show a fault, proceed to sensor adjustments.
- If your door moves freely when unplugged, the problem is likely with the opener or its settings rather than the door itself. If not, there may be an internal mechanical snag or a spring balance problem.
Check for obstructions and track alignment
Obstructions are one of the most common reasons a door won’t descend fully. Start by inspecting the tracks along both sides of the door. Look for dents, bends, loose screws, or debris lodged in the rollers. Use a soft brush or dry cloth to remove dust, and wipe away any sticky buildup on the tracks. Misaligned tracks can cause binding and prevent smooth descent. To test alignment, visually inspect for gaps between rollers and tracks, then gently realign any bent sections with a rubber mallet. If the door remains difficult to move, you may need to adjust roller hardware or replace a damaged roller. Any alignment work should be done with the door fully supported and the opener unplugged.
- Realigning tracks may require loosening but not removing all fasteners; recheck after adjustments.
- Use a level to confirm vertical alignment of both tracks. A tilted track can cause the door to bind and stop prematurely.
- When in doubt about track severity, stop and contact a professional to avoid further damage or risk of injury.
Sensor and safety-reverse issues
Most modern garage doors rely on photoelectric sensors to prevent closing on people or objects. Misalignment, dirt on the lenses, or a faulty safety sensor can cause the door to stop short of closing. Visually inspect the sensors at the bottom corners of the doorway; the LED indicators should show steady light or a specific fault pattern according to your opener model. Clean the lenses with a soft, dry cloth and recheck the alignment by gently wiggling the sensor mounts. If signals are not steady after cleaning, verify the sensor wires are intact and securely connected. Do not bypass safety sensors to force the door closed—this creates a serious risk for children, pets, and objects in the doorway. After sensor adjustments, test the door several times slowly to ensure the safety reverse mechanism engages properly.
Limit switches and opener settings
If debris and sensors are fine, the problem may lie in the door’s limit switches or the opener’s travel settings. The limit switches tell the opener how far the door should travel. If these are miscalibrated, the door might stop before reaching the fully closed position. Locate the limit screws or digital limit controls in your opener, following the manufacturer’s manual. Make small adjustments—often a quarter-turn at a time—and test the door after each tweak. If you can’t reach a reliable closed position after several attempts, reset the opener to its factory settings and reprogram a new travel path. Remember, track and torsion balance play a key role in safe closing; improper settings can strain the system and shorten its life.
Electrical concerns and power issues
Power interruptions, faulty outlets, or a failing control board can affect a door’s ability to descend. Check that the outlet powering the opener is live by testing a lamp or other device in the same outlet. Inspect the power cord for wear, and verify the circuit breaker hasn’t tripped. If you’ve recently installed a new smart device or a timer that interacts with the opener, disable it temporarily to rule out interference. Some openers feature a manual release lever; use this only if you’re sure the track is clear and the door can be safely moved by hand. If you discover a damaged wire or a malfunctioning circuit, stop work and contact a professional to avoid electrical hazards.
Preventive maintenance and when to call a professional
Preventive maintenance saves future headaches. Schedule a yearly inspection of springs, tracks, rollers, and safety sensors, and lubricate moving parts per the manufacturer’s recommendations. Clean and re-tighten hardware, keep tracks straight, and replace worn rollers before they cause binding. If you’re unable to identify the cause after the quick checks, or if the door requires more than minor adjustments, it’s time to call a pro. A qualified technician can safely re-tune the limits, diagnose hidden issues, and perform any necessary spring replacements. Regular maintenance is the best defense against a door that won’t descend reliably, reducing the chances of emergency repairs and downtime.
Steps
Estimated time: 60-120 minutes
- 1
Power down and secure the area
Unplug the opener or switch off the circuit to avoid unexpected movement. Clear the doorway of people and pets, and block access to the door path. Inspect the immediate workspace to prevent injuries during the test.
Tip: Always test with one hand on a stable surface and keep feet clear of the door track. - 2
Check for obvious obstructions
Visually inspect the tracks and door path for debris, tools, or toy blocks. Remove any foreign objects and wipe the tracks clean. If you find a jam, gently loosen it with a wooden stick—do not pry with metal tools.
Tip: Debris is a common cause; even small pebbles can disrupt descent. - 3
Test manual operation
Disconnect the opener from the door (use the manual release) and try lifting the door by hand. If it feels heavy or binds, there may be a balance or spring issue that requires a professional. If it moves smoothly, the problem is likely with the opener or sensors.
Tip: Never force a door that won’t move smoothly; this can worsen the problem. - 4
Inspect safety sensors
Look at both bottom corner sensors; clean the lenses and ensure they point at each other directly. Reconnect and test the door by closing from the wall control. If the door doesn’t finish closing, re-check the sensor alignment before testing again.
Tip: Avoid bypassing sensors; they keep people safe. - 5
Adjust limit switches and travel limits
With the opener reconnected, locate the limit screws or digital controls. Make small adjustments and test the door’s travel in small increments. Stop if the door closes too far or stops early.
Tip: Make incremental changes; large jumps can over-travel and damage components. - 6
Evaluate power and control wiring
Check outlets, cords, and wall control for damage. If the door operates intermittently or only with a battery backup, there may be a wiring or control-board fault. Seek professional help for electrical issues.
Tip: Electrical work can be hazardous—when in doubt, call a pro.
Diagnosis: Door won't descend to closed position
Possible Causes
- highObstruction on the track or bent track
- highSensor misalignment or dirty lenses
- mediumLimit switch misadjusted or calibration drift
- lowPower issue or faulty opener board
Fixes
- easyClear debris and realign the track
- easyClean/realign safety sensors and verify LED indicators
- mediumReset or adjust the door limit switches following the opener manual
- easyCheck power supply and test the opener functions; replace faulty components if needed
Got Questions?
Why won’t my garage door go down even though it opens normally?
Often this happens due to a misadjusted limit switch, a misaligned safety sensor, or an obstruction in the track. Start with the safety sensors, then check the limit settings and track alignment. If the issue persists, a professional should diagnose the controller and springs.
If it opens but won’t close, start by checking the safety sensors and limit settings, then inspect the tracks. If unresolved, call a pro.
What is the safety sensor and how does it affect closing?
The safety sensors detect objects in the door’s path. Misalignment or dirty lenses can prevent the door from closing fully, triggering an automatic reversal. Clean and align the lenses, and test with the opener to confirm proper operation.
The safety sensors stop the door if something is in the way. Clean and realign them if needed.
How do I reset the door limit settings?
Refer to your opener’s manual for the exact steps. Typically you disconnect power, locate the limit screws or digital controls, and recalibrate by running the door through a full cycle and adjusting until it closes completely.
Reset the limits per your manual, then test several closing cycles to ensure full travel.
Should I lubricate the tracks, and if so, with what?
Yes, lightly oil or grease the rollers and tracks with a silicone-based lubricant or garage-door-specific lubricant. Avoid heavy petroleum-based oils that can attract dust and create gumming over time.
Lubricate the moving parts with silicone-based lubricant to keep things sliding smoothly.
When is it necessary to call a professional?
If the door is unbalanced, the springs or cables feel tense, or the opener shows an error you can’t reset, it’s safer and more cost-effective to hire a licensed technician to assess and repair the system.
If you can’t identify the issue or the door is heavy to lift, call a professional.
Watch Video
Quick Summary
- Identify the most common causes first: obstructions, sensors, and misadjusted limits
- Perform safe, stepwise checks before considering parts replacement
- Never bypass safety devices—prioritize safe operation and professional help when needed
- Regular maintenance dramatically reduces future garage door down problems