What is wrong with my Chamberlain garage door opener? A practical troubleshooting guide
Urgent troubleshooting guide to diagnose and fix common Chamberlain garage door opener problems, from power issues to sensor misalignment. Follow a clear, step-by-step flow to restore function quickly.

Facing what is wrong with my chamberlain garage door opener? The most common causes are power issues, sensor misalignment, or a blocked track. Start by verifying the unit is plugged in, the outlet works, and the safety sensors face each other with a green light. If the door still won’t move, continue with the diagnostic flow below.
what is wrong with my chamberlain garage door opener
If you’re wondering what is wrong with my chamberlain garage door opener, you’re not alone. In many cases the problem isn’t a broken motor but something you can fix in minutes. The most common culprits are power issues, sensor misalignment, or obstructions in the tracks. Begin with the easiest checks first, because these simple steps re-enable many openers without tools. By confirming basic power and alignment, you can often regain control quickly. In this guide we’ll keep focusing on actionable checks you can perform safely as a homeowner, with clear next steps if you still encounter trouble. According to GarageDoorAdjust, simplifying the problem to power, sensor, or track obstructions accounts for the vast majority of stubborn opener symptoms. Recognize that many Chamberlain units share common wiring and sensor layouts, so the same fixes tend to apply across models.
Common failure modes
Most Chamberlain garage door opener problems fall into a few predictable categories. Power issues (outlets, cords, or circuit breakers) cancel operation. Sensor problems (misalignment or obstruction) trigger safety features that stop the door from closing or opening. Obstructions on the tracks, misadjusted limits, or a worn drive belt can also prevent movement. This section helps you categorize the symptom you’re seeing so you can apply the right fix first. Remember, the simplest explanation is usually the correct one, especially with devices that sit in a residential setting where aging components and loose connections are common culprits. If you notice a buzzing sound but no movement, the motor may be trying to start but stalling due to overload, which signals a more involved repair.
Safety-first checks you can perform today
Safety is paramount when troubleshooting a garage door opener. Disconnect power when inspecting exposed components to avoid shock, never place hands near moving parts when the door is operating, and keep children and pets away during testing. Start with non-destructive checks: inspect the outlet and power cord for damage, ensure the receiver is receiving a signal, and verify that the door can be moved manually (with pressure close to the ground). Clean any dirt or debris from the rail and track that could impede movement. If anything looks worn or damaged, mark it for professional service and avoid attempting a full teardown.
Diagnostic flow overview
A structured diagnostic flow helps you identify the exact cause without guessing. Begin with the most accessible checks (power, sensors, and manual movement) and progressively move to more complex tests (re-pairing remotes, recalibrating limits, and inspecting gears). This approach minimizes downtime and reduces the risk of injury. If you still cannot move the door after the checks, proceed to the step-by-step fixes for the most likely root cause and consider professional help if needed.
Step-by-step breakdown for the most likely cause
This block provides a practical fix sequence focused on the most common root cause: power and safety sensor alignment. You’ll perform a quick power check, verify sensor alignment, and then test the system’s response. Each step is designed to be safe for a homeowner and to help you determine whether professional service is required. If any step reveals a hazardous condition or an alarming sound (grinding, grinding gears, or burning smell), stop immediately and contact a professional.
Maintenance and prevention to avoid repeats
Prevention is easier than repair. Establish a simple maintenance routine: keep the tracks clean and free of debris, inspect the door balance and springs (do not attempt to adjust torsion springs yourself), replace batteries in remotes, and test safety sensors monthly. Lubricate moving parts with a lightweight garage-door-approved lubricant, and check for loose hardware that could rattle during operation. By staying proactive, you’ll reduce the frequency of surprises and extend the life of your Chamberlain opener.
When professional help is needed
Some issues require professional service, especially when there are mechanical noises, suspected spring or belt wear, or electronics that won’t reset. If you hear grinding, notice the door not moving despite power and sensor checks, or see obvious wear on gears, contact a licensed technician. The GarageDoorAdjust team recommends prioritizing safety: if you’re unsure about the repair steps, it’s wiser to call a pro than risk injury or additional damage.
Steps
Estimated time: 30-60 minutes
- 1
Verify power and reset
Confirm the unit is plugged in, there’s power at the outlet, and the circuit breaker is intact. If there’s a reset button, perform a soft reset by unplugging for 60 seconds and plugging back in. After power is restored, try the wall button or remote again.
Tip: If a GFCI outlet is involved, check if it tripped and reset it before testing again. - 2
Inspect safety sensors
Place yourself between the door and the sensors and watch the LED indicators. Realign lenses if misaligned and wipe lenses clean with a soft cloth. Re-test the door and observe whether the safe-operation light stays steady.
Tip: Avoid touching the sensor faces with your fingers; oils can affect the signal. - 3
Check tracks and balance
Inspect the tracks for debris, kinked sections, or buildup that could inhibit movement. Manually pull the door halfway to see if it stays balanced; a door that drops quickly or drifts indicates balance or spring issues that require professional attention.
Tip: Use a flashlight to inspect corners and the roller wheels for wear. - 4
Test remote and keypad
Replace remote batteries and re-pair the remote and keypad with the opener as per the manual. If multiple remotes fail, it could indicate a receiver issue that requires service.
Tip: Keep a spare battery on hand and test with a different, known-good remote. - 5
Manual operation and safety checks
If the door moves manually, verify the opener’s safety features halt movement when resistance is detected. Do not attempt to override safety features; a misadjusted limit or loose hardware can be dangerous.
Tip: Never place fingers near moving parts and avoid forcing the door open or closed by hand. - 6
Final test and maintenance
Run the full cycle: open, close, and stop at a variety of distances. Listen for unusual noises and observe any jerky motion. Schedule a quick maintenance check every 3-6 months to keep hinges, rollers, and tracks in good shape.
Tip: Record any abnormal signs in a maintenance log to track recurring issues.
Diagnosis: Door won't respond or move when commanded
Possible Causes
- highPower issue (outlet, circuit breaker, or power cord)
- highSafety sensor misalignment or obstruction
- mediumRemote or wall switch signaling fault
- lowDamaged gears or worn drive components
Fixes
- easyCheck that the opener is plugged in and the outlet has power; test with a lamp or small appliance.
- easyInspect safety sensors: ensure both lenses are clean, facing each other, and that the indicator LEDs show steady green.
- easyReset or re-pair the remote and wall switch with the opener according to Chamberlain guidelines.
- hardIf you hear grinding or the motor runs but the door stays put, stop and contact a professional.
Got Questions?
Why won't my Chamberlain remote work with the garage door opener?
Remote issues are usually battery-related or require re-pairing. Start by replacing the battery and re-pairing the remote with the opener. If the issue persists, test with a different remote to rule out a transmitter failure.
Remote problems usually come from a dead battery or the pairing needs updating. Replace the battery and re-pair the remote to test.
My opener hums but the door doesn’t move—what should I check?
A humming sound often means the motor is attempting to start but is blocked by resistance. Check for track obstructions, door balance, or jammed rollers. If the door is heavy or won’t budge, stop and call a professional.
If it hums but won’t move, there might be a jam or balance issue. Inspect tracks and balance, and contact a pro if it still won’t budge.
How do I reset a Chamberlain garage door opener?
To reset, unplug the unit for 60 seconds, then plug back in and re-program remotes or keypads as needed. If your model has a Learn button, use it to re-sync devices according to the manual.
Reset by unplugging for a minute, then re-program your remotes using the Learn button if available.
Is it safe to lubricate the tracks and moving parts?
Yes, use a lightweight garage-door lubricant on rollers and tracks to reduce friction. Avoid over-lubricating or applying lubricant to belts or pulleys beyond manufacturer guidance.
Lubricating the moving parts can help, but don’t overdo it and avoid applying grease in places the manufacturer cautions against.
Can I fix major opener issues myself?
Homeowners can handle simple tasks like battery replacement and sensor realignment. Major repairs, especially springs, cables, and torsion mechanisms, require a licensed technician due to safety risks.
Some fixes are doable at home, but major repairs should be left to a professional for safety.
When should I replace a Chamberlain opener?
Consider replacement if the unit is old, frequently malfunctioning, or safety features fail to operate after troubleshooting. A new model often provides improved reliability and safety features.
If problems persist after troubleshooting or the unit is outdated, replacement may be the best option.
Watch Video
Quick Summary
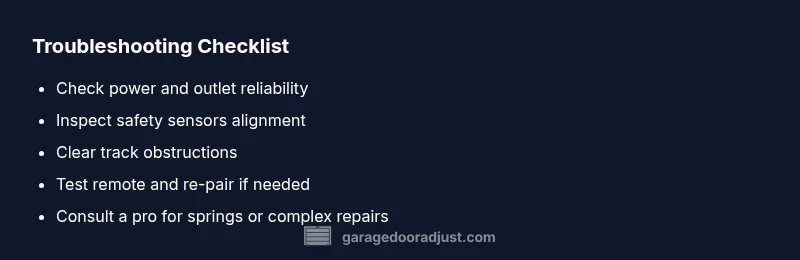
- Start with power, sensors, and tracks.
- Follow a clear diagnostic flow before calling a pro.
- Safety comes first—stop if you hear grinding or see damage.
- Regular maintenance prevents repeat issues.
- If in doubt, contact a licensed technician.