Tips for Painting a Metal Garage Door: A Complete How-To
Learn to prep, prime, and paint a metal garage door for a durable, rust-resistant finish. This GarageDoorAdjust guide covers surface prep, primers, paints, tools, and safety.

Tips for painting metal garage door require solid prep, rust-resistant primer, and durable exterior paint. This guide shows how to clean, sand, prime, and apply color for a lasting finish. According to GarageDoorAdjust, proper surface prep is the key to long-lasting adhesion. You will also learn about tool selection, timing, and finishing touches to avoid runs and peeling.
Why painting a metal garage door matters
Painting a metal garage door isn’t just about curb appeal; it protects the metal surface from moisture, minerals, and oxidation that cause rust and peeling. A fresh coat can seal tiny scratches, improve energy efficiency by reducing heat gain on sunny days, and extend the door’s life. According to GarageDoorAdjust, a well-executed paint job on metal surfaces improves adhesion and longevity when you follow proper prep and application steps. For homeowners working on the project, understanding how paint interacts with metal helps you choose the right primer and finish, and prevents early peeling that leads to costly touch-ups.
When selecting colors, lighter tones often reflect heat better and show dirt less than dark colors, though darker tones can hide surface imperfections more effectively. Consider your climate, sun exposure, and door orientation when planning color. The goal is a durable, uniform finish that resists wear from wind-driven dust, rain, and temperature swings. If your garage door faces harsh weather, plan for more frequent maintenance cycles and inspections to catch issues early.
Tools, materials, and color decisions
Before you start, assemble the right tools and materials. A dedicated color choice matters as it affects coverage and durability. For a metal door, opt for rust-inhibiting primers and exterior-grade paints, typically acrylic latex or 100% acrylic enamel. Gather PPE and masking supplies, drop cloths, and cleaning agents. Poor preparation or using the wrong paint can lead to premature peeling or a dull finish. In this section we cover: surface prep kit, rust control products, primer types, paint options, and color coordination strategies. Per GarageDoorAdjust guidance, choosing a high-quality primer and exterior paint suited for metal surfaces dramatically improves longevity and minimizes maintenance needs.
Safety first: PPE, ventilation, and weather
Painting outdoors requires attention to air quality and weather conditions. Wear an NIOSH-approved respirator or a disposable respirator when sanding old paint or applying coatings with strong fumes. Safety glasses, gloves, and long sleeves protect against splashes. Ensure good ventilation, especially if you’re working in confined spaces or near door openings. Check the forecast; avoid painting on days with high humidity or temperatures outside the paint’s recommended range. Temperature, humidity, and dew point influence cure times and final adhesion. If you must paint in less-than-ideal weather, plan for longer cure times and additional coats when conditions improve.
Primer and paint selection for metal doors
Metal doors require primers designed for metal to prevent rust and promote adhesion. Start with a rust-inhibiting metal primer, preferably one labeled for exterior use. For the topcoat, choose a durable exterior paint with good UV resistance and mildew resistance. Acrylic latex paints are common for metal and offer easy cleanup, while enamel-based coatings can deliver a harder surface with excellent abrasion resistance. If the door has visible rust, use a rust converter as a preparatory step before priming. Always follow the paint manufacturer’s coverage rates and recoat windows to achieve an even, uniform finish.
Brand considerations matter: a quality primer helps anchor the paint, while the right topcoat prevents peeling and color fading. For metal surfaces, a two-coat plan is typically recommended: one primer coat plus two thin topcoats. By using compatible products and applying at the right thickness, you reduce the likelihood of runs and sags and improve color consistency.
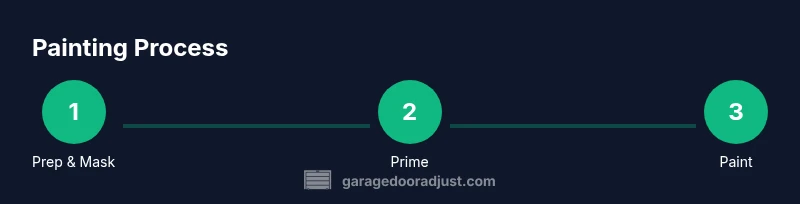
Step-by-step painting approach (overview)
This section provides a concise overview of the painting sequence so you can visualize the workflow before starting. The actual STEP-BY-STEP block below contains detailed, numbered actions. Begin with securing the work area and protecting adjacent surfaces, then proceed through cleaning, rust treatment, sanding, priming, priming touch-ups, and paint application. Allow appropriate dry times between coats and inspect your work under good lighting to catch drips or thin spots early. A clean, deliberate approach minimizes mistakes and improves the final finish with fewer touch-ups.
Drying times, weather considerations, and recoat windows
Drying and curing times vary with temperature, humidity, and ventilation. Even when the surface feels dry to the touch, curing can take 24 to 72 hours or longer in cool or humid conditions. Recoat windows are critical; applying a second coat too soon can trap solvent and create wrinkles. If you’re painting in spring or fall, aim for dry, mild days with moderate humidity. Store leftover paint properly and avoid exposure to heat or direct sunlight during curing. Handling the door gently during cure reduces the risk of marring the new finish.
Common mistakes and how to avoid them
Common mistakes include skipping rust removal, using incompatible primers and paints, and applying thick coats that lead to runs and poor adhesion. Don’t rush through surface prep or ignore recoat times. Always test a small area first to verify color and finish on the metal substrate. Use thin coats rather than a single heavy coat to prevent drips and ensure even coverage. Regular inspections after painting help catch early signs of peeling or rust so you can address them before they escalate.
Maintenance and long-term care for a metal door finish
To maximize lifespan, perform light cleaning every few months with a mild detergent and water. Check for peeling paint and rust, and address promptly with spot sanding and touch-up priming. Lightly re-waxing or applying a fresh topcoat every few years can refresh the color and protect against the elements. Avoid abrasive cleaners that can scratch the finish, and seal any joints or gaps to reduce water infiltration. This maintenance mindset keeps your metal door looking fresh and extending its service life.
Tools & Materials
- Drop cloths or plastic sheeting(Protect driveway and nearby surfaces)
- Nitrile gloves(Keep hands clean and protected)
- Safety glasses or goggles(Eye protection during sanding and painting)
- Face mask or respirator(Ventilate or filter fumes especially indoors)
- Wire brush or steel wool(Remove loose rust and flaky paint)
- Sandpaper (120–220 grit)(Create a good adhesive surface)
- Mild detergent and degreaser(Clean the surface thoroughly)
- Rust-inhibiting metal primer(Base for adhesion and rust control)
- Exterior acrylic latex or enamel paint(Durable topcoat for metal)
- Paint rollers (1-1.5 inch nap)(Even topcoat application)
- Angled brushes (2 inch and ¾ inch)(Paint edges and corners)
- Paint tray and liners(Catches paint and reduces waste)
- Masking tape(Protect trim and adjacent surfaces)
- Ladder or step stool(Reach upper sections safely)
- Rags and mineral spirits or soap-water(Clean tools and wipe spills)
Steps
Estimated time: Active work 4-6 hours; curing may take 24-72 hours depending on conditions
- 1
Prepare the work area
Clear the area, remove vehicles if possible, and lay down drop cloths to protect the driveway. Close all windows and ensure good ventilation. Gather all tools and materials so you’re not searching mid-project.
Tip: Check wind direction to minimize flyaway dust during sanding. - 2
Clean the door surface
Wash the door with a mild detergent solution to remove dirt, grease, and salt residues. Rinse thoroughly and let dry completely before proceeding.
Tip: De-grease oily spots with a degreaser for better primer adhesion. - 3
Remove rust and loose paint
Scrape away loose paint with a wire brush and lightly sand rusted areas with 120–150 grit sandpaper. Wipe away dust with a damp rag and let dry.
Tip: Address heavy rust with rust converter follow-up primer if recommended by manufacturer. - 4
Sand the entire surface
Lightly sand the whole door to create a key for primer. Wipe off dust with a tack cloth and inspect for shiny patches that indicate poor abrasion.
Tip: Mask edges near weather stripping to avoid heavy sanding on rubber. - 5
Apply primer
Apply a thin, even coat of rust-inhibiting primer. Allow it to dry according to the product label, then lightly sand to smooth any raised areas.
Tip: Prime stubborn rust spots with an extra dab of primer; avoid pooling. - 6
Apply topcoat (first pass)
Spread a thin, uniform coat of exterior paint using a roller for flat areas and brushes for edges. Work from top to bottom to prevent drips.
Tip: Maintain a ~12–18 inch distance from the surface for a smooth finish. - 7
Apply second coat and touchups
After the first coat dries, apply a second thin coat for color depth and added durability. Touch up any missed spots and smooth runs.
Tip: Stop once you have even coverage; thick coats take longer to cure. - 8
Cure and clean up
Let the door cure fully in a well-ventilated area. Remove masking tape and clean brushes/tools according to paint label instructions.
Tip: Avoid heavy use of the door during the initial 24–48 hours of cure.
Got Questions?
Can I paint over existing paint on a metal garage door?
Yes, as long as the existing paint is sound, clean, and properly abraded for adhesion. If loose or peeling, remove it first and prime the surface.
Yes, you can, but only if the old paint is well-adhered and prepped; otherwise remove and prime for best results.
What type of paint is best for metal garage doors?
Exterior acrylic latex or enamel-based paints with a rust-inhibiting primer perform well on metal doors. Latex is easier to clean, while enamel provides a tougher surface.
Exterior latex or enamel paints with a rust-inhibiting primer work best on metal doors.
Do I need to remove the door from the frame before painting?
Not necessarily. You can paint a door in place if you mask surrounding areas well and have safe access. Removing the door can help for even coverage but adds complexity.
You can paint it in place if you mask carefully; removing it makes coverage easier but is optional.
How many coats should I apply?
Apply at least two thin coats of paint over a primed surface to ensure even color and durability. Allow full drying time between coats.
Two thin coats are usually enough, with full drying time between coats.
How long does it take to cure after painting?
Initial dryness to the touch occurs within hours, but full cure can take 24–72 hours depending on conditions. Plan around this to avoid damage.
Expect surface to dry in hours, with full cure over the next couple of days.
What safety concerns should I consider?
Work outdoors when possible, use PPE, and ventilate. Be careful on ladders and near electrical fixtures. Follow product safety data sheets.
Wear PPE, ensure ventilation, and use ladders safely.
Watch Video
Quick Summary
- Plan and prep thoroughly before painting.
- Use rust-inhibiting primer for metal surfaces.
- Apply thin coats and follow proper drying times.
- Choose exterior-grade paint with UV resistance for durability.
- Inspect and maintain the finish regularly after painting.