Roller Door Repair & Install Guide: DIY Steps for Homeowners
Step-by-step, you’ll diagnose, repair, or install a roller door safely. Learn essential tools, safety tips, common issues, and when to hire a pro. Guidance based on GarageDoorAdjust Analysis, 2026.

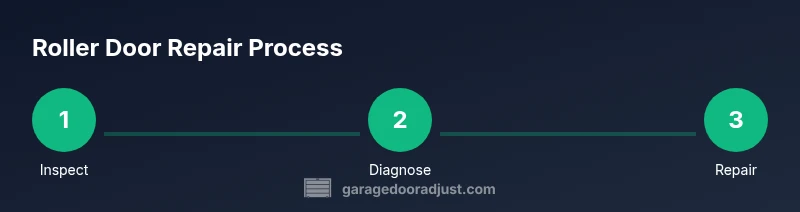
Today you’ll learn how to diagnose, repair, or install a roller door safely. You’ll perform quick safety checks, test the opener, inspect tracks and torsion spring balance, and identify common failure signs. The guide covers essential tools, step-by-step actions, and when professional service is wise. By the end you’ll know parts to replace, how to test balance, and how to reduce noise.
What is a roller door and common failure modes
According to GarageDoorAdjust, a roller door is a compact, overhead door that rolls up around a drum or into a header as it opens and closes. In most homes it is paired with a torsion or extension spring system that balances the door's weight, making manual lifting unnecessary. The right combination of tracks, rollers, springs, and the opener keeps the door moving smoothly. When any one component wears or misaligns, the door can bind, squeak, or stall.
GarageDoorAdjust notes that roller door problems most often involve worn rollers, bent tracks, misaligned guides, or worn-out weather seals. These issues can cause the door to rub on the casing, stop partway, or open unevenly. Other frequent culprits include a faulty opener motor, loose mounting hardware, or a mis-adjusted safety sensor. While some problems are cosmetic, others threaten personal safety if the door is out of balance or if springs or cables show wear. Start by observing how the door moves: does it rise smoothly, reverse properly at the bottom, and stop in the same place every time? If not, continue with a careful inspection.
In the next sections we’ll translate these observations into a practical plan, with checks you can perform and parts to replace or service. The goal is to restore balance, minimize noise, and keep your roller door reliable for daily use. This guide uses plain-language steps you can follow before considering professional service, while acknowledging when a pro is the safe choice.
Tools & Materials
- Non-contact voltage tester(Verify power at the opener outlet and switch)
- Safety glasses(Eye protection during inspection and adjustment)
- Gloves(Grip and protect hands while handling springs or rollers)
- Ladder or step stool(Reach tracks and header safely)
- Screwdrivers (Phillips and flat-head)(Loosen/tighten mounting screws)
- Wrench set or adjustable wrench(Tighten track bolts and hardware)
- Lubricant spray (silicone-based or white lithium)(Lubricate rollers, hinges; avoid springs)
- Rags or paper towels(Wipe excess lubricant and clean tracks)
- Replacement rollers (if worn)(Only replace after inspecting wear)
- Replacement track repair kit(Only if track damage is detected)
- Tape measure(Check track alignment and door height)
- Level(Ensure tracks are plumb during re-alignment)
Steps
Estimated time: 30-60 minutes
- 1
Disconnect power and secure the door
Unplug the garage door opener or switch off the circuit. Engage the emergency disconnect so the door won’t move. Use a wedge to hold the door in place and prevent any sudden drop during the inspection.
Tip: Always verify power is off before touching any moving parts. - 2
Inspect tracks and rollers for damage
Look for bent rails, loose screws, or debris that blocks roller movement. Use a flashlight to inspect the top and bottom tracks and inspect rollers for wear or flat spots.
Tip: If you see bent tracks or missing rollers, don’t force movement; plan a repair plan. - 3
Check door balance and springs safety
With the door disconnected from the opener, lift to about shoulder height. It should stay where you leave it and not drift downward or rise on its own. Do not attempt to re-tension springs; this is hazardous.
Tip: If the door sags or behaves unpredictably, stop and call a pro. - 4
Lubricate moving parts
Apply a light coating of silicone-based lubricant to rollers, hinges, and track joints. Wipe away any excess to avoid drips that can attract dust.
Tip: Never lubricate springs or cables with oil-based products. - 5
Realign tracks and tighten hardware
Loosen mounting bolts just enough to adjust the track alignment. Tap the track gently back into position with a rubber mallet, then tighten bolts while keeping the track plumb.
Tip: Use a level to confirm vertical alignment of both tracks. - 6
Reconnect and test the opener
Reconnect power and operate the door through a full cycle. Listen for smooth operation, and check that the auto-reverse and sensors function correctly.
Tip: Observe pinch points and ensure fingers are kept clear. - 7
Assess wear and plan replacements
If any component shows significant wear—such as rollers with flat spots or rails with deep dents—plan for replacement parts or professional service.
Tip: Document the wear with photos for your repair log. - 8
Final safety and function check
Do multiple cycles, check for smooth motion, and confirm the door returns to rest position. Confirm all fasteners are tight and the door closes and opens without binding.
Tip: Maintain a quarterly check routine to catch issues early.
Got Questions?
What usually causes a roller door not to open?
Most often the opener, misaligned tracks, worn rollers, or sensor issues. Start with a power test, then inspect tracks and rollers for wear before calling a pro.
Common causes are opener problems or worn parts; start with power testing and track inspection.
Can I fix tension springs myself?
Tension springs are dangerous and under high load. Do not attempt to adjust or replace them yourself; contact a licensed technician.
Springs can cause serious injury; it’s best to leave adjustments to a professional.
Is it safe to lubricate roller tracks?
Yes, use a silicone-based lubricant on rollers and tracks but avoid oil-based products on moving metal parts.
Lubricate with silicone-based product and wipe away excess.
How long does a typical DIY roller door install take?
Install times vary by door type and skill; expect a multi-hour process if you’re new, and plan for help on heavy doors.
It can take several hours depending on the door and hardware.
What maintenance should I do annually?
Inspect tracks, rollers, cables, and springs; lubricate where appropriate; test safety sensors and auto-reverse.
Do a quick annual check of tracks, rollers, and sensors.
When should I replace the door entirely?
If the door is warped, tracks are severely bent, or springs show wear that cannot be safely repaired, replacement is recommended.
If wear is extensive, consider replacement for reliability and safety.
Watch Video
Quick Summary
- Check balance before anything else
- Never adjust springs — seek pro help
- Lubricate moving parts regularly
- Test safety features after repairs