Garage Door Roller Replacement Near Me: Step-by-Step Guide
Learn to safely replace garage door rollers with our comprehensive step-by-step guide. Find local replacement near you, choose the right kit, and restore quiet, smooth operation with tips from GarageDoorAdjust.

In this guide you will learn how to replace garage door rollers safely and effectively. You'll identify worn rollers, choose the right replacement kit, and complete the install with minimum downtime. We cover safety steps, tools, common mistakes, and how to test the door after the swap. Start by disconnecting power and securing the door. This process is suitable for homeowners doing a DIY repair.
Why replacing garage door rollers matters
Worn or damaged rollers can cause the door to bind, wobble, or derail from the track. Replacing damaged rollers improves door smoothness, reduces noise, and restores balance. According to GarageDoorAdjust, regular roller inspection is a key part of garage-door maintenance. If rollers appear cracked, flat-spotted, or emit a grinding sound, it's a sign you should replace them promptly. Before you begin, ensure you understand local regulations and that the door is safely supported. The heavier your door and the longer it has operated, the more likely rollers are worn, especially at the bottom corners where dirt can grind the wheel against the track. Keep in mind that rollers wear unevenly: one side can seize while the other spins freely, causing the door to pull to one side. Replacements are a good time to evaluate the overall hinge condition and lubricate tracks to extend life. In most homes, a standard roller replacement maintains door balance and reduces noise for months to come, provided you replace with the correct wheel type and install brackets securely.
This is also an opportunity to assess the track alignment and the condition of the brackets. If the tracks are bent or brackets are loose, replacing rollers alone won’t fix the underlying issue. Following the right steps minimizes risk and helps protect the torsion or extension-spring system from unnecessary wear. For homeowners who want to minimize downtime, planning ahead by ordering compatible rollers and keeping a basic set of tools on hand makes the job smoother and safer.
How to assess if replacement is needed
Not all roller noises require a full replacement, but persistent symptoms usually do. Start with a visual inspection: look for cracks or chips in the wheel, flat spots, or a wheel that spins unevenly. Check for looseness in the roller brackets and any wobble when the door is slowly moved by hand. Listen for grinding or squealing as the door moves along the tracks. If the door drifts to one side or the track shows signs of wear, you may have a misalignment issue that pairs with worn rollers. Nylon rollers tend to run quieter and resist wear better in humid environments, while steel rollers can handle heavy doors but may be louder. GarageDoorAdjust analysis shows that choosing the right roller material and installing them correctly reduces noise and improves balance. Always start by turning off the power to the opener to avoid unexpected movement, then manually operate the door to feel where the stiffness or wobble occurs. If you can identify which rollers are sticking or failing, you know which locations to focus on during replacement.
Tools and materials you’ll need
Preparing the right tools before you begin saves time and minimizes mistakes. You’ll need a sturdy ladder, safety glasses, work gloves, screwdrivers (Phillips and flat), a socket or wrench set, needle-nose pliers, a lubricant suitable for metal tracks, and the replacement roller kit that matches your door’s wheel type and axle size. Keep a flashlight handy to inspect the tracks and brackets up close. If you encounter a stubborn fastener, a penetrating oil can help, but avoid forcing parts that are not meant to move. A clean workspace and organized parts layout reduce the chance of mixing parts from different rollers. Finally, consider pairing rollers in symmetrical positions to preserve balance and reduce drive-train strain. As you shop for replacements, verify compatibility with your door model and bracket type to avoid misfits that could lead to future issues.
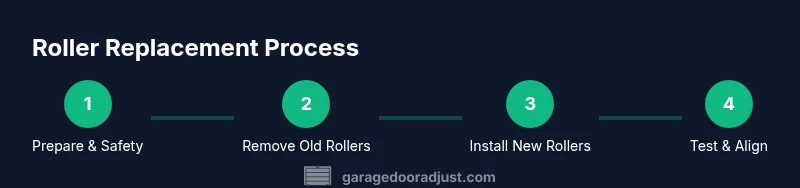
Step-by-step overview and safety considerations
Replacing garage door rollers is a practical task for a confident DIYer, but it requires careful handling of heavy components and moving parts. Start by securing the door and ensuring the entire system cannot shift. Remove the old rollers, then install the new wheels in the brackets before reattaching them to the door. Mind the orientation of wheels and ensure the axle seats cleanly in tracks. After assembly, test manually and then re-connect power to verify smooth operation under light load. If anything feels off—unusual resistance, noises, or misalignment—pause and reassess rather than forcing a misfit. This approach keeps you safer and preserves the life of the torsion or extension springs and the door hardware.
Installing the rollers: considerations and common practices
When installing new rollers, ensure the wheel faces the correct direction and seats fully in the bracket. Tighten fasteners securely, but avoid over-tightening which can crack brackets. If your door uses different rollers on top and bottom sections, install each in its corresponding position. After mounting, reattach the bracket to the hinge or door panel and verify that each wheel runs freely along the track with minimal resistance. Lubricate the tracks lightly after installation to reduce future wear, then test the door by hand and with short opener cycles. Remember: do not attempt to modify torsion springs during this process; if you suspect spring issues, call a professional.
Aligning, testing, and adjustments after replacement
With all rollers in place, check track alignment across the entire length of the door. Look for gaps between the wheel and track and ensure the door remains centered as it moves. Reconnect the opener temporarily and run the door through a few cycles at low speed to observe any binding or abnormal noise. Listen for binding or rubbing at corners or in the tracks, and inspect all brackets for tightness. If the door pulls toward one side, adjust the bracket screws slightly on the opposite side to re-center. Finally, clean and lightly lubricate the track and wheel surfaces to extend life and reduce friction. Consistent testing calms the system and helps you identify issues early.
Maintenance tips and safety notes
Keeping up with roller maintenance reduces future breakdowns and costly repairs. Schedule periodic inspections—ideally every six months for busy households—and replace rollers in pairs when possible to maintain balance. Always wear eye protection and gloves, and keep children and pets away from the work area. If you notice track damage, bent brackets, or a persistent misalignment that you cannot fix with simple adjustments, don’t hesitate to contact a professional. The safer you are, the longer your door will perform reliably.
Tools & Materials
- Safety glasses(ANSI Z87.1 or equivalent)
- Work gloves(Grip and protection)
- Sturdy ladder or platform(Reach upper tracks safely)
- Socket wrench set (metric and standard)(Bracket and screw access)
- Screwdrivers (Phillips and flathead)(Size as needed for screws)
- Needle-nose pliers(Clip removal and small parts)
- Replacement roller kit(Match wheel type and axle size)
- Lubricant (silicone-based or lithium grease)(Lightly lubricate tracks)
- Cleaning cloth(Wipe dust and debris from tracks)
- Locking pliers/C-clamps(Secure door during work)
- Penetrating oil(Loosen stubborn bolts if needed)
- Headlamp or flashlight(Improve visibility in tracks)
Steps
Estimated time: 60-90 minutes
- 1
Power down and secure the door
Unplug the garage door opener or switch off at the wall. Use locking pliers to clamp the tracks and prevent movement. Confirm there are no people or pets nearby.
Tip: Keep a helper nearby to stabilize the door as you work. - 2
Position yourself and prepare the workspace
Set up your ladder on a firm surface. Wear safety glasses and gloves. Ensure good lighting and clear the area of clutter before starting.
Tip: Have a trash bin ready for old rollers and screws. - 3
Remove access to the first roller
Locate the roller bracket and remove the screws or bolts that hold the bracket to the door. Do not tamper with springs or track wiring.
Tip: Keep track of screws by placing them in a labeled container. - 4
Extract the old roller from the bracket
Slide the wheel out from the bracket carefully. If resistance occurs, inspect for a damaged axle or rivet that may require a different approach.
Tip: Take a photo of the orientation for reference. - 5
Compare and prepare the new roller
Check that the new roller matches the wheel size, bearing type, and axle length. Inspect the new bracket for burrs or defects before installation.
Tip: If in doubt about compatibility, contact the retailer or manufacturer. - 6
Install the new roller into the bracket
Slide the new wheel into the bracket and secure with the existing fasteners. Ensure the wheel spins freely without side-to-side play.
Tip: Avoid overtightening screws to prevent bracket deformation. - 7
Reattach the bracket to the door
Mount the bracket back onto the door hinging points. Tighten screws evenly and avoid cross-threading.
Tip: Use a torque-friendly approach; snug is enough, not over-tight. - 8
Repeat on other rollers and check alignment
If replacing more than one roller, repeat the process in symmetric positions. After all are in place, visually inspect alignment and ensure wheels track smoothly in the center of each rail.
Tip: Do not force rollers into misaligned tracks. - 9
Lubricate, test, and finalize
Lightly lubricate the tracks and re-test the door by hand first, then with the opener on a slow cycle. Confirm the door moves evenly without catching or rubbing.
Tip: If there is any binding, stop and reassess before using the door normally.
Got Questions?
What are the signs that my garage door rollers need replacement?
Common signs include grinding noises, binding, uneven door movement, and visible wear on wheel treads. If you notice any of these, inspect the rollers and brackets and consider replacement.
Watch for grinding sounds, binding, or uneven movement. If you see wear, inspect and consider replacing the rollers.
Can I replace rollers without removing the door from the tracks?
You can replace rollers with the door in place if you can access the brackets safely. However, fully removing the door from the tracks or supports provides better visibility and reduces risk of track damage.
You can replace with the door in place, but removing it may be safer and gives better access.
Are nylon rollers better than steel rollers?
Nylon rollers are generally quieter and resist corrosion, making them popular for residential doors. Steel rollers are stronger but louder. Choose based on door weight and noise tolerance.
Nylon rollers are quieter and resist corrosion; steel rollers are stronger but louder.
Do I need to replace tracks or springs along with the rollers?
If tracks are bent or brackets are cracked, or if springs show wear, address those issues. Replacing rollers alone won’t fix major track or spring problems and may require a professional.
If tracks or springs show wear or damage, address those issues or call a pro.
How long does DIY roller replacement typically take?
Most DIY replacements take about 60 to 90 minutes depending on door type and accessibility. Allow extra time for alignment and testing.
Most DIY replacements take about an hour to an hour and a half.
Is it safe to operate a garage door after roller replacement?
Yes, after a careful test and proper alignment, the door should operate smoothly. Always test manually first, then run a short opener cycle at low speed.
Yes, test manually first, then run a slow opener cycle to verify safety.
What if a roller doesn’t seat correctly after replacement?
Stop and remove the roller to check alignment and bracket fit. Misfit parts can cause binding and track damage, so verify compatibility and reinstall carefully.
If a roller won’t seat, recheck alignment and reinstall correctly.
Should I hire a pro for roller replacement?
If you’re unsure about spring tension, track damage, or heavy doors, it’s safer and often cost-effective to hire a pro. They can complete the job quickly and ensure safety.
If you’re unsure about safety or springs, hire a professional for peace of mind.
Watch Video
Quick Summary
- Replace worn rollers promptly for safe operation
- Use compatible roller types and brackets
- Test door movement before normal use
- Avoid working on springs; call a pro if needed
- Lubricate lightly after replacement