Reset Garage Door After Power Outage: A Step-by-Step Guide
Learn to safely reset a garage door after a power outage with this step-by-step guide covering safety checks, reinitialization, remotes, keypad, and common fixes to restore reliable operation quickly.

After a power outage, resetting your garage door opener ensures safe and reliable operation. Start with a full system check: unplug and replug the opener, locate the learn/reset button, and clear any jam indicators. Then reprogram remotes and keypad, perform a test opening and closing, and verify safety reversing sensors are aligned.
Why Resetting After a Power Outage Matters
Power outages can reset or confuse the control logic inside your garage door opener. When the unit loses its memory of travel limits, force settings, or sensor calibration, the door may behave unpredictably. A proper reset re-establishes communication between the opener, remotes, and keypad, realigns safety sensors, and restores the door’s normal travel limits. Without this reset, you risk abrupt stops, uncommanded door movement, or failure to reverse on contact with an obstacle. For homeowners, a well-executed reset means safer operation, fewer surprises, and less frustration as you regain control of your garage.
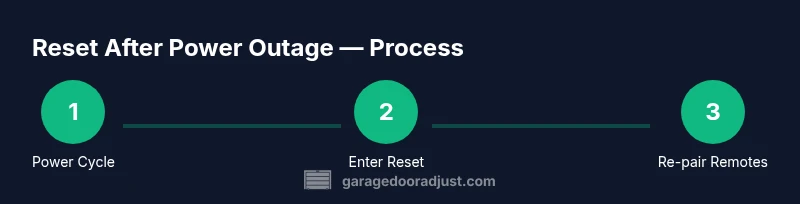
GarageDoorAdjust notes that the reset process is model-dependent but generally involves a power cycle, activation of a learn/reset mode, and re-pairing accessories. Following the manufacturer’s instructions minimizes the risk of misalignment and sensor errors that commonly occur after outages.
Safety First: Readiness and Hazards
Before you touch any hardware, ensure the area around the door is clear of people and pets. Read the operator’s manual to locate the correct reset procedure for your model, as steps can vary. If the door is heavy or bound, do not force it manually during operation; this can strain the springs or gears. Wear safety goggles and keep hands away from moving parts. If you smell burning plastic or hear abnormal noises during testing, stop immediately and unplug the unit to avoid fire or shock hazards. A power outage also means the door’s sensors may be out of alignment, so approach tests slowly and calmly.
GarageDoorAdjust emphasizes starting with a visual inspection of tracks, rollers, and hinges for obstructions or damage. If a track is misaligned or a roller is damaged, address those issues before attempting a reset. Safety first, then proceed with the reset steps.
Understanding the Reset Process
Reset methods are typically grouped into two categories: a simple power cycle followed by reinitialization, and a full reset that clears memory and requires re-pairing all accessories. The common threads are: disconnect power to the opener, locate the Learn/Reset button, and observe LED indicators or beeps that confirm the reset mode has been activated. After entering reset mode, you’ll reprogram remotes and keypad, then reestablish sensor alignment. Always consult your model’s manual for exact button sequences and timing, as incorrect steps can leave the door in a nonfunctional state.
Key concepts to know include travel limits (how far the door moves), force (how hard the motor pulls to move), and sensor alignment. If the door travels too far, too little, or stops unexpectedly, you may need to adjust the limit and force settings after the reset. If you don’t have the manual, you can often find the correct procedure on the manufacturer’s website using your opener’s model number.
Reconnecting Remotes and Sensors: Remotes, Keypad, and Safety Beams
After the reset mode is active, you’ll need to re-link remotes and keypads. This usually involves pressing the Learn/Program button on the opener, then pressing a remote button or entering a code on the keypad to re-pair. Ensure the safety beams are unobstructed and aligned—both transmitters should face each other with a clear line of sight. A minor misalignment can create false positives or a failure to reverse, so verify each beam with the indicator lights on the sensor eyes. If your model uses a battery in remotes, replace worn batteries before testing again.
Keeping your model’s firmware up to date, when available, can improve reliability and sensor performance. If you have multiple remotes, test each one after pairing to confirm consistent operation across devices.
Troubleshooting Common Problems After a Reset
Even after a careful reset, you may encounter issues. If the door won’t move, re-check the safety beams and ensure nothing is blocking the path. If the door moves but stops mid-way, adjust the limit and force settings per the manual. If remotes won’t respond, re-enter pairing mode and re-test. A blinking or beeping light usually indicates a sensor fault or misconfiguration; re-check the wiring connections and sensor alignment first. If the door rattles or sounds strained, inspect tracks for debris and consult a professional if you cannot locate the source of the noise.
Document any error codes shown by the opener and cross-reference them with the manual. In some cases, a faulty circuit board or worn drive components may require a service call. GarageDoorAdjust suggests documenting the model number, serial, and observed symptoms to speed up support if needed.
Maintenance Tips to Prevent Future Outages from Turning into a Hassle
Regular maintenance reduces the odds of post-outage headaches. Lubricate moving parts per manufacturer recommendations, check springs for sag or wear, and replace worn weather seals to protect electronics from dust. Create a simple battery check for key fobs and keypad dimming indicators. Consider keeping a small, labeled toolkit nearby for quick resets, and store the manual or model number in a safe place for fast reference. Practicing a routine reset once or twice a year can keep the system familiar and easy to troubleshoot when power returns.
Quick Recap: What to Do Quickly if Power Returns
- Power cycle the opener and locate the reset button. 2) Enter reset mode and reprogram remotes/keypad. 3) Test door operation, then verify safety beams. 4) Check limits and force, and perform a final safety test. 5) Schedule routine maintenance to prevent future outages from causing issues.
Tools & Materials
- Screwdriver set (Phillips #2)(For opening cover plates and terminal screws)
- Flashlight(Bright, hands-free preferred)
- Safety goggles(Protect eyes from debris)
- Ladder or stable step stool(Ensure stable footing, do not overreach)
- Owner’s manual or model number(Needed to locate exact reset steps)
- Replacement batteries (for remotes/keypad)(Have on hand in case remotes fail to pair)
Steps
Estimated time: 20-30 minutes
- 1
Power cycle the opener
Unplug the opener from its power source or flip the disconnect switch. Wait 30 seconds, then plug it back in. This clears minor glitches and forces the control board to restart.
Tip: Ensure kids and pets are away from the door during the reboot to avoid pinch points. - 2
Enter reset/learn mode
Locate the Learn/Reset button on the opener housing. Press and hold it until the indicator light blinks or a chime sounds, signaling entry into reset mode. Different models have different cues, so refer to the manual if the light behavior varies.
Tip: If you don’t see a light blink, try pressing the button again with a firm, steady press. - 3
Reprogram remotes and keypad
While still in reset mode, press the learn button once more and then press a button on each remote to pair it. For keypad pairing, enter the program code on the keypad and press the # key or follow your manual’s sequence.
Tip: Test each device after pairing to confirm reliable operation before moving on. - 4
Test door operation from wall control
Use the wall-mounted switch or button to open and close the door. Observe smooth movement and listen for unusual sounds. If the door stalls, stop and re-check safety beams and limit settings.
Tip: Don't stand in the door path while testing; keep hands clear of the tracks. - 5
Test safety sensors and reversal
Place a small object in the door’s path and initiate a close. The door should stop and reverse, then return to open. If it fails to reverse, realign the sensors and adjust the mounting as needed.
Tip: Clean the sensor lenses and remove any debris that could block the beam. - 6
Final safety check and manual re-engagement
Manual operation: disconnect the opener and lift the door by hand to confirm balance. Re-engage the opener’s emergency release and ensure the door lowers fully under power. If manual movement remains stiff, call for service.
Tip: Keep the manual release handle accessible but secure to prevent accidental disengagement.
Got Questions?
What should I check first after a power outage?
First unplug the opener, verify power is restored, and locate the correct reset procedure for your model. Ensure the area around the door is clear and inspect tracks for obstructions.
First unplug the opener, confirm power is back, and locate your model's reset steps. Check the area around the door for obstructions.
Do I need to reset my keypad and remotes after the outage?
Yes. After entering reset mode, reprogram each remote and keypad so they communicate with the opener again. Test all devices to ensure reliable operation.
Yes. Reprogram remotes and keypad after the reset and test them all.
What if the door won’t move after the reset?
Check for power and safety-beam issues, then verify travel limits and force settings. If misalignment persists, inspect tracks and springs or seek professional assistance.
If the door won’t move, check power, sensors, and limits. If unresolved, call a pro.
Is it safe to manually open or close the door after a reset?
Yes, but use the manual release carefully and only when the door is supported. Always ensure the door is secured if you’re working near the tracks.
Manual operation is possible with care; use the release and keep hands clear of tracks.
When should I call a professional?
If you notice persistent sensor misalignment, unusual noises, persistent failure to reset, or damaged tracks/springs, contact a qualified technician.
Call a professional if problems persist after a reset or if you see damage.
Why do I need to re-pair accessories after a reset?
Reset memory may disconnect remotes and keypad. Re-pairing re-establishes control and ensures the door responds reliably to each device.
Accessories often need re-pairing after a reset to regain control.
Watch Video
Quick Summary
- Identify model-specific reset steps before starting.
- Prioritize safety: unplug, clear area, test sensors.
- Reprogram remotes/keypad after reset to reestablish control.
- Test door balance and limits to ensure reliable operation.
- Have a plan to contact a professional if issues persist.