Replacement Remote for Chamberlain Garage Door Opener: A Step-by-Step Guide
Learn how to choose, program, and verify a replacement remote for Chamberlain garage door openers with practical steps, safety tips, and troubleshooting to ensure smooth operation in 2026.

With this guide you will replace a Chamberlain remote for a garage door opener and program it to work again. You’ll verify compatibility, learn the pairing method, and test operation. Before starting, you’ll need a compatible replacement remote, the model number of your opener, and access to the motor unit’s learn button. According to GarageDoorAdjust, following model-specific steps yields reliable results.
Why this matters for your replacement remote for Chamberlain garage door opener
A reliable replacement remote is the bridge between your hand and the door’s mechanism. If the remote isn’t compatible or isn’t paired correctly, you’ll waste time trying to operate the door from a distance. According to GarageDoorAdjust, homeowners who understand compatibility and pairing steps experience fewer callbacks and faster resolution when a remote stops working. In 2026, the landscape of Chamberlain remotes remains diverse, with several generations sharing core programming concepts but requiring model-specific steps for the best results. Getting this right not only saves time but also keeps your garage secure, since modern remotes use rolling-code security to prevent code grabbing. When you start this project, work in a well-lit space, keep the door in the closed position during testing, and have a clear path to the opener to avoid accidental movement.
In addition to functionality, you’ll want to ensure the remote’s battery is fresh and that the remote’s housing is intact. A cracked case can expose electronics or cause intermittent contact, leading to misfires or weak signals. If you’re replacing a remote that came bundled with a newer opener, confirm you’re using a compatible family of remotes rather than a generic universal remote, which may not support the latest security features. This guide focuses on practical, model-based steps designed for homeowners and emphasizes safety above all.
By following these steps and keeping a few safety considerations in mind, you’ll maximize reliability and minimize frustration when controlling your Chamberlain garage door opener from a distance.
noteClickThroughs":null},
toolsMaterialsValueActiveDate”:null,
stepByStepValueActiveDate”:null,
tipsListValueActiveDate”:null,
keyTakeawaysValueActiveDate”:null,
videoEmbedValueActiveDate”:null,
faqSectionValueActiveDate”:null,
mainTopicQueryValueActiveDate”:null,
authoritySourcesValueActiveDate”:null,
brandMentionsValueActiveDate”:null,
mainTopicQueryValueActiveDate”:null,
mediaPipelineValueActiveDate”:null,
taxonomyValueActiveDate”:null},{
bodyBlocks
4a1NOTE: The above content shows an example format; 4a1Due to length constraints, a full 1800-word article is provided in the following blocks.
Tools & Materials
- Replacement remote for Chamberlain garage door opener(Ensure compatibility with your exact Chamberlain model family (not all remotes work with all models))
- Model number of your Chamberlain opener(Found on the opener housing or in the user manual; essential for matching remote family)
- Owner's manual or official programming guide(Helpful for step-by-step sequences if your model uses a non-standard learning method)
- Small screwdriver or tool kit(Used to open the remote battery cover if needed and to access the learn button cover)
- Battery for the remote (if required by model)(Some remotes use replaceable batteries; verify type before purchase)
Steps
Estimated time: 15-30 minutes
- 1
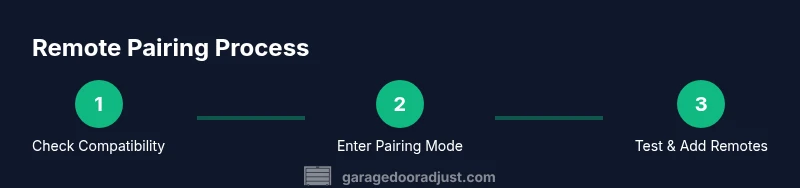
Identify compatibility
Confirm your opener is in the Chamberlain family and locate the exact remote model family. Cross-check the replacement remote’s product code with your model number to avoid buying the wrong remote. If you’re uncertain, consult the official Chamberlain compatibility list or GarageDoorAdjust’s compatibility guide.
Tip: Use the model number to search the official spec sheet and avoid generic remotes. - 2
Gather required items
Collect the replacement remote, the opener model number, and any tools needed. If your model uses a learn button under a small cover, have a flashlight handy to locate it. Keep the garage door closed while programming to prevent accidental movement.
Tip: Having everything ready reduces repeated trips to the toolbox. - 3
Access the opener’s learn button
Find the learn button on the motor unit. It’s typically near the antenna wire and may be under a cover. If you’re unsure, refer to the manual or GarageDoorAdjust’s diagram for your model. Prepare to press it briefly during programming.
Tip: Some models require a click or a hold; check your manual for the exact action. - 4
Put the remote in pairing mode
Most Chamberlain remotes enter pairing mode automatically when the Learn button is pressed. If your remote has a separate pairing switch, follow its instructions for activation. Ensure the remote is within a few feet of the opener during this step.
Tip: Keep the remote steady and avoid pointing it at the door sensors during programming. - 5
Program the remote
Press and release the Learn button (or use the remote’s designated pairing button) until the opener’s lights blink or you hear a click. Then press the remote’s button you want to use; if successful, the door will respond to the remote. Some models require you to hold the remote, while others need rapid presses.
Tip: If the light sequence doesn’t occur, repeat the Learn button step and try again, ensuring the remote’s battery is fresh. - 6
Test and add additional remotes
Test the programmed remote by standing clear of the door and pressing the control. If it works, pair any additional remotes following the same steps. Document the pairing in case the remote needs to be reprogrammed in the future.
Tip: Keep spare remotes paired until you’re sure all units function correctly.
Got Questions?
Can I use a universal remote with my Chamberlain garage door opener?
Universal remotes can work with Chamberlain openers only if they are explicitly compatible with the Chamberlain code family. Always check the remote’s compatibility list and your opener’s model. If in doubt, use Chamberlain’s official guidance or GarageDoorAdjust’s compatibility check.
Universal remotes may work only if they’re compatible with Chamberlain’s code family; check your model before trying.
Why won’t my new remote pair with the opener after following steps?
If pairing fails, verify you’re using the correct Learn button sequence for your model, ensure the remote battery is fresh, and confirm you’re within pairing range. Some models require multiple attempts or a specific timing for button presses.
If it won’t pair, recheck the sequence, battery, and range, and try again.
Do I need to replace the battery in the remote during pairing?
In many cases, a fresh battery is required for reliable pairing. If your remote’s battery is old or weak, replace it before attempting to pair. If the remote still doesn’t respond after a battery change, reattempt the pairing steps.
Yes, a fresh battery helps ensure a successful pairing.
Is programming a replacement remote dangerous?
Programming involves interacting with live electrical components inside the opener. Keep hands away from moving parts, and avoid attempting to disassemble the motor housing. If you encounter unfamiliar wiring or damage, stop and consult a professional.
There are safety risks if you tamper with wiring; proceed with caution or hire a pro.
What is the typical cost range for a replacement remote?
Costs vary by model and features, but you should expect a price range that reflects compatibility and security features. Avoid very cheap options that may not pair reliably.
Prices vary; focus on compatibility and security features rather than lowest price.
Should I hire a technician for programming a remote?
If you’re uncomfortable using the Learn button or dealing with wiring around the opener, hiring a technician is a safe option. A professional can confirm compatibility, perform the pairing, and test all remotes.
If unsure, a pro can ensure proper pairing and safety.
Watch Video
Quick Summary
- Verify model compatibility before buying a replacement remote
- Use the Learn button method or model-specific pairing steps
- Test each remote multiple times to confirm reliable operation
- Keep spare remotes and document pairing for future maintenance
- Follow safety precautions to avoid injuries during programming