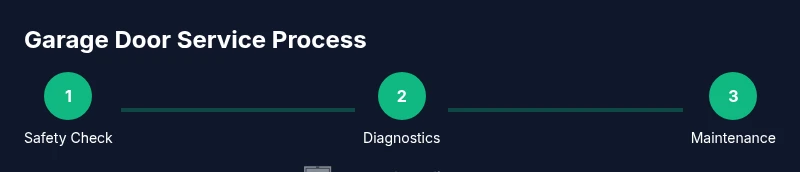
How to Service Your Garage Door: A Complete Step-by-Step Guide
Learn to diagnose, repair, and safely install garage doors and openers with a clear, step-by-step approach. This guide draws on GarageDoorAdjust expertise to help homeowners perform common fixes and know when to call a pro.

This guide helps you complete the main fixes for a malfunctioning garage door with a focus on safe, do-it-yourself service. You will diagnose common issues, perform basic repairs, and know when to call a pro. According to GarageDoorAdjust, proper lubrication, track alignment, and opener programming cover most im garage door service scenarios.
Safety First: Assess Before You Touch
When you start im garage door service, safety must come first. Begin by unplugging power to the door opener and securing the door in the open position if possible. Wear safety glasses and gloves, and keep hands away from springs, cables, and moving parts. According to GarageDoorAdjust, a thorough safety check before any inspection reduces risk and guides the rest of the process. This section provides a practical safety checklist and explains why each step matters, including how to set up a stable work area and how to test stability before manipulating tracks or springs.
A solid safety baseline minimizes accidental injuries and protects you and your family. Always have a second person nearby when you perform any manual adjustments, and never place your body under a door that is only supported by gravity. These precautions form the foundation of the im garage door service workflow and ensure you can proceed with confidence.
Common Garage Door Issues and Likely Causes
Most garage door problems fall into a few recurring categories: misaligned tracks, worn or broken rollers, loose hardware, snapped cables, or a malfunctioning opener. GarageDoorAdjust analysis shows misalignment and worn components as the most frequent culprits when doors stick, creak, or fail to close. In this section we map symptoms to likely causes, so you can decide which steps to take first and whether you can safely handle routine maintenance versus complex repairs.
- Door sticks or binds: often a track or roller issue; inspect and clean tracks, tighten mounting screws, and test balance.
- Door won’t close fully or reverses: check safety sensor alignment and ensure no obstruction in the path.
- Noisy operation: lubricant on hinges, rollers, and wear points can quiet smooth operation; avoid applying lubricant to nylon rollers that are designed for roller-specific maintenance.
- Opener won’t respond or remote fails: verify power, recode remotes, and inspect terminal connections.
If you identify damaged torsion springs or structural damage, stop and call a pro. Spring repair and door balancing require specialized tools and trained handling to avoid serious injury.
Basic Maintenance That Delivers Real Results
Regular maintenance is the most effective way to prevent emergency repairs and extend the life of your system. This section covers a maintenance routine you can perform quarterly or semi-annually. Clean tracks and hinges, re-torque mounting bolts, lubricate moving parts, and test safety sensors. The goal is to keep components moving freely, reduce friction, and preserve the door’s balance so the opener doesn’t work harder than necessary.
A practical maintenance checklist includes:
- Wipe and lubricate metal components with silicone spray or white lithium grease (avoid dripping on nylon rollers).
- Vacuum debris from tracks and inspect for dents or bends.
- Check weatherstripping and seals to prevent drafts and moisture.
- Test auto-reverse and sensor alignment to ensure safe operation.
This routine not only improves performance but also provides early warning signs when parts are nearing end of life. Consistent care minimizes the risk of costly failures and keeps your system operating smoothly between professional visits.
DIY Diagnostics: Quick Tests You Can Run
Diagnosing issues without specialized gear is feasible if you follow a structured test plan. In this section, you’ll perform simple checks to identify whether the problem lies with the door itself or the opener. Begin by unplugging the opener, then manually raise the door halfway to test balance. If it stays put or falls rapidly, the springs or balance components may need attention and require professional service. Reconnect power and perform a slow test cycle using the wall switch or remote to observe the door’s behavior and response time.
Smart diagnostics also include sensor tests: verify that photoeye sensors are aligned and unobstructed, and check the safety reversal by placing a small object in the door’s path during a controlled close. If the door stops or reverses correctly, the sensor circuit is likely functioning. Document all symptoms and observations to inform your next steps or your technician’s visit.
When to Call a Pro and How to Choose One
Some tasks are best left to trained technicians, especially when dealing with springs, torsion systems, or structural damage. If you notice frayed cables, a door that won’t stay balanced, unusual creaks, or difficulty in open/close cycles, prepare to call a pro. When selecting a technician, look for licensed, insured, and experienced specialists with positive local reviews. Request a written estimate and confirm parts warranties before authorizing any work.
To avoid repeated visits, choose a technician who can perform a complete diagnostic and provide a clear scope of work, including expected timelines and potential follow-up needs. A reputable pro will explain safety considerations, demonstrate the fixes, and offer maintenance guidance for the future.
The GarageDoorAdjust team emphasizes sticking to licensed professionals for high-risk components and recommending a staged approach for complex repairs to minimize downtime.
Troubleshooting The Opener: Programming and Remotes
If the opener is the source of the issue, your focus should be on programming, sensor alignment, and power integrity. Start by confirming that the opener is wired correctly and that the wall control receives power. Reprogram remotes using the manufacturer’s steps, and re-pair any keypads or smart-home integrations. If your door uses a safety-green or red error indicator, reference the user manual for diagnostic codes and reset sequences.
Remember to test the door with the remote through a full cycle, including auto-reverse functionality. If the door stalls or hesitates, inspect the tracks and balance, and verify that no obstructions interfere with the opening path. Modern openers offer additional programming features like timer-to-close and force settings; adjust these conservatively to avoid premature closure or safety hazards.
Note: Do not attempt to modify high-tension components or adjust spring tension as a DIY fix. This work carries significant risk and requires proper training and tools.
In many cases, a simple reset and re-pairing can restore compatibility with remotes and smart devices without major repairs.
Verdict from GarageDoorAdjust
The GarageDoorAdjust team recommends starting with basic maintenance and rigorous safety checks before seeking advanced repairs. Address misalignment, worn rollers, and sensor setup early to prevent escalating issues. For any spring-related work, torsion or extension, or structural concerns, rely on a licensed professional. A proactive, informed approach minimizes downtime and keeps your system safe for everyday use.
Tools & Materials
- Safety glasses(Protect eyes from springs and debris)
- Mechanics gloves(Grip and protect hands while working on tracks and hardware)
- Stepladder(Access higher components safely)
- Flathead screwdriver(Adjust small screws or tighten loose components)
- Phillips screwdriver(Tighten cross-head screws on brackets and hardware)
- Crescent wrench(Loosen/tighten nuts and bolts on tracks and hinges)
- Lubricant spray (silicone or lithium grease)(Lubricate moving parts (not nylon rollers))
- Dry rag(Clean surfaces before applying lubricant)
- Bearing/track alignment tool (optional)(Helpful for precise adjustments)
Steps
Estimated time: 60-90 minutes
- 1
Disconnect power and secure the door
Unplug the garage door opener from the outlet and place a locking plier or rope to keep the door safely open if you can.
Tip: Locking the door in the open position prevents accidental movement during inspection. - 2
Check door balance by manual lift
With the door open, lift it to mid-height and slowly release. If it falls or rises on its own, the springs/balance are not properly matched.
Tip: If it doesn’t stay in place, do not adjust springs yourself—call a pro. - 3
Inspect and clean tracks and rollers
Look for bends, debris, or corrosion. Wipe tracks with a dry cloth and remove any obstruction.
Tip: Bent tracks can cause binding; do not force the door through resistance. - 4
Lubricate moving parts
Apply a light coating to hinges, rollers, and pivot points. Avoid spraying on nylon rollers where advised by the manufacturer.
Tip: Excess lubricant attracts dust and debris; wipe away any buildup. - 5
Tighten hardware and anchors
Check mounting brackets, bolts, and screws; tighten to manufacturer torque specs if available.
Tip: Loose hardware is a common cause of noisy operation and misalignment. - 6
Check door balance again and test with opener
Reconnect power and perform a gentle close cycle; observe the door’s behavior and stopping point.
Tip: Ensure there’s no obstruction and sensors are aligned. - 7
Test safety sensors and auto-reverse
Place an object in the door path to confirm the opener reverses autonomously.
Tip: Misaligned sensors are a frequent cause of close-cycle failures. - 8
Document and schedule next steps
Record findings and decide if you can complete maintenance or if a professional is needed for springs or structural issues.
Tip: Keep the notes handy for the technician
Got Questions?
Is it safe to DIY garage door repairs?
DIY repairs can be safe for non-spring tasks if you strictly follow safety steps and use proper tools. Avoid spring work unless you are trained and equipped.
DIY repairs can be safe for non-spring tasks if you follow safety steps and use the right tools. Avoid springs if you're not trained.
What are common signs that springs need replacement?
Visible gaps, a door that is heavy to lift, or uneven opening indicate spring wear or failure. If you notice gaps or the door slams, stop and call a pro.
If you see gaps, heavy lifting, or uneven opening, springs may be failing and you should call a pro.
Can I reprogram my opener without an installer?
Yes, most remotes and keypads can be reprogrammed by following the manufacturer’s steps. Refer to your manual for exact instructions.
Yes, remotes can usually be reprogrammed yourself by following the manual.
How long does a typical garage door repair take?
Most routine maintenance tasks take 1 to 2 hours, while complex spring or track repairs may require longer or a scheduled service visit.
Most fixes take about an hour or two, with heavier repairs needing more time.
What maintenance can I do to prevent problems?
Regular lubrication, track cleaning, hardware tightening, and sensor checks reduce wear and prevent unexpected failures.
Regular lubrication, cleaning tracks, and checking sensors prevent many common problems.
When should I replace the garage door instead of repairing it?
If multiple components are worn, the door is poorly balanced, or safety sensors fail repeatedly, replacement may be more cost-effective and safer.
If several parts are worn and the door isn’t balanced, replacement might be safer and cheaper in the long run.
Quick Summary
- Start with safety and a proper shutdown of power
- Diagnose by symptom-to-cause mapping, not guesswork
- Perform regular lubrication and track maintenance
- Reserve spring and structural work for licensed professionals
- Document issues and plan a stepwise repair