How to Remove Paint from a Garage Door: A Complete Step-by-Step Guide
Learn safe, effective methods to remove paint from a garage door and prep for repaint. This guide covers wood, steel, and aluminum doors, safety, tools, and best practices for durable results. GarageDoorAdjust analyses inform surface-friendly approaches.

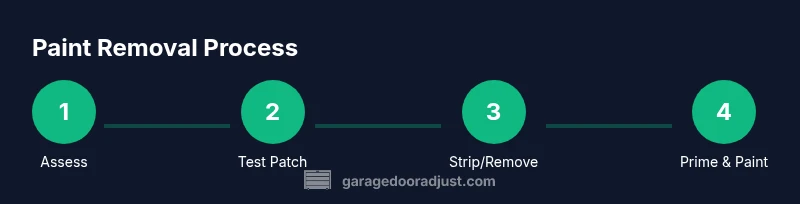
By the end of this guide you will know how to remove paint from a garage door safely and effectively, with steps you can follow for wood, steel, and aluminum doors. You'll learn about test patches, choosing the right stripping method, essential tools, and proper cleanup to prep for priming and repainting.
Why removing paint from the garage door matters
Paint buildup on a garage door can trap moisture, hide underlying damage, and interfere with adhesion of a new finish. Removing old paint helps you reveal the true surface and ensures the next coating bonds properly. According to GarageDoorAdjust, a controlled removal minimizes damage to the substrate and makes it easier to spot rust, rot, or delamination early. The method you choose should respect the door material—wood, steel, or aluminum—and the original coating. Starting with a light assessment saves time and reduces the chance of causing new flaws. Look for peeling edges, cracks along seams, and any grit buildup in textured surfaces. Document any areas that look suspicious so you can address them before you repaint. This foundation informs your approach and keeps the project on track.
Safety first: PPE, ventilation, and handling chemicals
Before you touch a paint layer, set up a well-ventilated area and wear proper PPE. Protective eyewear, chemical-resistant gloves, and a respirator or at least a fit-tested mask are essential when working with strippers or sanding dust. Keep the workspace free of clutter and ensure children and pets are kept away. If you choose chemical strippers, always read the label for ventilation requirements and disposal instructions. A small test patch can reveal whether the product irritates skin or emits strong fumes on your particular door finish. For wooden doors, seals and solvents can also affect grain; plan for a slower approach if the grain is exposed.
Assessing the door: material and finish
Doors vary widely in composition—wood, steel, aluminum, or composite—and each surface accepts paint removal differently. GarageDoorAdjust Analysis, 2026 notes that adhesion varies by old coating and substrate. A metal door often tolerates chemical strippers or heat as long as you don’t overheat and warp the metal. Wood doors may require gentler techniques to avoid gouging or raising the grain. Begin by inspecting the door edges, corners, and any panels to identify seams and potential areas where the coating has peeled or bubbled. Knowing the substrate helps you select the least invasive method that still removes the finish effectively, which saves time and minimizes cleanup later.
Testing adhesion on a hidden area
Always test your chosen method on an inconspicuous spot first. Apply a small amount of stripper or heat for a brief period, then try to lift the coating with a plastic scraper. If the paint lifts cleanly without gouging the surface, you’ve identified a compatible approach. If the coating resists or the surface shows damage, you’ll need to adjust (for example, switch from a harsher chemical stripper to a gentler mechanical approach). Document the test results so you can reference them later, especially if you are stripping a large area. This step reduces the risk of widespread damage and ensures you have the right plan before committing to the full door.
Choosing the removal method: chemical, heat, or sanding
There isn’t a one-size-fits-all method. For smooth metal surfaces, a well-suited chemical stripper or heat gun can work well if used with care. For wood doors or textured finishes, mechanical removal with plastic scrapers and light sanding often yields the best results with less risk of surface damage. If you go with chemical stripping, select a product labeled for your door material and finish, and follow all safety guidelines. For sanding, start with a coarse grit to break the coating, then move to finer grits to achieve a smooth finish. A combined approach—gentle chemical stripping followed by sanding—can balance effectiveness with surface protection.
Protecting surrounding areas and preparing the workspace
Lay down drop cloths and plastic sheeting to catch dust and paint chips. Remove or cover nearby plants, vehicles, and concrete floors to avoid stains and chemical exposure. Ensure good ventilation by opening doors and using a fan to push fumes away from you. Keep a bucket of clean water and detergent handy for rinsing tools and wiping surfaces. This preparation minimizes cleanup time and reduces the chance of accidentally transferring paint or chemicals to unintended areas.
Surface prep after paint removal: cleaning, neutralizing, and smoothing
After you remove the paint, clean the surface to remove residue, oils, and stripper remnants. Use a mild detergent solution or a dedicated cleaner appropriate for the door material. Rinse with clean water and let the surface dry completely before inspecting for remaining finish, rough patches, or etching. If you used a chemical stripper, neutralize the surface according to the product instructions to prevent any residues from affecting adhesion. Lightly scuff the surface with 120-grit sandpaper to create a uniform profile for priming. Wipe away the dust with a tack cloth, ensuring a clean slate for priming and painting.
Priming and repainting: preparing for a durable finish
Once the surface is clean and dry, apply a suitable primer that matches your door material and planned topcoat. For metal doors, use an inhibited primer that resists corrosion; for wood doors, choose a stain-blocking or grain-filling primer as needed. After the primer dries, assess for any pinholes or uneven spots and lightly sand them before applying the topcoat. Follow the paint manufacturer’s application guidelines, applying multiple thin coats rather than a single thick coat for the best adhesion and durability. Allow ample curing time between coats and after the final coat before exposing the door to the elements.
Common mistakes and quick fixes
Rushing the process or skipping a test patch can lead to edge peeling, delamination, or warping. If you notice raised grain after cleaning, lightly dampen and re-sand in the direction of the grain before priming. If you accidentally gouge the surface, fill the indentation with a compatible wood filler or metal putty depending on the substrate, then re-sand smooth before priming. Always dispose of rags and solvents according to local regulations and never leave stripping products in closed spaces where fumes can build up.
Quick troubleshooting and next steps
If paint removal reveals severe rust, rot, or structural damage, address those issues before painting. Sand away rough edges, treat corrosion, and consider professional help for extensive damage. After repaint, inspect the door periodically for new peeling or corrosion, especially after extreme weather. Routine maintenance—cleaning, lubricating moving parts, and repainting as needed—extends the life of your door and keeps it looking its best.
Tools & Materials
- Protective gear (safety glasses, chemical-resistant gloves, respirator or mask)(Ensure proper fit; respirator should be rated for organic solvents if using chemical strippers)
- Plastic drop cloths or tarps(Protect plants, concrete, and nearby surfaces)
- Plastic scraper or putty knife(Plastic is gentler on finishes; avoid metal gouges)
- Fine to medium grit sandpaper (120-220 grit)(Used for smoothing after stripping)
- Orbital sander (optional)(Speeds up large flat areas)
- Chemical stripper suitable for your door material(Follow label for wood vs metal; ensure ventilation)
- Detergent and water; or TSP substitute(For cleaning before and after stripping)
- Rags or microfiber towels(For wiping down surfaces and drying)
- Goggles and hearing protection(Eye protection mandatory; hearing protection optional but helpful near power tools)
- Ladder or stable steps(Safely reach higher panels without wobbling)
- Primer and topcoat suited to door material(Select rust-inhibiting primers for metal; stain-blocking primers for wood)
Steps
Estimated time: 2-6 hours depending on door size, finish, and method
- 1
Prepare the workspace and tools
Clear the area and lay down protective coverings. Set up ventilation and ensure all tools and chemicals are within reach. Check the door for safety hazards like loose panels and stabilize the door if needed.
Tip: Arrange a dedicated waste area to keep paint chips from spreading. - 2
Choose removal method based on surface
Review the door material and existing finish to decide between chemical stripping, heat, or mechanical sanding. Test patches in a hidden area to confirm compatibility before full application.
Tip: Start with the least aggressive method that will still remove the finish. - 3
Protect surrounding areas
Cover nearby surfaces and vehicles; ensure pets and children are out of the workspace. Seal off vents temporarily if using strong solvents.
Tip: Ventilation is key to reducing fume exposure. - 4
Apply the stripping method
Follow the product directions and apply the stripper evenly. Do not rush; allow the coating to loosen according to the recommended dwell time.
Tip: Avoid over-applying; thicker layers dry unevenly. - 5
Remove softened paint
Gently lift the coating with a plastic scraper, working with the grain or along flat surfaces. Reapply stripper to stubborn sections as needed.
Tip: Keep scrapes shallow to prevent gouging the surface. - 6
Sand and smooth the surface
Use 120-220 grit to feather edges and create a uniform surface. Wipe away dust with a tack cloth.
Tip: Always sand in the direction of the surface texture. - 7
Clean and neutralize
Wipe with detergent solution, rinse, and allow drying. If required by the stripper, neutralize residues as instructed on the product label.
Tip: A clean surface ensures primer adheres evenly. - 8
Prime and repaint
Apply a compatible primer, then topcoat with the desired color. Use thin, even coats and let each coat cure before applying the next.
Tip: Dormant curing with good ventilation improves finish durability. - 9
Clean up and inspect
Collect all waste, dispose of hazardous materials per local regulations, and inspect the finished surface for smoothness and adhesion.
Tip: Check for any missed spots and touch up as needed.
Got Questions?
Can I remove all paints from a garage door without damaging the surface?
In most cases you can remove multiple layers, but the result depends on the door material and original finish. Test a patch first and proceed with a method that minimizes surface impact. If you encounter deep gouges or corrosion, address those areas before repainting.
Usually you can remove all paints if you test a patch first and choose a gentle method for the surface. Address any damage before repainting.
Is sanding always better than using chemical strippers for a garage door?
Not always. Sanding is effective for flat, smooth surfaces and helps control heat and chemical exposure. Chemical strippers can remove finish quickly on complex textures, but require careful use and ventilation. Choose the method that minimizes surface damage while achieving even removal.
Sanding works well on flat areas; chemicals can be faster on textured surfaces but require care. Pick the method that reduces surface damage.
What should I do if the door is older and possibly has lead paint?
Lead paint requires special handling. Avoid sanding bare lead-based coatings; instead, use lead-safe practices or hire a professional for testing and removal. Do not disturb lead-contaminated finishes in ways that release dust into living spaces.
Lead paint needs special handling. If you suspect lead, test and consider professional help.
Do I need to prime the door after removing paint?
Yes. Priming promotes adhesion and blocks stains. Use a primer suitable for your door material (metal, wood, or composite) and follow with the topcoat per manufacturer instructions.
Yes, prime after removal to ensure good adhesion and finish.
Can I repaint the door right away after removing the paint?
No. Allow the surface to dry fully and cure any cleaners or primers as recommended on product labels. Rushing the process can compromise adhesion and finish durability.
Let the surface dry and cure before painting to ensure a durable finish.
What disposal considerations should I know for paint and stripper?
Dispose of paint chips, solvents, and contaminated materials according to local hazardous waste guidelines. Do not pour solvents down drains and follow label disposal directions for strippers.
Dispose of waste per local hazardous waste guidelines and product labels.
Is it worth hiring a pro for garage door paint removal?
For large doors or difficult coatings, a pro can ensure safe, efficient removal and proper surface preparation for painting. If the door has structural issues or potential lead paint, professional service is especially wise.
If the job is large or surfaces seem tricky, consider hiring a pro for best results.
Watch Video
Quick Summary
- Assess the door material and finish before stripping
- Prioritize safety and ventilation throughout the process
- Choose a removal method that suits the surface and finish
- Test on a hidden area to prevent damage
- Prime and paint after surface preparation for lasting results