How to Get Garage Door Back on Chain: A Homeowner’s Guide
Learn, step by step, how to safely reattach a garage door to its chain drive. This homeowner-friendly guide covers safety, diagnosis, realignment, tensioning, and testing—plus tips to avoid common mistakes.

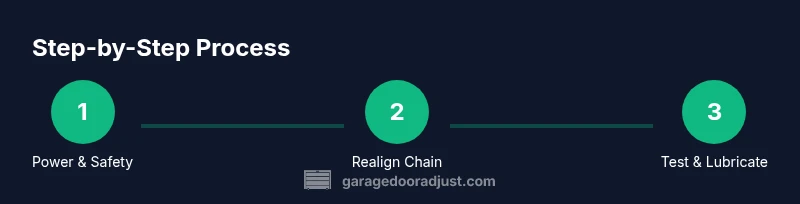
By following this guide, you’ll safely get a garage door back on its chain and restore smooth operation. The steps cover powering off for safety, realigning the chain on the drive sprocket and trolley, re-tensioning, and testing movement. According to GarageDoorAdjust, never bypass safety features and seek professional help for complex springs or track issues.
Understanding the chain drive system
A typical chain drive garage door uses a trolley that moves along a track, powered by a motor through a sprocket and chain. When the door won’t rise or drops unexpectedly, the chain can slip off the sprocket or become misaligned. Understanding the basic components helps you diagnose what happened and why getting the door back on chain matters. The goal of fixing a chain issue is to restore controlled movement, ensure the trolley engages the drive properly, and prevent the door from dropping or binding on the tracks. If your door uses extension springs or torsion springs, treat those parts with extra care and do not attempt to adjust them unless you are trained. The GarageDoorAdjust analysis emphasizes safety, methodical checks, and using the right tools to avoid damaging sensors or gears.
Safety first: precautions you must take
Work with the door powered down and securely supported. Wear eye protection and gloves, and keep curious children and pets away from the work area. A door that is not fully supported can fall, causing injury or damage. If you hear grinding, see loose parts, or the door behaves erratically after any adjustment, stop and reassess. Do not attempt to force a chain back onto a serrated sprocket or a tight area; this can damage the chain, track, or motor. A calmer, organized approach reduces risk and increases the chance you’ll fix the problem correctly the first time. As always, if you’re unsure, seek professional help to avoid injury and further damage.
Diagnosing common chain misalignments
Chain misalignment often shows as a skewed ride along the track, a gap where the chain slips off the sprocket, or intermittent binding when the door moves. Inspect the chain for kinks, bent links, or excessive slack. Verify that the trolley engages the drive gear evenly and that the drum is free of debris. Look for any loosened mounting screws or worn sprockets. This diagnostic step helps you decide whether the fix is a simple realignment or something more serious that requires replacement parts.
Step-by-step: realigning the chain and re-engaging the trolley
This section describes the planned actions you’ll perform in the next steps. Realigning the chain requires a stable work surface, careful handling of moving parts, and precise positioning so the chain rides evenly on the drive sprocket. You’ll reposition the trolley along the rail, guide the chain back onto the sprocket, and ensure the chain sits in the track’s channel. Proper alignment reduces wear and helps the door operate smoothly. Remember to keep hands clear of the track and never twist the chain during adjustment.
Aftercare: testing the door and maintenance tips
After realignment and tensioning, test the door in small increments to confirm it moves smoothly and stops at the correct heights. Listen for unusual noises or slipping. If the door is misaligned, recheck the chain position and tension. Lubricate moving parts sparingly, focusing on the chain, pulleys, and track joints. Periodic maintenance—cleaning rails, inspecting springs for wear (without adjusting them), and ensuring the safety sensors stay aligned—helps prevent future chain issues.
When to call a pro
If you encounter stubborn chain misalignment, damaged sprockets, a bent track, or if the door is not balanced after your adjustments, stop and call a professional. A trained technician can safely handle chain replacements, tension adjustments, and any associated spring work. Complex issues may require model-specific steps and specialized tools that are beyond typical home maintenance.
Tools & Materials
- Safety glasses(Protect eyes from debris and sudden movement)
- Work gloves(Grip parts securely; prevent cuts)
- Stepladder(Access the track safely, at a comfortable height)
- Socket set & wrenches(Remove and reattach fasteners as needed)
- Screwdrivers (Phillips/flathead) and pliers(Adjust brackets, detach/reattach chain clips)
- Lubricant (garage door lubricant or light machine oil)(Lubricate chain and pulleys after realignment)
- Towel/rag(Clean up grease and wipe surfaces)
- Owner’s manual or model-specific instructions(Consult for model-specific steps and safety notes)
Steps
Estimated time: 25-40 minutes
- 1
Power off and secure the door
Turn off the opener at the wall switch and unplug the unit if accessible. Place a clamp or prop under the door to prevent sudden movement. Ensure the door cannot descend or rise during adjustments.
Tip: Never work under a moving door; confirm power is off and blinds or sensors won’t trigger movement. - 2
Relieve any residual tension and support the weight
If your door is closed or partially open, carefully support upward weight with a prop to prevent it from dropping when you loosen components. This keeps the door stable while you reposition the chain.
Tip: Use a sturdy prop and never rely on the door’s balance; a helper can watch from the ground. - 3
Disconnect or loosen the chain from the trolley
If accessible, detach the chain from the trolley or disengage the chain from the drive gear so it can move freely without pulling the door out of balance. Do not remove more components than necessary.
Tip: Keep track of removed parts so you can reinstall them exactly where they came from. - 4
Realign the chain onto the drive sprocket
Position the chain so it sits evenly on the sprocket and the drum. Ensure the chain lies within the track channels and does not snag on brackets or brackets endings.
Tip: Spin the sprocket by hand gently to confirm smooth engagement before proceeding. - 5
Reattach the chain to the trolley and brackets
Reconnect the chain to the trolley or to the drive linkage as per your model. Tighten any fasteners to the recommended snug fit without over-tightening.
Tip: Check for kinks or twists as you reattach to avoid binding later. - 6
Tension and test the door movement
Restore gentle tension, then plug in the opener and test the door’s movement in short increments. Listen for unusual noises and check that the door stops smoothly at the desired height.
Tip: If movement is stiff or noisy, recheck chain alignment and consult your manual. - 7
Finalize and perform light maintenance
Wipe away excess lubricant, recheck all fasteners, and ensure sensors are aligned. Consider a light lubrication of the track and pulleys for smoother operation.
Tip: Regular light maintenance prevents future chain issues.
Got Questions?
Is it safe to reattach the chain myself, or should I hire a professional?
Simple realignment and tension adjustments can be safe for a confident homeowner following proper safety steps. If you encounter springs, damaged tracks, or uncertain alignment, hire a professional.
You can handle basic realignment if you follow safety steps, but get a pro for springs or damaged parts.
What signs indicate the chain is damaged and needs replacement?
Look for stiff links, corrosion, kinks, or frequent slipping. If the chain shows significant wear, plan for replacement rather than continued adjustment.
Watch for stiff links or obvious wear before proceeding.
How can I tell if the door is properly tensioned after reassembly?
Lightly lift the door manually (when safe) to see if it stays balanced. If it drops or feels uneven, recheck the chain tension and alignment.
Check balance by lifting gently; it should hold in place without dropping.
What should I do if the door won’t stay on track after reassembly?
Stop immediately. Recheck the chain alignment and track clearance. Ensure brackets aren’t bent and the track is clear of debris.
If the track still causes issues, recheck alignment and consider a pro.
Do I need to lubricate the chain after reassembly?
Yes, use a light garage door lubricant on the chain, pulleys, and moving joints to reduce friction and wear.
A light lubrication after reassembly helps smooth operation.
Watch Video
Quick Summary
- Power off and secure before touching moving parts
- Realign the chain carefully to prevent future slips
- Check tension and smooth operation with incremental testing
- Consult the manual or a pro for model-specific steps and safety notes