LiftMaster Garage Door Opener Chain Drive: Maintenance and Repair
A homeowner-friendly guide to diagnosing, repairing, and maintaining LiftMaster garage door opener chain drive units with safety, tools, steps, and practical tips.

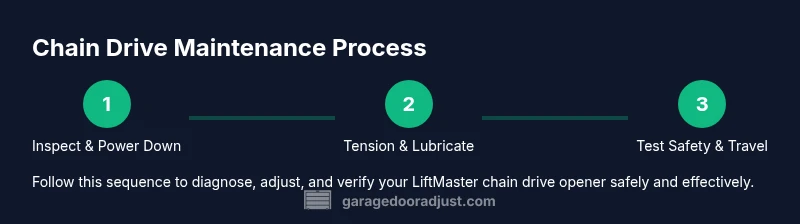
According to GarageDoorAdjust, you can safely diagnose and service a LiftMaster garage door opener chain drive by following a power-off plan, using the proper tools, and inspecting the chain, sprockets, and safety sensors. The GarageDoorAdjust Team found that regular lubrication and tension checks reduce wear and noise. This quick guide outlines the essential steps and safety considerations.
Understanding the liftmaster garage door opener chain drive
The phrase liftmaster garage door opener chain drive refers to a standard Drive mechanism used in many LiftMaster models where a steel chain pulls the trolley along a track to raise or lower a residential garage door. This design is known for its strength and reliability when properly maintained, but it can become noisy or less efficient as components wear. Key parts include the drive chain, sprockets, gears, a trolley, tracks, rollers, and safety sensors. Regular inspection helps identify wear on the chain links, loose sprockets, or stretched chain before performance declines. The GarageDoorAdjust team notes that these openers deliver solid performance when kept clean, properly lubricated, and correctly tensioned. The goal of this section is to help you recognize common signs of wear and understand how the chain drive interacts with other moving parts to move the door smoothly and safely.
Diagnosing common symptoms and root causes
When a liftmaster garage door opener chain drive starts making unusual noises, moving slowly, or stopping partway, the cause is often a combination of chain wear, guide rail misalignment, or sensor misalignment. Start with a simple visual inspection: look for kinks in the chain, missing or bent teeth on sprockets, and any buildup of dirt or grime along the chain path. If the door reverses unexpectedly or stops before the floor, check the safety reversing sensor alignment and ensure the track is clear of obstructions. This approach aligns with best-practice troubleshooting: isolate the symptom, verify the obvious causes, and confirm that electrical components are functioning. GarageDoorAdjust analysis shows that routine lubrication and tension checks can extend life when combined with proper track alignment and sensor calibration.
Safety considerations before you begin
Working on a garage door opener involves lifting heavy parts and potential pinch points. Always disconnect power to the opener from the wall switch and the outlet or disconnect the door from the power supply at the breaker. Keep children and pets away from the workspace, wear eye protection and gloves, and use a sturdy ladder with a spotter if you need to reach the unit. Ensure the door is supported in the closed position using locking pliers or clamps to prevent accidental movement. These steps reduce the risk of injury and avoid unintended door movement during maintenance.
Maintenance practices to extend the life of a chain drive system
Regular maintenance keeps the liftmaster garage door opener chain drive operating quietly and reliably. Clean the chain path to remove dust and debris that can increase wear. Check tension so the chain has a slight amount of play but does not sag or bind. Lubricate metal-to-metal contact points with a light, non-silicone lubricant designed for garage doors, avoiding plastic parts and nylon bushings that can degrade with the wrong lubricant. Inspect the track for alignment, ensure rollers spin freely, and verify that the chain moves smoothly without binding. Keep in mind that lubrication intervals may vary with climate; in dusty or humid environments, you may need more frequent attention. The GarageDoorAdjust team emphasizes regular checks as the best defense against escalating wear.
When to replace rather than repair a LiftMaster chain drive
If the chain shows significant stretching, kinking, or broken links, or if sprockets are worn beyond repair, replacement is usually the safer option. Other indicators include persistent noise after maintenance, uneven door travel, or a failure of the safety sensors to register correctly. Replacing a chain drive system may also be considered when the door acts inconsistently under load or if your unit is several years old and the cost of parts or labor would exceed the price of a new opener. In these cases, upgrading to a newer LiftMaster model with modern sensors and a quieter drive system can offer long-term reliability.
Compatibility notes and regional considerations
Not all LiftMaster models use the same drive components, and installation requirements can vary by door height, track length, and garage width. Before buying parts or planning a DIY repair, verify the model number and consult the user manual or manufacturer support resources for your specific LiftMaster chain drive configuration. If you’re unsure about compatibility or the correct lubrication type, seek professional guidance. This reduces the risk of mismatched parts and ensures the door operates within safety standards.
Tools & Materials
- Safety glasses(Eye protection during inspection and lubrication)
- Power drill or screwdriver(For removing covers and adjusting screws)
- Wrench set and pliers(To tighten bolts and grips safely)
- Flashlight(Thorough inspection of chain, sprockets, and track)
- White lithium grease or garage-door lubricant(Apply to metal-to-metal contact points only)
- Clean rags or shop towels(Cleanup and wipe excess lubricant)
- Ladder or sturdy step stool(Reach high components safely)
- Masking tape or clamps(Temporary door stabilization if needed)
Steps
Estimated time: 45-75 minutes
- 1
Power down and secure the door
Begin by unplugging the opener or cutting power at the breaker. Secure the door in the closed position with clamps or locking pliers to prevent movement. This step protects you from unexpected startup while you work.
Tip: Double-check that power is fully disconnected before touching any internal components. - 2
Inspect the chain and sprockets
Visually examine the chain for stiff links, rust, or missing teeth on the sprockets. If you see excessive wear or stiffness, plan for replacement rather than trying to force movement.
Tip: Use a bright flashlight and mirror to inspect hard-to-see areas along the chain path. - 3
Check and adjust chain tension
With the door closed, test the chain for slight sag or binding. Adjust tension per your model’s manual using the adjustment bolt or screw; avoid overtightening which can cause motor strain.
Tip: Make small adjustments and re-test travel after each change. - 4
Lubricate the chain, gears, and rails
Apply a light lubricant to the chain, drive gears, and inside of the tracks where metal slides against metal. Wipe away any excess to prevent dirt buildup.
Tip: Use lubrication sparingly; excessive lubricant attracts dust and can gum up movement. - 5
Check track alignment and rollers
Ensure tracks are parallel and firmly mounted. Misaligned tracks can cause the door to bind or derail; replace damaged rollers and realign as needed.
Tip: If tracks are bent, do not force straight—seek professional help. - 6
Test safety sensors and travel
Reconnect power and run the door through a few cycles, verifying the safety sensor reverses on contact with a test object and that travel is smooth in both directions.
Tip: Keep hands clear of the door path during tests.
Got Questions?
Is a LiftMaster chain drive louder than belt drive?
Yes, chain drives tend to be louder than belt drives due to metal-to-metal contact. Regular maintenance, proper lubrication, and track alignment can reduce noise noticeably. If noise persists after tuning, you may consider upgrading to a quieter option or adding sound-dampening measures around the unit.
Chain drives are usually louder than belt drives, but proper maintenance can reduce most of the noise.
Can I replace a chain on my LiftMaster opener myself?
Replacing a chain is a moderately complex task that involves disconnecting power, disassembling parts of the opener, and correctly aligning the new chain with sprockets. If you’re not comfortable with mechanical work or if your model requires special tools, hire a professional technician.
You can, but it’s best to hire someone if you’re uncertain about the steps or tools required.
What safety features should I check on a LiftMaster chain drive?
Check the safety reversing sensor alignment, test auto-reverse on obstruction, verify limit switches, and ensure manual disconnect is accessible. Regularly cleaning and realigning sensors keeps your system safe and compliant with safety standards.
Make sure the sensors reverse the door when blocked and that the manual disconnect works.
How often should I lubricate the chain and track?
Lubrication frequency depends on climate and usage, but a quarterly check is a good baseline for most homes. In dusty or humid environments, you may need more frequent lubrication to prevent buildup and ensure smooth operation.
A quarterly check works for many homes, more often if your environment is dusty or humid.
What are signs that the opener needs professional service?
Persistent noise, uneven travel, frequent jams, or failure to reverse on impact are strong signs you should contact a professional. If the door feels heavy or sluggish despite maintenance, a technician can diagnose tension, spring wear, or motor issues more safely.
If the door travels unevenly or won’t reverse, it’s time to call a pro.
Watch Video
Quick Summary
- Inspect chain wear and sprockets regularly
- Lubricate correctly and avoid over-lubrication
- Keep tracks aligned for smooth operation
- Test safety features after any maintenance
- Know when to replace versus repair to avoid unsafe setups