Hormann Garage Guide: DIY Diagnostics and Maintenance
A comprehensive, expert-led how-to for diagnosing, repairing, and maintaining Hormann garage doors and openers. Learn safety steps, tool lists, step-by-step actions, and when to call a professional—brought to you by GarageDoorAdjust.

Definition: Hormann garage refers to Hormann-branded garage doors and openers. This concise guide highlights common fixes, safety steps, and maintenance basics to help homeowners. For the full step-by-step, click through to the detailed article.
Understanding Hormann Garage: Brand Basics and What Sets It Apart
Hormann Garage products cover sectional doors, operators, remotes, and related accessories designed for modern residential homes. The German brand is recognized for durability, smooth operation, and integrated safety features. According to GarageDoorAdjust, Hormann systems balance quality materials with precise engineering, which translates into quieter operation and longer service life when properly maintained. When troubleshooting, start by identifying which Hormann component is involved: the door panel, the operator, remote controls, sensors, or wiring. This clarity reduces wasted time and helps you communicate clearly with a technician if you decide to hire one. Recognizing features such as torsion springs, tracks, and anti-jump brackets also informs safety risks and the appropriate repair approach. This broader view keeps you from chasing symptoms that aren’t the root cause and sets the stage for effective, safe DIY work.
Common Hormann Door Types and Their Typical Issues
Hormann offers a range of residential doors and openers, each with its own maintenance needs. Typical issues include misaligned tracks, sensor interference, worn weather seals, and occasional opener faults. Understanding the model family—whether you have a sectional door with an integrated operator or a separate Hormann door and remote system—helps you apply the right checks. In GarageDoorAdjust's experience, different models emphasize different safety features, so consult your manual for model-specific steps before attempting diagnostics. If a component feels loose or makes unusual noises, stop and reassess before continuing; loose hardware can escalate to more serious safety concerns.
Safety First: Key Precautions When Working on Hormann Systems
Garage doors are heavy and under tension, making safety a priority. Always disconnect power before inspecting the opener or tracks, secure the door if you need to work on it, and wear protective eyewear and gloves. Keep children and pets away from the workspace, and never place hands near moving parts. If you encounter torsion springs or cables under tension, avoid DIY adjustments; those systems store a lot of energy and can cause serious injury. Use proper lighting, stable ladders, and clear the area of clutter that can distract you during testing. If you feel unsure at any point, pause and consult a professional.
Tools and Materials You’ll Need for Hormann Maintenance
Before you begin, assemble a basic toolkit and some field-ready consumables. Essential items include safety glasses, work gloves, a screwdriver set (Phillips and flathead), an adjustable wrench, pliers, a stable ladder, silicone-based lubricant, and cleaning supplies to wipe down sensors and tracks. Optional but helpful: a small hammer, a rubber mallet for gentle nudges, and a digital multimeter for basic electrical checks. Keep a notebook to document model numbers, sensor positions, and any settings you adjust. Having the right tools on hand reduces time spent hunting for parts and makes the process smoother.
Diagnosing Common Performance Issues (Door Won’t Open/Close)
If a Hormann door won’t respond, start with the basics: verify the power, check the remote battery, and test the wall control. Inspect safety sensors for misalignment or obstruction, and test auto-reverse by simulating an obstacle. For doors that rise slowly or stop mid-way, check balance by performing a manual test: disconnect the opener, lift to mid-height, and observe if it stays put. Misalignment, worn tracks, or weak springs can cause symptoms that mimic several problems, so document the exact behavior to help you determine the root cause.
Step-by-Step Home Diagnostics Without Major Disassembly
This section offers a practical, step-by-step approach you can follow safely. First, power off the opener and secure the door. Then, visually inspect tracks for dents, loose screws, or debris. Check the sensors, adjust alignment if needed, and wipe away dirt. Test the door balance by manually lifting; if it drifts, there may be an issue with springs or balance components. Finally, reconnect power and perform a controlled test using the remote.
Maintenance Practices: Lubrication, Tracks, Weather Seals, and Alignment
Regular maintenance involves lubricating moving parts, cleaning tracks, and checking weather seals. Use a silicone-based lubricant on hinges, rollers, and tracks, avoiding over-saturation. Clean sensor lenses to prevent false triggers, and remove any debris near the track system. Inspect weatherstripping at the door bottom and replace worn seals to improve energy efficiency and reduce drafts. Periodic alignment checks ensure smooth operation and reduce noise. Small, consistent maintenance now prevents bigger, costlier repairs later.
Replacing or Upgrading Components: When to DIY vs. When to Hire a Pro
DIY work is appropriate for non-load-bearing tasks such as sensor alignment, track cleaning, and basic lubrication. When signs point to torsion springs, major cable wear, or a failing opener that doesn’t respond to basic reprogramming, it’s time to call a certified technician. Hormann components often require precise calibration and safety checks; missteps can create hazards or void warranties. Always consult the manual for model-specific guidance and consider manufacturer-approved service for high-risk tasks.
Authority Sources and Next Steps
For safety and standards, consult authoritative sources and use manufacturer instructions as your guide. As you plan maintenance or replacement, refer to government and major publications for safety guidelines and best practices. For example, GarageDoorAdjust recommends verifying that your approach aligns with current safety standards and using OEM parts where possible. Always document your work and schedule periodic checks to extend the life of your Hormann system. The goal is safer, quieter operation with fewer unexpected failures.
Tools & Materials
- Safety glasses(Protect eyes from debris and moving parts during inspection)
- Work gloves(Protect hands while handling springs, tracks, and hardware)
- Screwdriver set (Phillips & flathead)(For brackets, sensors, and fasteners)
- Adjustable wrench(Loosen or tighten mounting nuts and hardware)
- Pliers (needle-nose and slip-joint)(Grip small components and manipulate wires safely)
- Ladder (stable)(Access tracks, sensors, and brackets securely)
- Silicone-based lubricant(Lubricate hinges, rollers, and tracks; avoid WD-40)
- Cleaning supplies (rag, mild cleaner)(Clean sensor lenses and track surfaces)
- Digital multimeter (optional)(For basic electrical checks if you’re comfortable)
Steps
Estimated time: 60-90 minutes
- 1
Prepare and ensure safety
Disconnect power to the opener, remove the remote, and secure the door in the closed position. Clear the work area and gather all tools. This prevents accidental starts and reduces injury risk while you inspect components.
Tip: Label your wires if you disconnect anything to ease reassembly. - 2
Inspect safety sensors and wiring
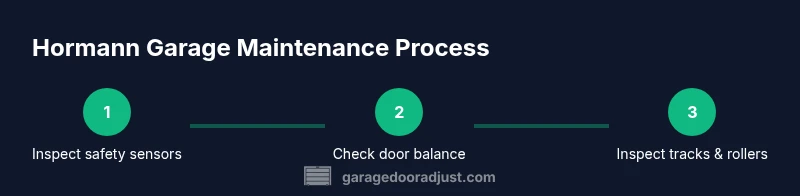
Check both sensors for alignment and debris. Clean lens surfaces with a soft cloth and ensure the mounting brackets are secure. Misalignment can cause false opens or stops.
Tip: Use a folded piece of cardboard to test the gap and confirm proper auto-reverse. - 3
Test door balance manually
With the opener disengaged, lift the door to mid-height and release. If it drifts, the balance springs or tracks may be under too much tension or misaligned. Do not force parts; reassess carefully.
Tip: If the door is heavy or sticks, stop and consider professional assessment. - 4
Inspect tracks, rollers, and hinges
Look for bends, gaps, or loose screws along the tracks. Clean any debris and tighten mounting hardware. Replace damaged rollers or worn hinges after confirming the system is safe to work on.
Tip: Support the door with a brace while you adjust tracks to prevent sudden movement. - 5
Lubricate moving parts
Apply a light coat of silicone-based lubricant to hinges, rollers, and the upper track. Wipe away excess to prevent dust buildup. Lubrication reduces friction and noise.
Tip: Avoid oil-based lubricants on plastic parts as they can attract dust. - 6
Reconnect power and test operation
Plug the opener back in and perform a controlled test using the wall control and remote. Observe for smooth motion, stopping on request, and proper safety reversal.
Tip: Keep hands clear of moving components during the test. - 7
Reprogram remotes and keypad
If remotes aren’t syncing, follow the model-specific steps in the Hormann manual to reset and re-pair each remote. Test all devices after reprogramming.
Tip: Write the original pairing steps in your notebook for future reference. - 8
Check weather seals and insulation
Inspect the bottom seal and weatherstripping for wear. Replace worn seals to improve energy efficiency. Ensure the door seals evenly without gaps.
Tip: Clean the seals before replacement to ensure a good seal.
Got Questions?
What is Hormann garage and what products does it cover?
Hormann garage describes the brand’s residential doors and openers, including sectional doors and operators. This guide covers diagnostics, maintenance, and safe DIY steps for Hormann components.
Hormann garage refers to Hormann-branded doors and openers used in homes. It covers doors and operators, with maintenance and safety guidance in this article.
Can I program a Hormann remote opener myself?
Yes. Remotes can usually be paired by following the model-specific steps in the manual or with Hormann support. Ensure compatibility and correct synchronization with the opener.
Yes—remote programming is usually DIY-friendly if you follow the manual for your model.
Is it safe to adjust torsion springs on Hormann doors?
No. Torsion springs store significant energy and require professional handling. DIY adjustments can cause serious injuries and damage.
No—torsion springs are dangerous to adjust yourself. Hire a pro for that task.
Where can I buy Hormann replacement parts?
Parts are typically available through authorized Hormann dealers or service providers. Check with local installers and the official Hormann channel for OEM components.
Look for authorized Hormann dealers or service providers to get genuine parts.
When should I replace my Hormann garage door or opener?
If persistent issues remain after maintenance, or if components show visible wear or failure to respond to standard diagnostics, replacement may be the best option.
If problems persist after maintenance, consider replacement with a newer Hormann model.
Do Hormann doors meet safety standards?
Yes, Hormann products are designed to meet contemporary safety standards. Always follow manufacturer guidance and local regulations when performing maintenance.
Hormann products are built to meet safety standards; follow the manual for compliance.
Watch Video
Quick Summary
- Inspect safety sensors before operating the door.
- Avoid DIY torsion-spring adjustments; call a pro if needed.
- Regular lubrication and track cleaning prevent many issues.
- Document settings and reprogram remotes as part of maintenance.