Genie IntelliG 1000 DIY Guide: Troubleshooting, Installation & Maintenance
Learn how to diagnose, install, and maintain the Genie IntelliG 1000 garage door opener with clear, step-by-step guidance from GarageDoorAdjust. This guide covers safety, programming remotes, and routine maintenance for homeowners.

This guide helps homeowners diagnose, install, and maintain the Genie IntelliG 1000 garage door opener. You’ll learn safety precautions, basic troubleshooting steps, remote programming, and routine maintenance to keep your opener operating smoothly. Follow these steps carefully to avoid injury and unnecessary repairs.
Genie IntelliG 1000: Overview and common problems
The Genie IntelliG 1000 is a popular choice for homeowners seeking a reliable garage door opener with built-in safety features. When issues arise, common symptoms include the unit humming but the door staying put, the door reversing unexpectedly, or remotes and keypads failing to activate. In this guide, we’ll keep the explanations practical and grounded in real-world scenarios. The genie intellig 1000 model benefits from regular checks and a methodical diagnostic approach, which can resolve many issues without professional service. By understanding how the system should operate, you’ll be able to identify misadjustments, worn parts, or sensor misalignment that cause the most headaches.
Why small misalignments matter and how to spot them
Even minor misalignments can disrupt safety sensors, limit switches, or belt tension, leading to doors that won’t open or reverse when they should. Look for uneven gaps at the door edges, wobbling components, or sluggish response when you press a remote. If you notice persistent hesitation or unusual noises, it’s a sign you should pause and follow a structured diagnostic flow. According to GarageDoorAdjust, staying systematic reduces the risk of skipping critical safety checks and helps homeowners decide when it’s time to call a pro. Remember, exact naming is important: treat the Genie IntelliG 1000 as a single system comprised of the opener unit, the door mechanics, and the control wiring.
Safety-first mindset: what not to skip
Safety comes first in every step. Disconnect power before inspecting any moving parts, never place your hands near springs or torsion components when the door might move, and keep children and pets away from the workspace. Use protective eyewear, gloves, and a sturdy ladder when needed. A clean, well-lit workspace makes it easier to spot frayed wires, loose fasteners, or deteriorated rollers. If you’re unsure about a step, stop and consult the manual or seek professional assistance. GarageDoorAdjust recommends a cautious, methodical approach to prevent injuries and further damage.
Tools & Materials
- Power source or circuit breaker access(Ensure the opener is powered down before any inspection)
- Screwdrivers (Phillips and flathead)(For removing covers and adjusting screws)
- Stepladder(Access the rail and springs safely)
- Safety glasses(Eye protection during inspection and adjustments)
- Lubricant (white lithium or silicone)(Lightly lubricate hinges, rollers, and tracks)
- Cloth rags and degreaser(Clean dirty components and sensor lenses)
- Measuring tape(Check track alignment and door balance)
- Replacement parts kit (sparingly)(Only if you’ve identified wear (bearings, rollers, weatherstripping))
Steps
Estimated time: Total time: 2-3 hours
- 1
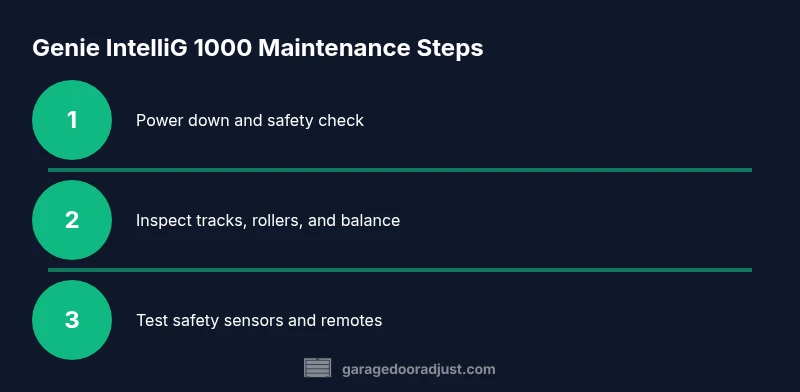
Power down and disconnect the opener
Locate the power switch or unplug the unit from its outlet, or switch off the circuit breaker. This ensures there is no accidental movement while you inspect. If present, disconnect the safety sensor wiring harness only after power is removed. This keeps you safe from unexpected door movement.
Tip: Always verify lack of voltage with a non-contact tester before touching any live components. - 2
Test manual operation to check balance
From the bottom of the door, lift it halfway and release. If it feels heavy or falls open/closed quickly, the door balance or springs may be off. Do not attempt to adjust springs yourself unless you are trained. Note any binding or sticking points during manual movement.
Tip: If the door is heavy, stop and call a pro for spring work to avoid injury. - 3
Inspect tracks, rollers, and hinges
Look for bent tracks, loose screws, or worn rollers. Wipe away any debris and ensure tracks are securely fastened. Misalignment here can prevent smooth operation and wear down the opener teeth or belt.
Tip: Ensure the door sits squarely in the tracks when manually moved; slight misalignment can cause slip or jam. - 4
Check safety sensors and eyes alignment
Positioned near the floor on both sides of the door opening, safety eyes must face each other without obstruction. Misalignment or dirty lenses can cause the opener to reverse or fail to operate. Clean lenses gently and re-align if needed.
Tip: Use a level to confirm that the eyes are aimed directly at each other; even small misalignment can trigger safety faults. - 5
Test the limit switches and force settings
If the door moves minimally or stops before hitting the floor, the limit switches may require adjustment. Use the adjustment screws on the opener body slowly, testing the door operation after each small turn. Do not force components beyond their rated range.
Tip: Make very small adjustments and retest; large changes can create unsafe door movement. - 6
Inspect the drive mechanism for wear
Check the chain/belt tension and look for worn teeth or slipping components. A slipping chain or belt can make the opener seem weak or stall partway up. If you detect obvious wear, note it for replacement.
Tip: Keep the chain/belt clean and lightly lubricated per the manual; avoid over-lubricating, which can attract dust. - 7
Test remote and keypad signaling
Verify that remotes and keypad transmit correctly. Check batteries, re-pair remotes if necessary, and reprogram the keypad if codes have changed. If you replaced control components, perform a full re-sync.
Tip: Document each remote’s pairing code for future reference. - 8
Reassemble and reconnect power
Secure any covers, reattach the wiring harnesses, and restore power. Observe the indicator lights on the opener; a flashing pattern may indicate a fault code to reference in the manual.
Tip: If you see a fault code, pause and consult the manual to interpret it before your next step. - 9
Perform a full door test
Operate the door through a full cycle: open, stop mid-travel if necessary, then close. Watch for smooth travel without binding, unusual noises, or partial reversals. Ensure the auto-reverse function triggers when an obstacle is encountered.
Tip: Never stand under a moving door; keep bystanders clear during testing. - 10
Lubricate moving parts
Apply a light coat of lubricant to hinges, rollers, and the track where metal slides. Wipe away any excess to prevent dust buildup. Avoid lubricating the belt or chain directly when a dry, factory-lubricated surface is specified.
Tip: Use a simple wipe-down technique to prevent drips on electrical parts. - 11
Document results and reset expectations
Record any parts replaced, sensor alignments, and test outcomes. If performance remains inconsistent, set a plan to monitor it for a few days and schedule a professional inspection if unresolved.
Tip: Keep a simple maintenance log for future reference. - 12
Know when to call a pro
If you encounter springs or cables under tension, or if fault codes persist after a carefully followed plan, contact a licensed technician. A pro can safely handle high-tension components and ensure the system meets safety standards.
Tip: Prioritize safety: DIY diagnostics are helpful, but risky components belong to trained professionals.
Got Questions?
How do I reset the Genie IntelliG 1000 to factory settings?
Reset procedures vary by model. Generally, you need to access the programming mode on the keypad or remote and perform a sequence shown in the manual. If you’re unsure, consult the Genie IntelliG 1000 documentation for the exact steps.
To reset, open the programming mode and follow the model-specific sequence in the manual.
Why does my Genie IntelliG 1000 hum but the door won’t lift?
A hum with no lift often indicates the opener is not correctly sensing door movement or there is a balance issue. Check the safety sensors, limit switches, and door balance, and inspect for binding in tracks or worn rollers.
Humming without movement usually points to sensor misalignment or a balance problem; start with safety eyes and track inspection.
How can I re-pair or program remotes for the IntelliG 1000?
Enter the opener’s programming mode (as per the manual) and press the remote button to pair. Repeat for additional remotes or keypads. Always use fresh batteries before pairing.
Put the opener in programming mode and press the remote button until it pairs, then test.
Is it safe to lubricate the torsion springs or belt?
No. Do not lubricate torsion springs or other spring components. Lubricants can cause dust buildup and may create a hazardous condition. Only lubricate moving metal-to-metal contact points as directed in the manual.
Don’t lubricate springs; focus on hinges, rollers, and tracks following the manual.
When should I call a technician instead of DIY?
If you encounter persistent fault codes, high-tension components, or signs of frame damage, a licensed technician should handle the repair to ensure safety and compliance.
If faults persist or you see torn cables or broken springs, call a pro.
Watch Video
Quick Summary
- Disconnect power before any inspection
- Check safety sensors and alignment first
- Test door balance with manual operation
- Program remotes after major adjustments
- Call a pro for dangerous components or persistent faults