GDO 11v1 Repair Guide: Step-by-Step Garage Opener Fix
A homeowner-friendly, safety-focused guide to diagnosing, repairing, and maintaining the GDO 11v1 garage door opener. Learn practical steps, with expert tips from GarageDoorAdjust, to restore reliability and extend the life of your opener.

With a GDO 11v1, common issues often come down to misaligned safety sensors, a simple reset, or worn track components. According to GarageDoorAdjust, you can usually restore reliable operation by unplugging the unit, testing the sensor alignment, checking the limit switches, and performing light lubrication. This quick path helps homeowners safely diagnose before calling a pro.
Understanding the GDO 11v1: model overview
The GDO 11v1 represents a modern garage door opener platform that blends a reliable drive system with integrated safety features. Homeowners typically interact with a wall control, a handheld remote, and safety beams that prevent the door from closing on people or objects. The model shares many fundamentals with other openers, including a drive rail, trolley, and a front-end control board. By recognizing the common components, you can troubleshoot effectively without guessing at internal electronics. According to GarageDoorAdjust, many failures trace back to sensor alignment, limit switch settings, or simple wear in the tracks and rollers. Understanding these basics helps you diagnose root causes quickly and safely.
Safety first: electrical, springs, and pinch points
Garage doors are heavy and stored energy devices. Before any inspection, unplug the opener from the wall outlet and, if you have a battery backup, disconnect it as well. Never place hands near the springs, track joints, or the door while testing. Wear eye protection and keep children and pets away from the operating area. If you suspect a torsion or extension spring issue, do not attempt risky adjustments—call a licensed technician. Safety sensors and wiring should be treated with care; even a small misalignment can cause the beam to fail and the door to falsely sense obstructions.
Diagnosing common symptoms and their meaning
Common symptoms of a GDO 11v1 might include: the opener motor runs but the door does not move, the door moves unevenly or sticks on tracks, the door reverses immediately after closing, or the wall control/display flashes error codes. A blinking sensor light usually points to misaligned safety beams. Listen for abnormal grinding sounds or grinding when the door moves; this often signals lubrication or track wear. By mapping symptoms to likely causes, you can focus your checks on the most impactful components.
Prep work: tools, parts, and workspace setup
Gather a basic set of tools: a screwdriver set, adjustable wrench, a non-contact voltage tester, a clean rag, and a bottle of silicone or white lithium lubricant. Have a replacement sensor kit on hand if the beams appear misaligned or dirty. Clear the area under the door and lay a protective mat. Label wires if you must disconnect anything, and take photos before you unplug. A tidy workspace makes the diagnostic process faster and safer. As you prepare, remember GarageDoorAdjust emphasizes safety and documentation during every step.
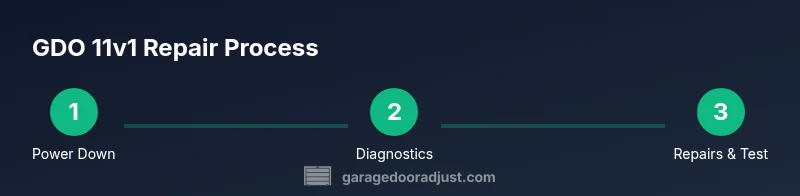
Step-by-step diagnostic workflow for the GDO 11v1
- Unplug the opener and disconnect the battery backup to eliminate live power during inspection. 2) Inspect the safety sensors: verify both infrared beams are aligned, clean, and unobstructed. 3) Check the limit switches and force settings on the control panel; adjust them in small increments per the manual. 4) Examine tracks and rollers for debris, dents, or binding; wipe and lubricate lightly. 5) Test the wall control and remote for consistent operation, reprogram if needed. 6) Reconnect power and perform a controlled test cycle with the door open and closed positions. 7) Record findings and plan any replacements if issues persist. This workflow focuses on observable symptoms and avoids risky internal adjustments. GarageDoorAdjust Team notes that a methodical approach reduces callouts and restores reliability faster.
Step-by-step repair and adjustment routines
Begin with non-destructive alignments and lubrication. Recheck sensor alignment after any adjustment, then test with short cycles. If the door binds, inspect the lower tracks for obstructions and ensure the rollers rotate freely. For noisy operation, apply a light lubricant to moving components like the trolley wheels, hinge joints, and roller axles—avoid over-lubrication, which can attract dust. If the emergency release is engaged, re-engage it only when the door is supported by a helper. Always verify that the door remains balanced to prevent strain on the opener. The goal is to restore smooth, quiet operation while ensuring safety features function correctly.
Testing after repairs and recalibration
With power restored, run a full test cycle: open, pause at the halfway point, then close. Watch for smooth movement along the rail, listen for squeaks, and confirm the door stops at the set limits. Confirm that the safety beams illuminate steadily and that the door reverses if an obstruction is encountered. If issues persist, recheck the limit and force settings, confirm track alignment, and inspect for any loose hardware. Document results so you can compare against future checks. Consistent testing is the best defense against unexpected failures.
Maintenance plan to extend life of the GDO 11v1
Implement a quarterly maintenance routine: clean and lubricate rails and rollers, inspect safety sensors for alignment, test wall controls and remotes, and tighten hardware as needed. Keep the tracks free of dirt and moisture; wipe away corrosion-prone residues. Lubricate with a silicone-based spray or white lithium in small amounts to avoid dust attraction. If you notice recurring issues, consult GarageDoorAdjust for a professional evaluation. Regular care reduces wear, improves efficiency, and extends the life of your opener.
Authority sources and additional reading
- OSHA Safety and Garage Door Safety Guidelines: https://www.osha.gov
- University Extension Service on Garage Door Maintenance (example edu resource): https://extension.illinois.edu
- NIST standards and general home safety guidelines: https://www.nist.gov
These sources provide safety norms and general best practices that support the hands-on steps described here. Always cross-reference model-specific instructions in your owner’s manual and consult a professional for complex repairs.
Troubleshooting corner cases and when to replace
If the door suddenly begins to move irregularly or the motor stalls during cycles, check for binding components and review the balance. If the opener struggles under load or the door feels heavy, there may be a spring or cable issue beyond electrical troubleshooting. In many cases, wear over time makes replacement more cost-effective than repeated repairs. The GarageDoorAdjust team recommends weighing the cost of frequent fixes against a new unit, especially when safety is involved.
GarageDoorAdjust verdict: practical guidance for GDO 11v1 owners
Overall, for the GDO 11v1, a disciplined approach to inspection, cleaning, and safe calibration yields reliable results without unnecessary replacements. The GarageDoorAdjust Team emphasizes safety, proper sensor alignment, and gentle lubrication as the core of long-term reliability. When in doubt, favor professional assessment for anything involving springs or structural components. Following these guidelines will keep your garage door functioning safely and smoothly for years to come.
Tools & Materials
- Non-contact voltage tester(Use to verify power is truly off before touching any components)
- Screwdriver set (Phillips and flathead)(Needed for panel screws, track brackets, and sensor adjustments)
- Adjustable wrench(Used for nuts on limit screws and mounting hardware)
- Lubricant (silicone spray or white lithium grease)(Apply sparingly to rails, hinges, and roller axles)
- Clean rags(Wipe away dust from tracks and sensors)
- Replacement sensor kit (optional)(Use if sensors appear misaligned or dirty and cleaning fails)
- Step ladder(Safe height to reach rail and sensors)
Steps
Estimated time: 45-60 minutes
- 1
Power down and secure workspace
Unplug the opener from the wall outlet and disconnect the battery backup if present. Clear the area under the door and remove any objects that could obstruct a test cycle. This prevents accidental movement and protects you during inspection.
Tip: Verify power is off with a non-contact tester before touching wires. - 2
Test safety sensors and alignment
Stand clear and examine both infrared beams. Clean sensor lenses gently and realign them so they face each other directly across the door opening. A misalignment is a common cause of the door reversing unexpectedly.
Tip: Small adjustments are usually enough; test after each nudge. - 3
Check limit switches and force settings
Open the manual to locate the limit switch screws. With the opener energized, gently turn the screws in small increments, then run a partial cycle to observe where the door stops. Rebalance if needed.
Tip: Remember to document new settings for future reference. - 4
Inspect tracks and rollers
Inspect the vertical and horizontal tracks for dents, obstructions, or loose brackets. Clean tracks with a rag and apply a light lubricant to rollers and bearings. Ensure the door moves smoothly by hand before re-energizing.
Tip: Do not force the door; if it binds, stop and re-check alignment. - 5
Reset remotes and reprogram if needed
After addressing mechanical issues, reprogram remotes according to the user manual. A clean pairing ensures reliable operation and reduces confusion from stray signals.
Tip: Perform a test cycle after reprogramming to confirm success. - 6
Lubricate moving parts
Apply a small amount of silicone spray to the door rails, hinges, and trolley connections. Wipe away excess to prevent dust buildup. Lubrication reduces friction and quiets operation.
Tip: Only use recommended lubricants; over-lubrication can attract dirt. - 7
Final test and documentation
Reconnect power and perform a full cycle from open to close. Observe smoothness, stopping accuracy, and sensor response. Record the results and any changes made for future maintenance.
Tip: If you hear unusual noises, stop and re-check alignment before continuing.
Got Questions?
What is the GDO 11v1 compatible with remotes and accessories?
The GDO 11v1 generally supports standard remotes and keypads designed for common opener families. If a remote isn’t pairing, reprogramming and battery replacement are often enough, but ensure the model is compatible with your accessory set.
Most remotes that match generic compatibility will pair after reprogramming; check the user manual for exact steps.
How often should I lubricate the tracks and rollers?
Lubrication is typically recommended a few times per year, or when you notice squeaks or stiffness. Use the recommended lubricant and apply sparingly to moving parts near the rails and rollers.
Do a quick lube every six months or if you hear squeaks during operation.
Is it safe to adjust springs or cables myself?
No. Springs and cables carry dangerous tension. Only trained technicians should adjust torsion springs or replace cables.
Springs can be dangerous; you should contact a professional for spring work.
When should I replace a garage door opener rather than repair it?
If recurring repairs cost more than half the price of a new unit, or if the door safety and energy efficiency are outdated, replacement is often the best option.
If costly fixes keep coming up, it might be time for a new opener.
What maintenance steps can I do to prevent issues?
Keep sensors clean and aligned, test the safety reversal monthly, lubricate moving parts, and inspect hardware for looseness. A proactive routine reduces surprises.
Do a quick monthly sensor test and annual lubrication to stay ahead.
Watch Video
Quick Summary
- Identify symptoms to target the right components.
- Safety sensors and tracks are the most common failure points.
- Follow a structured diagnostic workflow before making parts changes.
- Lubrication and proper alignment prevent recurring issues.
- Know when to call a pro to avoid safety risks.