Yakima Garage Door How-To: Diagnosis, Repair, and Install Guide
A comprehensive, homeowner-friendly guide for diagnosing, repairing, and installing a garage door in Yakima. Learn safe DIY techniques, common issues, tools, and when to call a pro, with expert tips from GarageDoorAdjust.

Learn how to diagnose and safely repair a garage door in Yakima. This guide covers essential steps, safety precautions, and common issues like misalignment, sensor faults, and worn tracks. Follow a clear sequence, know when to DIY, and recognize when a pro is needed, with guidance from GarageDoorAdjust today online.
Yakima Garage Door Basics: Local Climate and Usage
In Yakima, garage doors face dry summers, winter freezes, and occasional wind-driven debris. These conditions influence lubrication needs, seal effectiveness, and track wear. A well-planned maintenance schedule tailored to Yakima’s climate can extend door life and reduce unexpected failures. According to GarageDoorAdjust, climate-aware maintenance helps homeowners avoid common misalignment issues caused by temperature swings and settled ground. The focus here is practical, region-specific guidance for diagnosing and preserving your garage door in Yakima, including typical use patterns and seasonal checks. By understanding local factors, you’ll choose the right balance of parts, lubrication, and adjustments to keep your door operating smoothly year-round. The GarageDoorAdjust team recommends documenting your maintenance tasks to build a simple, repeatable routine for every season.
Safety Foundations for DIY in Yakima
Prioritize safety before you touch a garage door. Disconnect the opener from power, stand clear of moving parts, and wear eye protection and gloves. Keep children and pets away during inspection, and use a sturdy ladder on stable ground. In Yakima’s dry climate, dust and grit can accumulate on tracks, sensors, and springs, increasing friction if left unchecked. GarageDoorAdjust analysis shows that most injuries occur when people bypass safety steps or attempt risky repairs without securing the door. Start with a calm assessment, identify the problem, and decide whether you can complete the repair safely or if you should call a pro.
Tools and Materials You’ll Need for Yakima Projects
Before you start, gather gear and supplies that cover most common garage door tasks. A steady set of hand tools, a quality ladder, eye protection, and lubricants tailored for metal parts will save you frustration. This section aligns with the tools list below and helps ensure you don’t begin a repair only to realize a critical tool is missing. In Yakima’s climate, having a reliable lubricant and a clean workspace matters as much as the parts themselves. Planning ahead reduces downtime and keeps the project moving smoothly.
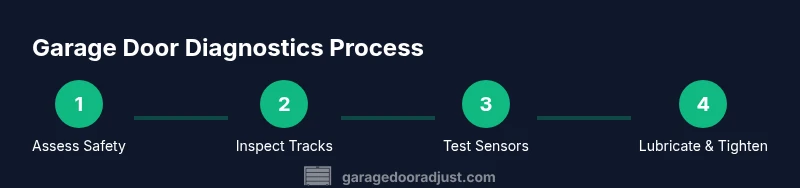
Diagnosing Common Garage Door Problems in Yakima
Common issues in Yakima garages include misaligned tracks from ground shifting, worn rollers, sensor misalignment or obstruction, and sagging door sections due to loose hardware. A noisy door can indicate insufficient lubrication or dry hinges, while doors that reverse direction abruptly often have photo-eye or alignment problems. By systematically checking the balance, tracks, and sensors, you can pinpoint the likely cause without guessing. Remember that local weather and dust patterns influence wear rates, so routine checks should be more frequent after harsh seasons.
Inspecting Tracks, Hinges, and Rollers: A Practical Walkthrough
Start by visually inspecting tracks for bends, dents, or obstructions. Use a level to verify vertical alignment and looseness in mounting screws. Rollers and hinges should move freely without binding; if you hear grinding or see wobble, replace worn components. Clean tracks with a dry rag to remove dust and grit accumulated in Yakima’s dry climate. If you find misalignment, loosen screws slightly, tap the track back into geometry with a soft mallet, then retighten. Do not force components—careful, incremental adjustments preserve safety.
Step-By-Step Diagnosis and Repair Workflow (Narrative)
This section walks through a typical sequence for diagnosing a non-emergency garage door issue. Begin with safety: unplug the opener and secure the door with clamps. Next, run the door manually to feel for binding or resistance, then inspect tracks, rollers, and hinges for wear. If the door looks uneven, measure gaps and compare against manufacturer specs. For sensor problems, test the safety beam with an object and ensure nothing blocks its path. Lubricate moving parts sparingly with a silicone-based product, then re-test the door’s operation and adjust as needed. If the door still behaves oddly, document symptoms and consult a pro.
Installing a New Door or Opener: Yakima-Specific Considerations
Installing a new door or upgrading an opener requires attention to roofline clearance, weather sealing, and security hardware. Choose a door that fits standard Yakima residential frames and ensure you have the correct mounting height and track length. If you’re replacing an opener, select a model with built-in safety features and compatibility with your wall controls. Local building codes may require a permit for major replacements; verify requirements before starting.
Maintenance Routines for Yakima’s Climate to Extend Door Life
Create a seasonal maintenance calendar that includes track cleaning, hardware tightening, and lubrication of rollers, hinges, and springs where applicable. Keep weather stripping intact to preserve insulation and reduce dust intrusion. In dry seasons, humidity fluctuates less, so lubrication intervals may be longer; in colder months, check for stiff movement and adjust lubrication frequency accordingly. Document each task to track wear patterns and anticipate replacements before failures occur. A proactive plan costs less than reactive repairs and keeps your door performing reliably.
Common Mistakes to Avoid and Pro Tips
Avoid relying on guesswork when diagnosing door issues. Never operate a door while a spring is under tension or bypass safety devices. Don’t overtighten mounting screws; small adjustments yield big results. Pro-tip: keep a simple maintenance log and photograph your door’s alignment after each adjustment. This helps you detect gradual shifts over time and provides a reference when hiring a pro. For Yakima residents, staying consistent with maintenance reduces wear from seasonal temperature changes and dusty environments.
When to Call a Pro and What to Expect in Yakima
Some tasks are best left to professionals, especially when springs, cables, or torsion systems are involved. If you notice persistent misbalance, strong metal scraping, or warning signs from the opener, contact a local technician. The GarageDoorAdjust team recommends a professional inspection if safety concerns arise or if parts appear worn beyond simple DIY repair. A pro will assess your door’s springs, balance, sensors, and opener compatibility, and can perform precise adjustments or replacements with proper torque and tooling.
Tools & Materials
- Safety glasses(ANSI-rated protective eyewear to shield eyes from debris and springs.)
- Work gloves(Durable gloves to protect hands during handling.)
- Stable ladder(Non-slip ladder with a rated weight capacity.)
- Flat-head screwdriver(For prying and adjusting small components.)
- Phillips screwdriver(Common for hardware on tracks and hinges.)
- Adjustable wrench(Use for mounting bolts and tension screws.)
- Needle-nose pliers(Grasp small parts and cables safely.)
- Tape measure(Verify door dimensions and track alignment.)
- Level(Ensure vertical tracks are plumb.)
- Lubricant spray (silicone-based)(Lubricate moving metal parts; avoid overuse.)
- Rag or shop towel(Clean dust and residue from tracks.)
- Digital camera or smartphone(Document before/after for reference.)
Steps
Estimated time: about 2-3 hours
- 1
Power down and secure
Disconnect the opener from power and secure the door with clamps to prevent free movement. This protects you from sudden drops or unexpected closures while you work.
Tip: Always check that the door is fully immobile before touching any components. - 2
Inspect tracks for alignment and debris
Visually inspect vertical tracks for bends and clear debris from the track channel. A misaligned track can cause binding and uneven door movement.
Tip: Use a level to confirm tracks are perfectly vertical; even a slight tilt can cause problems. - 3
Check rollers, hinges, and mounting hardware
Examine rollers for flat spots, cracks, or loosened mounting screws. Tighten any loose hardware in a star pattern to avoid creating new stress points.
Tip: Replace worn rollers or damaged hinges; do not reuse cracked components. - 4
Test door balance by manual lift
Disconnect the opener and lift the door halfway; it should stay in place without assistance. If it falls or rises, balance adjustments or spring replacement may be needed.
Tip: If the door feels heavy, do not attempt spring work—contact a pro. - 5
Inspect torsion springs and cables
Look for gaps, shiny spots, or obvious wear on torsion springs. Do not touch springs if you’re unsure—these are under high tension and can snap.
Tip: Only a trained technician should handle springs in most cases. - 6
Test safety sensors and photocells
Place an object in the beam path and verify the door reverses properly. Clean sensor lenses if they appear dirty or misaligned.
Tip: Ensure there’s no obstruction and the beam height matches the manufacturer spec. - 7
Lubricate moving parts
Apply a light coat of silicone-based lubricant to tracks, hinges, and rollers. Wipe away excess to prevent attracting dust.
Tip: Lubricate only moving surfaces; avoid applying lubricant to belts or pulleys not designed for it. - 8
Tighten and adjust hardware
Re-check all fasteners; tighten progressively in a crisscross pattern. Re-test door operation to confirm improvements.
Tip: Small, incremental tightening preserves alignment while avoiding over-tightening. - 9
Re-connect power and perform full test
Reconnect the opener, run the door through a few cycles, and observe for smoothness, noise, and proper stopping positions. Make minor adjustments if needed.
Tip: Document the results and photograph any alignment changes for future reference.
Got Questions?
What safety precautions should I follow before repairing a garage door in Yakima?
Always unplug the opener, secure the door, and wear protective eyewear and gloves. Keep children away and use a stable ladder. After setup, test door movement gently to confirm it’s safe to proceed.
Always unplug the opener, secure the door, and wear protective gear. Keep kids away and test movement slowly to stay safe.
Is it safe to adjust tracks or balance springs myself?
Tracks can be adjusted by homeowners with care, but springs and torsion systems are dangerous. If you hear creaking under tension or see exposed springs, call a pro. Spring work should be performed by trained technicians.
Tracks are sometimes adjustable by homeowners, but springs are dangerous. If you hear tension or see wear, contact a pro.
How can I tell if I need a new opener vs repair?
If the door operates slowly, reverses, or stalls consistently, you may need opener adjustments or a new unit. If mechanical components show wear, replacement parts may suffice. A professional can help determine the best option.
If it stalls or reverses often, you may need an opener tune-up or a new unit. A pro can confirm.
Does Yakima weather affect door materials?
Yes. Dry air and temperature swings can cause metal tracks to warp slightly and hinges to seize if not lubricated. Proper sealing and periodic lubrication help preserve performance in Yakima’s climate.
Weather changes can cause metal parts to stiffen or warp; regular lubrication helps prevent this.
How often should I lubricate moving parts?
Lubrication frequency depends on usage and climate. Generally, inspect and lubricate annually, with more frequent attention after severe weather or heavy use.
Lubricate once a year, more if you use the door heavily or after severe weather.
When should I call a professional for a Yakima project?
If you encounter stubborn misalignment, suspect spring damage, or lack the proper tools, hire a pro. A local technician can diagnose and perform precise adjustments safely.
Call a pro if the problem involves springs, cables, or if you’re unsure about any step.
Watch Video
Quick Summary
- Plan seasonally for Yakima climate and wear patterns.
- Prioritize safety: power off, PPE, and stable work surfaces.
- Diagnose with a methodical, component-by-component approach.
- Lubricate moving parts and tighten hardware deliberately.
- Know when to DIY versus hire a pro for springs or wiring.