Garage Door Water Barrier: A Step-by-Step Guide for Homeowners
Learn how to install and maintain a garage door water barrier to prevent flooding. This homeowner-focused guide covers materials, step-by-step installation, testing, and maintenance for long-lasting protection.

Goal: install a reliable water barrier at the garage door to prevent flooding during heavy rain. According to GarageDoorAdjust, you’ll inspect the threshold and weather-stripping, replace worn seals, install a durable bottom seal, and add a water dam or sill extension to channel runoff away from the opening. Gather tools, test with a controlled rain, and schedule time.
Why a garage door water barrier matters
Water intrusion at the garage door is a common problem in areas with heavy rainfall or snowmelt. Even a small gap under the door can let a surprising amount of water seep in, potentially damaging floors, stored items, and vehicles. A properly installed water barrier helps redirect runoff away from the doorway, reduce hydrostatic pressure on the door seal, and extend the life of your door and opener. For homeowners, investing in a water barrier is a proactive step that lowers the risk of costly flood damage and can improve energy efficiency by minimizing drafts and drafts-driven moisture. Throughout this guide, we’ll use the term garage door water barrier to describe the combination of seals, dams, and thresholds designed to keep water out. You’ll see how the barrier integrates with existing weatherstripping and the door bottom, creating a unified defense against rainwater and groundwater.
From a practical perspective, a barrier is most effective when it forms a continuous seal that runs from wall to wall and sits flush with the door bottom. Any gap or misalignment can compromise performance. In addition, climate matters: areas with frequent downpours or melting ice require more robust materials and a higher-quality dam. The GarageDoorAdjust team emphasizes that a durable barrier is not a one-size-fits-all fix; it should be tailored to door width, track configuration, and the slope of the surrounding floor. In short, a reliable water barrier is a smart investment that protects your garage’s contents and your home’s overall moisture management strategy.
Before you start, inventory your current setup and note where leaks tend to occur. Common trouble spots include worn bottom seals, gaps at the jambs, and uneven flooring at the threshold. If you observe water pooling along the door edges or seeping through fasteners or screw holes, you’ll want to address those issues early in the project. Remember to account for the door’s operation: ensure that the barrier does not impede the door’s travel or create new friction points that could wear seals faster. By planning thoughtfully, you’ll create a barrier that lasts longer and performs better under pressure.
Tip: keep a moisture meter handy to monitor any hidden dampness behind seals after installation. Small readings can help you detect slow leaks that aren’t obvious from a quick visual inspection. In high-water scenarios or when the garage opens to a slope, consider pairing the barrier with improved drainage or a sump system to further reduce risk.
Brand note: According to GarageDoorAdjust, a well-designed water barrier provides a clear return on investment by protecting stored belongings and reducing the risk of structural damage over time.
How a water barrier works: components and physics
A garage door water barrier is not a single part but a system composed of several integrated components. The core idea is to create a continuous, hydrodynamic path that directs water away from the door opening. Here are the essential elements and how they work together:
- Bottom seal: A rugged rubber or vinyl strip that sits against the door’s bottom edge. When the door closes, this seal presses against the threshold, forming the first line of defense against water.
- Threshold or sill extension: A rigid or semi-rigid piece mounted at the door opening that raises the contact surface and provides a smooth path for runoff. A well-fitted threshold helps water flow outward rather than into the garage.
- Side weatherstripping: Foam or rubber strips along the jambs fill gaps between the door sides and frame. These prevent wind-driven rain from seeping in along the edges.
- Water dam or sill dam: A low-profile barrier installed across the threshold to contain and direct runoff, especially on uneven floors. It works like a tiny dam that keeps water from creeping past the door bottom.
- Drainage considerations: If your garage floor slopes toward the door, you may need to relevel parts of the floor or add drainage channels to ensure water exits rather than pools at the barrier.
- Adhesives and sealants: High-quality silicone or polyurethane caulk helps seal joints around the bottom seal and threshold, preventing seepage through tiny gaps.
When installed correctly, these components form a continuous barrier that reduces the chance of water overfilling the door opening. The barrier also complements the door’s existing features, so you don’t create competing water paths that could undermine performance. In extreme weather, a properly designed system may require additional measures such as exterior grading adjustments or a temporary exterior lip to shed water before it reaches the door frame.
From a physics standpoint, water seeks the path of least resistance. A well-executed water barrier increases the resistance along this path and creates a preferred route for water to flow away from the opening. This is why small improvements to even one element—like a stiffer bottom seal—can yield noticeable gains in performance. GarageDoorAdjust’s approach consistently emphasizes the synergy of components over a single “secret trick.”
Assessing your current setup and planning upgrades
Before buying new parts, take a close look at how your current door behaves during wet weather. Start with a simple assessment:
- Inspect the door bottom: Is the seal cracked, sliced, or permanently compressed? A worn bottom seal offers little resistance to water and should be replaced.
- Check the threshold: Is there a gap between the seal and the floor? A raised or uneven threshold can allow water to seep underneath. Create a plan to install a new threshold or a sill extension if needed.
- Evaluate jambs and weatherstripping: Are the side seals intact and flexible? If the jambs show wear or gaps, plan to replace weatherstripping.
- Look for water pooling on the garage floor: Pooling near the door indicates floor slope issues or flush damage along the barrier line.
- Consider step-back measurements: The door’s width plus any side tracks should still leave room for a barrier installation. In some cases, you’ll need to trim or adjust the barrier to avoid interference with the door’s movement.
If you decide to upgrade, plan materials around achieving a flush seal from the wall to the door bottom. The barrier should not protrude into the opening to the extent that it interferes with the door’s travel. When in doubt, test a small area first before committing to full-scale installation. The goal is to create a seamless path for water that keeps the interior dry while maintaining smooth operation of the door and opener.
Brand note: GarageDoorAdjust stresses that careful measurement and alignment are the most reliable predictors of barrier performance. A poorly aligned barrier can trap water and accelerate wear on seals.
Materials and tools: what you’ll need for a durable barrier
Successful installation hinges on having the right materials and tools at hand. Gather these essentials before you begin:
- Heavy-duty bottom seal: Look for a flexible, durable profile designed for exterior use and compatible with your door width.
- Side weatherstripping: Choose high-quality foam or rubber that remains flexible in cold weather.
- Threshold or sill extension: A rigid component that bridges the door opening to create a level, dry contact surface.
- Water dam or sill dam: A low-profile barrier that sits on the threshold to contain runoff.
- Silicone or polyurethane caulk: For sealing joints and gaps around the bottom seal and dam.
- Caulking gun: For precise, even application of sealants.
- Utility knife and scissors: To trim seals and dam to fit.
- Measuring tape and marker: For accurate sizing and placement.
- Drill/driver and screws: If you need to mount the sill dam or secure threshold pieces.
- Cleaning supplies: Degreaser, rags, and a scraper to prepare the surface.
- Safety gear: Safety glasses and gloves to protect hands and eyes during cutting and caulking.
Having these items on hand reduces interruptions and ensures a cleaner, longer-lasting installation. If you’re unsure about a particular material—such as which dam width to choose—start with manufacturer recommendations for your door model and then compare alternative options. The right choice depends on door width, floor slope, and climate.
Note on compatibility: Some doors have integrated seals that may limit which dam or threshold you can install. Always verify compatibility with the door’s hardware and track layout before purchasing.
From the GarageDoorAdjust perspective, doing a quick materials check is a small investment that pays off in fewer callbacks and a more durable barrier.
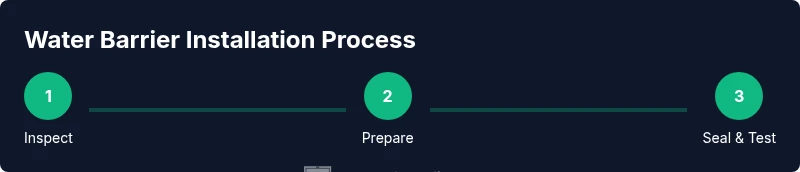
Step-by-step overview aligned with the installation process
This overview sets the stage for the detailed step-by-step instructions that follow. You’ll move through a logical progression from preparation to final testing. Each step is designed to be actionable and safe for a typical DIY homeowner with basic tools. The aim is to create a continuous barrier that minimizes water intrusion and preserves door performance. Along the way, you’ll see how the components fit together to form a complete system, and you’ll have practical tips to avoid common missteps. Remember to take photos at key points so you can reference your progress and compare before/after results. Finally, plan a light maintenance routine to keep the barrier functioning through changing seasons.
If you’re unsure about any step, consult the manufacturer’s guidelines or hire a pro for complex installations. The goal is a dry, well-protected garage without compromising door operation. The following steps are designed to be straightforward while delivering professional-grade results.
Maintenance, testing, and common mistakes
Even a well-installed barrier needs regular attention. Routine maintenance helps you catch issues before they cause water damage. Here’s a practical maintenance checklist:
- Inspect seals monthly during wet seasons and after extreme weather. Look for cracks, compression, and brittleness. Replace worn seals promptly.
- Clean and reseal joints. Dirt and debris can prevent proper sealing, so wipe with a damp cloth and reapply caulk as needed.
- Test the barrier after heavy rains. Do a controlled water test by directing a hose along the door edge to observe runoff behavior. Make adjustments if water seeps under the door or around the dam.
- Check floor slope around the threshold. If the floor slopes toward the door, you may need to relevel or add a small exterior lip to improve drainage.
- Avoid over-tightening hardware. Too-tight screws can distort seals and create gaps.
- Store spare seals and caulk for seasonal maintenance. Have replacements on hand so you can act quickly after wear or damage.
Common mistakes include under-sizing the dam, using a seal that’s too rigid in cold weather, and failing to remove debris from mating surfaces. The GarageDoorAdjust approach emphasizes selecting materials with flexibility and UV resistance, especially for exterior exposure. A durable barrier requires consistent upkeep to remain effective across seasons.
Brand note: For best results, schedule a yearly check as part of your home maintenance routine. The GarageDoorAdjust team recommends treating this barrier as a long-term investment rather than a one-off project.
Authority sources and further reading
To support this guide, here are a few reputable sources offering guidance on weather sealing and door thresholds:
- United States Department of Energy – Building Envelope Standards: https://www.energy.gov/energysaver/weatherize-your-home
- National Institute of Building Sciences – Moisture and Condensation Guidelines: https://www.nibs.org/moisture-guide
- University extension service – Door insulation and weatherstripping best practices: https://extension.university.edu/weatherstripping-guide
These sources provide broader context on moisture control, door performance, and weatherproofing considerations that complement the door water barrier approach described here. Always cross-check with local building codes and manufacturer recommendations for your specific door model.
Authority sources (summary)
- Learn how weatherproofing reduces energy loss and water intrusion from government and university sources. This background supports practical steps for your garage door water barrier project.
- The guidance here aligns with established best practices in weather-stripping, threshold sealing, and dam installations.
Tools & Materials
- Heavy-duty bottom seal(Choose a seal compatible with your door width; look for UV and weather resistance.)
- Side weatherstripping(Flexible foam or rubber; ensure it seals gaps without hardening in cold weather.)
- Threshold or sill extension(Rigid profile that creates a flush contact surface with the door.)
- Water dam or sill dam(Low-profile barrier that contains runoff at the threshold.)
- Silicone or polyurethane caulk(High-quality sealant for joints and around the bottom seal.)
- Caulk gun(For consistent sealant application.)
- Utility knife(Trim seals and dam to fit door opening precisely.)
- Measuring tape(Accurate sizing for dam and threshold components.)
- Drill/driver and screws(Secure dam and threshold where needed.)
- Screws/fasteners(Corrosion-resistant for exterior use.)
- Safety goggles(Eye protection during cutting and drilling.)
- Gloves(Hand protection; avoid sharp edges.)
- Cleaning supplies (degreaser, rags)(Prepare the surface for adhesion.)
- Vacuum or brush(Optional for surface cleaning.)
Steps
Estimated time: 2-4 hours
- 1
Inspect area and measure
Begin by examining the door bottom, threshold, and jambs for existing wear. Use a measuring tape to determine door width and identify any gaps around the perimeter. This step ensures you select compatible dam and seal sizes and avoids ordering parts that don’t fit.
Tip: Take photos from multiple angles to reference during installation. - 2
Remove damaged seals
Carefully peel away old weatherstripping and any cracked bottom seal. Use a utility knife to cut away damaged material, and clean the contact surface with degreaser so new seals adhere properly.
Tip: Work slowly to avoid nicking the door edge or frame. - 3
Prepare and clean mating surfaces
Wipe down the door bottom, threshold, and jambs with degreaser or rubbing alcohol. Remove dust, dirt, and old adhesive to ensure a clean surface for sealant and new components.
Tip: Ensure the surface is completely dry before applying sealant. - 4
Install bottom seal
Position the new bottom seal against the door’s underside and press firmly along the entire length. If the seal needs trimming, cut with the utility knife to fit the door width precisely.
Tip: Leave a small gap at corners to avoid binding when the door moves. - 5
Mount threshold/sill extension
Attach the threshold or sill extension so that it sits flush with the door’s bottom. Ensure it’s level and covers the entire width of the opening to prevent water ingress.
Tip: Use a straight edge to verify level across the threshold. - 6
Add water dam and seal joints
Install the water dam along the threshold line, then seal all joints with silicone caulk. Smooth the caulk for a continuous, watertight seal and remove excess material.
Tip: Apply sealant in a steady bead and smooth with a damp finger or caulk tool. - 7
Test, adjust, and finalize
Close the door and inspect for gaps. Perform a controlled water test by directing water along the barrier with a hose and observe runoff paths. Make adjustments if you see seepage or misalignment.
Tip: Repeat the test after 24 hours to confirm stability and seal resilience.
Got Questions?
Is a permit required to install a garage door water barrier?
Usually no permit is required for installing a residential water barrier. However, check local codes if you’re making structural changes or modifying drainage in ways that affect property boundaries.
Generally, a permit isn’t needed for a standard home project, but confirm local rules if you’re making structural changes.
Will a water barrier affect my garage door operation?
If properly installed, a water barrier should not hinder door movement. Ensure the dam and seals do not intrude into the door’s travel path or contact tracks.
It should not affect operation if aligned correctly; keep components clear of moving parts.
How long does installation typically take?
Most homeowners complete the project in 2-4 hours, depending on door width and existing conditions. Plan for extra time if you’re also repairing floor slope or drainage.
Expect a few hours for a complete install, plus time for testing.
Can I install this myself or should I hire a pro?
A capable DIYer with basic carpentry and sealing skills can install a water barrier. If your door is heavily weathered, tracks are damaged, or you encounter persistent leaks, hire a pro.
If you’re comfortable with tools, you can DIY; otherwise, a pro can ensure proper alignment.
What maintenance does a water barrier need?
Inspect seals and dam annually, clean joints, and reapply caulk as needed. After heavy storms, re-test to confirm the barrier remains watertight.
Check and reseal every year and after big rains.
Will this work on insulated vs non-insulated doors?
A water barrier can be adapted to both insulated and non-insulated doors. Ensure insulation components don’t trap moisture or impair seal performance.
Yes, with proper sizing and compatible seals for your door type.
Watch Video
Quick Summary
- Assess the entire barrier path from wall to door bottom.
- Choose compatible seals, dam, and threshold tailored to your door width.
- Seal every joint and test with real water for reliability.
- Schedule periodic maintenance to preserve performance.