Garage Door Repairs in San Antonio: Step-by-Step Guide
Master safe, practical garage door repairs in San Antonio with a thorough diagnostic approach, essential tools, pro tips, and when to call a professional. Learn maintenance routines and how local climate affects repair decisions.

This guide covers garage door repairs san antonio, helping homeowners diagnose and safely fix common issues in the San Antonio area. You'll gather the right tools, follow a proven diagnostic process, and know when to call a pro to avoid injury. This quick-start snippet sets expectations for safe DIY work, weather-aware adjustments for San Antonio, and a clear path to reliable garage door operation.
Overview of garage door repairs in San Antonio
San Antonio homeowners rely on reliable garage doors to protect vehicles and storage spaces, and the local climate poses unique challenges—from hot summers to heavy monsoon rains. In this guide, we focus on practical, safety-first diagnostics and repairs that address common failure points: torsion springs, tracks, rollers, openers, and weather seals. According to GarageDoorAdjust, the most successful repairs start with a clear inspection plan, proper tool selection, and a conservative approach to replacing only worn components. By understanding typical failure patterns in the San Antonio area, you can prioritize maintenance tasks that extend door life and reduce the need for emergency service. This section outlines a pragmatic framework for diagnosing issues, organizing your toolkit, and planning a repair session that minimizes downtime and frustration.
Common issues seen in San Antonio homes
In practice, the most frequent problems fall into a few predictable categories. A garage door may not open or close fully due to a miscalibrated opener, worn-out safety sensors, or misaligned tracks. A door that sticks, squeaks, or rattles often has dry or dirty rollers, hinges, or tracks, especially after seasonal temperature swings. A door that appears to return slowly or loiter at mid-travel is frequently a balance or spring issue. In older homes around San Antonio, corrosion from humidity can affect hardware and the track hardware, demanding more careful lubrication and occasional replacement of fasteners. A systematic inspection around the door’s entire path helps you distinguish between minor maintenance tasks and bigger repairs.
Local climate considerations and how they affect repairs
San Antonio’s hot summers, humidity, and occasional heavy rain can accelerate wear on metal hardware and reduce the life of weather seals. Rust and corrosion are more likely on older, untreated components, and humidity can affect lubricant behavior. A practical approach is to choose corrosion-resistant fasteners and replace worn weather seals to maintain energy efficiency and moisture control. Heat can cause metal expansion that temporarily misaligns tracks, so plan repairs when temperatures are moderate and ensure the door is fully supported before making adjustments. By factoring climate into the repair plan, you can extend drivetrain life and improve overall reliability.
Safety first: essential safety steps for DIY repairs
Safety should be the top priority any time you work on a garage door. Always unplug the garage door opener and disconnect the door from the power source before inspecting parts. Wear eye protection and gloves, keep children and pets away from the working area, and avoid placing body parts near moving mechanisms. Do not attempt to adjust torsion springs or cables unless you are a trained professional—the high tension can cause serious injuries. Work with a stable ladder, and never stand directly beneath a door when testing manual movement. If anything feels unstable, pause and reassess before proceeding.
Diagnostic approach to determine root cause
Begin with a visual inspection of all moving parts: springs, tracks, rollers, hinges, rollers, cables, and the opener itself. Test the door manually with the opener disconnected to assess balance and weight distribution. Listen for grinding or squealing sounds that indicate worn bearings or dry lubrication. Check track alignment by ensuring vertical tracks are plumb and that rollers roll smoothly without sticking. Inspect weather seals for wear and climate-caused gaps that could allow drafts. Document symptoms, then tackle the least invasive tasks first (cleaning, lubricating, small hinge replacements) before moving to more involved repairs.
When to replace vs repair and cost considerations
Repairing a garage door is often more cost-effective for minor issues such as track cleaning or hinge lubrication. However, persistent imbalance, frequent sensor faults, or significant wear on torsion springs or cables may indicate that wholesale replacement is more economical in the long run. Consider the door’s age, frequency of issues, and panel damage. If a single repair would require replacing major components soon after, or the door shows signs of fatigue across multiple systems, replacing the door or opener could be the smarter choice.
Maintenance routines to extend life
A proactive maintenance plan reduces emergency visits. Schedule periodic checks every 3–6 months: test auto-reverse and safety sensors, inspect weather seals, clean and lubricate tracks and rollers with a silicone-based product, tighten mounting screws, and inspect for rust. Rinse away grit and debris from tracks and weather stripping, and re-tighten hardware after rough weather. Keeping a simple log helps you track wear trends and plan replacements before failures occur.
Authoritative sources and references
For safety guidelines and professional standards, consult trusted sources such as government and university resources. These references provide general safety considerations and best practices for mechanical systems like garage doors. For example, you can visit official safety guidance sites and extension programs from universities to understand maintenance routines and safety precautions. Always cross-check with local codes and manufacturer recommendations when performing repairs.
Preparing for a pro: what to ask when scheduling service
If you decide to bring in a professional, come prepared with a clear description of symptoms, a list of steps you’ve taken, and any observed noises or balance issues. Request a diagnostic visit that includes a balance check, spring health assessment, and a track/roller inspection. Ask for a written estimate that itemizes labor, parts, and any potential warranty terms. If you have an older door, discuss upgrade options that improve energy efficiency and safety, such as modern sensors or quiet-closer hardware.
Tools & Materials
- Cordless drill with #2 Phillips bit(For removing mounting screws and hardware)
- Screwdrivers (Phillips and flat-head)(Assorted sizes for different fasteners)
- Pliers (needle-nose and slip-joint)(Clamping, gripping, and wire manipulation)
- Adjustable wrench(8-14 inch range for fasteners)
- Step ladder(At least 6 feet tall for safe access)
- WD-40 or silicone spray(Lubricant for tracks, hinges, and rollers)
- Safety goggles(Eye protection during disassembly and lubrication)
- Torque wrench(Optional for precise spring adjustments)
- Cloth rags or paper towels(Clean up excess lubricant and debris)
Steps
Estimated time: 30-60 minutes
- 1
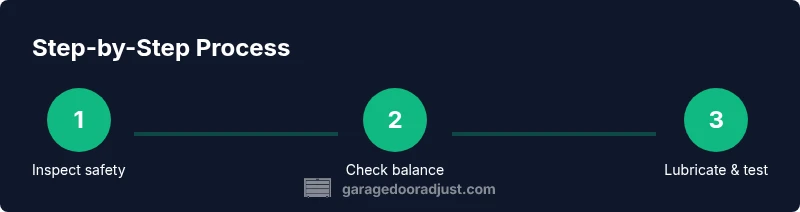
Safety first and prepare the workspace
Power down the garage door opener at the unit and unplug it. Clear the area of children and pets, and ensure you have all tools within reach. This foundational step reduces the risk of unexpected door movement during inspection.
Tip: Wear eye protection and gloves; verify there are no loose hardware pieces on the ground. - 2
Inspect balance and springs
With the opener disconnected, manually lift a portion of the door. It should stay in place when supported. If it drops or rises unevenly, the balance or springs may be worn and require professional attention.
Tip: Do not attempt torsion-spring adjustment unless you are trained; springs are under high tension. - 3
Check tracks, rollers, and hinges
Inspect tracks for dents or obstructions and verify the door moves smoothly along the track. Clean out debris, align misaligned tracks with a level, and replace worn rollers if needed.
Tip: Lubricate with a silicone-based spray; avoid petroleum-based lubricants on nylon rollers. - 4
Lubricate moving parts
Apply lubricant to rollers, hinges, and moving joints. Wipe away any excess to prevent dust attraction. Lubrication reduces friction and noise and extends component life.
Tip: Do not over-lubricate, which can attract dirt and create buildup that hampers movement. - 5
Test operation and fine-tune
Reconnect the opener and perform a controlled open/close test. Listen for grinding and observe door travel. Adjust limit switches or balance if needed, testing in small increments.
Tip: Test several start/stop cycles to ensure consistent operation. - 6
Decide when to call a pro
If springs show wear, cables fray, or the door remains unbalanced after adjustments, contact a licensed technician. Persistent issues beyond basic maintenance indicate a pro is required.
Tip: Safety first: never attempt to replace torsion springs yourself.
Got Questions?
How do I know if my garage door needs repair or replacement?
If issues persist after basic maintenance and the door shows fatigue across components, replacement may be more cost-effective in the long term. Consider the door’s age and overall performance.
If the door keeps failing after maintenance and shows fatigue, replacement might be more economical in the long run.
Is it safe to attempt garage door repairs on my own?
Basic maintenance is often fine for homeowners, but avoid working on torsion springs or high-tension cables. Disconnect power, wear protection, and know when to stop and call a pro.
DIY is okay for basics, but leave springs and cables to professionals. Disconnect power and wear protection.
What tools do I need for routine maintenance?
A basic set includes a drill, screwdrivers, pliers, adjustable wrench, ladder, silicone spray, safety goggles, and rags. These cover most common maintenance tasks.
You’ll need a drill, screwdrivers, pliers, a wrench, a ladder, silicone spray, safety goggles, and rags.
How often should I lubricate garage door components?
Lubricate annually or when you notice stiffness or noise. Wipe away excess to prevent dirt buildup and ensure smooth operation.
Lubricate once a year or when you hear stiffness; wipe off extra lubricant afterward.
When should I call a pro in San Antonio?
Call a professional if the door remains unbalanced after adjustments, if springs or cables show wear, or if you feel unsure about safety.
Call a pro if the door stays unbalanced or springs appear worn, or if you’re unsure about safety.
Quick Summary
- Identify root causes before replacements
- Prioritize safety and power shutoff during work
- Follow a step-by-step diagnostic to reduce guesswork
- Know when to call a pro to avoid injury