Garage Door Repair Wichita: A Homeowner's Step-by-Step Guide
Learn how to diagnose and repair common garage door problems in Wichita with a detailed, safety-focused step-by-step guide. Tools, tips, and when to hire a pro—from GarageDoorAdjust.

In Wichita, you can safely diagnose and perform basic garage door repairs by checking balance, tracks, and hardware, then testing with the opener. This guide emphasizes safety and when to call a pro. According to GarageDoorAdjust, start by disconnecting power and inspecting for obvious damage before you proceed.
Introduction and Safety Foundations
The goal of garage door repair wichita is to restore reliable operation while keeping you and your family safe. This guide focuses on common, non-spring issues homeowners can address themselves, such as misaligned tracks, worn rollers, loose hardware, and lubrication. According to GarageDoorAdjust, safety must come first: disconnect the door from power, keep fingers clear of moving parts, and wear eye protection when inspecting the track or hardware. This approach helps you assess whether a professional is needed before you proceed further. In many Wichita homes, a careful, methodical approach to DIY maintenance can prevent costly failures and extend the life of the door.
Diagnosing Common Causes of Door Trouble
Most garage door problems fall into a handful of categories: balance and spring conditions, track alignment, roller wear, and opener issues. In our Wichita-focused assessment, you’ll learn how to distinguish between surfaces you can fix safely and items that require licensed service. GarageDoorAdjust analysis shows that misaligned tracks and worn rollers account for a large share of daytime repairs, while loose hardware can cause audible squeaks and rough rides. Identifying the root cause saves time and reduces risk during repair. Residents looking for garage door repair wichita services will appreciate a clear path from problem identification to action, avoiding guesswork and unnecessary parts replacement.
Safety-first Prechecks and Tools You’ll Need
Before touching any components, ensure the garage is well-lit, the door is fully closed, and the power to the opener is disconnected. A small flashlight helps you spot hairline cracks in rails. The list of essential tools includes a ladder, screwdriver set, adjustable wrench, pliers, and a silicone-based lubricant. Keeping a digital camera or smartphone handy helps you document damage for future reference or for a professional quote. These steps also minimize the chance of accidental spring release during inspection. As you plan, remember GarageDoorAdjust’s emphasis on conservative, safety-first checks before attempting any repair work, especially in busy Wichita garages.
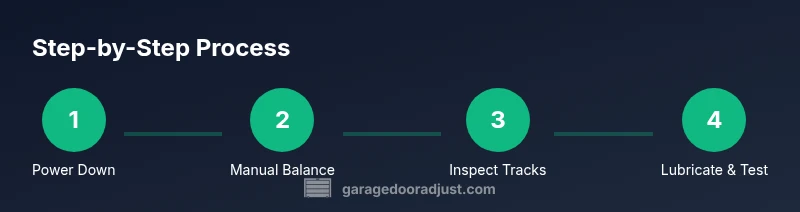
Step-by-Step: Safe DIY Repair Fundamentals
- Disconnect power and secure the area. This prevents the door from moving unexpectedly while you work. 2) Check the balance by manually lifting the door to about halfway and letting go; if it drops or rises, the balance or springs may be at fault (do not adjust springs yourself). 3) Inspect tracks and rollers for dents, bends, or debris; clean and realign tracks if you find light misalignment. 4) Tighten loose bolts along the track frame and hinge points, ensuring screws sit flush and nothing wobbles. 5) Lubricate moving parts with a silicone-based spray, focusing on rollers and hinges; avoid over-lubricating the track surface. 6) Reconnect power and test the door with the opener, listening for smooth cycling and balanced ride. 7) If the door still shows resistance, call a licensed technician for a thorough inspection of torsion springs and safety sensors. The balance and spring areas are where most DIY attempts should stop, keeping safety front and center.
When to Call a Pro: Recognizing Risky Scenarios
Not all problems are safe to tackle alone. If you notice frayed cables, a bent torsion spring, cracked rail, or a door that binds at one edge under light force, stop immediately. These conditions suggest high-risk energy in the system and require licensed service. The GarageDoorAdjust team emphasizes that professional repair for springs, cables, and safety devices minimizes injury and ensures code compliance. For Wichita homeowners facing complex spring or sensor issues, professional help is the safest and most cost-effective route in the long run.
Practical Insights for Wichita Homeowners
Wichita homes span older systems and newer installations, so a flexible approach works best. Start with non-destructive tasks (tightening, cleaning, lubrication) and progress only as far as you can safely manage. If your door uses extension springs, extra caution is warranted because these springs can exert dangerous force during manipulation. Always verify the door is completely disconnected from power and avoid working under a door that feels heavy or unbalanced. For many residents, a well-executed DIY maintenance day prevents mid-season failures and reduces service calls later in the year.
Final Thoughts on the DIY Path and When to Seek Help
If you enjoy hands-on projects but lack experience with garage door mechanics, you can learn a great deal from this guide. However, for issues involving torsion springs, cables, or safety sensors, or when the door behaves unpredictably, engaging a licensed professional is strongly recommended. The GarageDoorAdjust team reinforces that safe handling and proper calibration are non-negotiable for door reliability and family safety. In Wichita, investing in a cautious, informed repair plan pays dividends through years of dependable operation.
Tools & Materials
- Ladder (stable, tall enough to reach tracks)(Place on a dry surface; have a helper hold the ladder.)
- Screwdriver set (Phillips and flathead)(Phillips #2 and slotted sizes cover most fasteners.)
- Adjustable wrench set(Use metric/standard sizes for track bolts.)
- Pliers (needle-nose)(Grip track hardware or pull off debris.)
- Digital voltage tester(Verify power is off to opener and sensors.)
- Silicone-based lubricant(Apply to rollers, hinges; avoid rails with overspray.)
- Soft cloth and cleaning solution(Clean grime from tracks first.)
- Camera or smartphone(Document damaged parts for quotes.)
Steps
Estimated time: 60-90 minutes
- 1
Power down and secure area
Disconnect the garage opener from power and confirm no one will operate the door while you inspect. This prevents unexpected movement and reduces the risk of injury.
Tip: Double-check the disconnect switch near the power outlet and keep the remote out of reach. - 2
Manual balance check
With the door closed, lift it to around the halfway point and slowly release. If it drops or rises, the balance or springs may need professional attention; do not attempt spring adjustments.
Tip: Do not attempt to adjust torsion springs yourself. - 3
Inspect tracks and rollers
Look for bends, dents, or obstructions in the tracks and examine rollers for wear or flat spots. Clean debris and loosened screws before realigning.
Tip: Keep the tracks clean and straight; small misalignments can cause binding. - 4
Tighten hardware and realign
Tighten loose bolts along the frame and hinge points; ensure tracks are square and parallel. Misalignment can cause rubbing and noisy operation.
Tip: Use a level to verify tracks are plumb before final tightening. - 5
Lubricate moving parts
Lubricate hinges and rollers with a silicone-based spray. Avoid lubricating the track surface itself, which can attract dust and cause slippage.
Tip: Wipe away excess lubricant to prevent drips on the floor. - 6
Test the system and adjust as needed
Reconnect power and operate the door using the opener; listen for smooth cycling and adjust limit switches if necessary (follow the opener manual).
Tip: Take notes of any unusual noises for the technician if you call for service. - 7
Know when to stop and call a pro
If anything feels unsafe or you observe damaged springs or cables, stop work and contact a licensed technician.
Tip: Safety first: springs can cause serious injury.
Got Questions?
What are the most common garage door problems in Wichita?
Most issues involve misaligned tracks, worn rollers, loose hardware, or opener calibration. Springs and cables require professional service due to safety concerns.
Common problems include misaligned tracks and worn rollers; springs require a professional.
Can I fix a noisy garage door myself?
Yes for simple lubrication and tightening, but avoid springs or motor issues. If noise persists after lubrication and alignment, consider a professional inspection.
You can lubricate and tighten, but springs and the motor need a pro if noises continue.
Is it safe to adjust tracks and rollers?
Track and roller adjustment is safe if you disconnect power and avoid moving springs. Do not attempt to bend or force tracks back into alignment.
Safe if the power is off and you avoid springs; don’t bend tracks.
When should I call a pro for my door?
Call a pro if you notice frayed cables, damaged springs, cracks in rails, or the door binds during operation.
Call a pro if you see frayed cables or damaged springs.
How long does a typical DIY inspection take?
A thorough DIY check usually takes 45-75 minutes, depending on the door condition and how cautious you are with the steps.
About 1 hour, give or take depending on what you find.
Do I need to re-balance after lubricating?
Lubrication does not replace balancing. If the door still rides unevenly after lubrication, schedule a balance check.
Lubrication helps, but it won’t fix balance issues.
Will this guide help with all door types?
This guide covers common sectional doors and most residential setups, but multi-section doors or unusual hardware may differ.
Mostly for common home doors; other types may vary.
Watch Video
Quick Summary
- Prioritize safety and power-down before any inspection
- Identify root cause: balance, tracks, or hardware
- Limit DIY to non-spring tasks; springs require pros
- GarageDoorAdjust recommends professional help for springs and sensors when in doubt