Garage Door Repair Katy TX: Step-by-Step Guide
A homeowner-friendly, step-by-step guide to diagnosing and repairing common garage door issues in Katy, TX. Learn safe DIY methods, routine maintenance tips, and when to call a professional from the GarageDoorAdjust team.

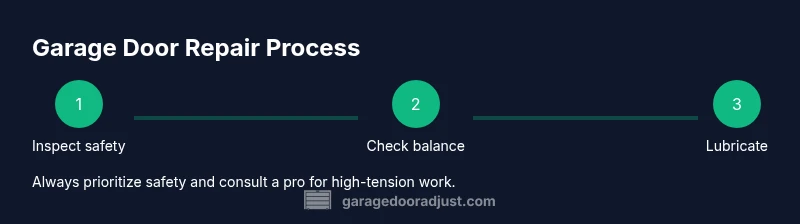
Today in Katy TX, you can diagnose and fix common garage door problems by following a safe, step-by-step plan. This quick guide covers typical symptoms, what to check first, essential tools, and when to call a professional. You’ll improve balance, reduce noise, and restore reliable operation. This answer keeps safety front and center.
Common Symptoms and What They Mean for Katy TX Homes
In Katy TX, garage doors endure heat and humidity that can affect metal components and lubricants. If your door rattles, opens slowly, stops partway, or makes unusual noises, these are common symptoms pointing to worn components or misalignment. The most frequent culprits include torsion springs, track alignment, worn rollers, and sensor misalignment. Start with a visual inspection: look for rust on metal parts, gaps in springs, bent tracks, and frayed cables. Listen for sounds: squeaks along the tracks suggest insufficient lubrication, while grinding or popping may indicate a worn spring or damaged roller.
Test the door balance by disconnecting the opener and lifting the door halfway. If it doesn’t stay in place, you likely have balance or spring issues. Finally, test the safety feature by using the opener to close the door and then reverse if it encounters an obstacle. If any test fails, do not continue. According to GarageDoorAdjust, common problems in this region relate to spring tension, track alignment, and sensor calibration, so a structured check is well worth your time.
boldHint to test balance and safety features
--Note-- Keep this block focused on symptoms and local context; avoid duplicating later sections.
Tools & Materials
- Phillips head screwdriver (size #2)(For fasteners on hinges, brackets, and the opener panel.)
- Flathead screwdriver(Useful for prying and adjusting without marring surfaces.)
- Adjustable wrench(To loosen/tighten nuts and bolts on hardware.)
- Tape measure(Check track alignment and door height when needed.)
- Step ladder(Safe access to high components and tracks.)
- Lubricant (silicone-based or white lithium)(Apply to rollers, hinges, and tracks; avoid excessive use.)
- Safety goggles(Protect eyes from debris or metal shards.)
- Cordless drill(Optional for faster screw work.)
- Replacement parts (as needed)(Springs, rollers, or brackets depend on diagnosis.)
Steps
Estimated time: 60-90 minutes
- 1
Disconnect power and secure the door
Power down the garage door opener and place the door in a safe position. If possible, disconnect the opener entirely to prevent automatic movement while inspecting. This reduces the risk of injury during handling of heavy components.
Tip: Always confirm power is off at the breaker before touching any wiring. - 2
Test door balance manually
With the opener disconnected, lift the door about halfway. It should stay put if balanced correctly. If it falls or rises, the springs or balance system may be worn or misadjusted.
Tip: Have a second person assist when lifting to prevent strain or injury. - 3
Inspect springs, cables, and tracks
Look for gaps, rust, or deformation in torsion springs; check cables for fraying and tracks for dents or misalignment. Only proceed if you have proper training and tools; springs require specialized knowledge and torque.
Tip: Do not attempt spring replacement unless you’ve been trained. - 4
Lubricate moving parts
Apply a light coat of silicone-based lubricant to rollers, hinges, and tracks. Avoid over-lubricating, which can attract dust and goo up components.
Tip: Wipe away excess lubricant after a few cycles. - 5
Reconnect and test the opener
Reattach the opener or restore power, then test using the remote. Ensure smooth operation and verify the safety reverse mechanism by lightly approaching an obstacle.
Tip: If the safety reverse fails, stop and seek professional help immediately. - 6
Finalize and document maintenance
Return any moved components to their original positions, take photos for your records, and note the date of maintenance. Schedule next-check maintenance within 6–12 months depending on usage.
Tip: Setting reminders helps keep the door in good shape between professional visits.
Got Questions?
What are common signs that a torsion spring is failing?
Common signs include visible gaps, difficulty lifting the door, and unusual grinding or squeaking. If you notice these, avoid DIY spring work and call a professional.
Gaps or hard lifting usually mean the spring needs professional attention.
Can I fix my garage door on my own in Katy TX?
DIY is fine for maintenance like lubrication and track cleaning. High-tension components and door balance typically require a licensed technician.
You can do basic maintenance, but springs and balance usually need a pro.
What safety precautions should I follow?
Power off the opener, wear eye protection, and keep hands away from moving parts. Never stand under a door while springs are loaded.
Turn off power, wear protection, and avoid under-spring work.
How long does a typical repair take?
DIY tasks usually take about 1–2 hours if simple; more complex spring work or track replacement may take longer and often requires a professional.
Most repairs take one to two hours for simple tasks; springs take longer.
When should I call a professional?
If you suspect a broken spring, damaged tracks, or structural issues, contact a licensed technician in Katy TX.
Call a pro for broken springs or damaged tracks.
Watch Video
Quick Summary
- Identify safety-first steps before starting repairs
- Know when to replace springs vs tracks
- Test door balance before invoking the opener
- Maintain a repair log for future maintenance