How to Quiet a Garage Door Opener: A Homeowner's Guide
Learn practical, safe steps to quiet a garage door opener. Diagnose noise, tighten hardware, lubricate parts, balance the door, and optimize your opener for smoother operation.

Goal: quiet a garage door opener. You’ll reduce noise by diagnosing vibration sources, tightening hardware, lubricating moving parts, balancing the door, and updating mounting and rollers. This step-by-step method covers tracks, springs, hinges, rollers, and opener settings to achieve smoother, quieter operation. It is suitable for standard torsion spring setups and common chain or belt openers.
Understanding the Noise Landscape of Garage Door Openers
According to GarageDoorAdjust, most garage door noise stems from vibration, movement friction, and loose hardware rather than the motor itself. The goal is not just to “fix the motor” but to reduce the energy transfer from the door to its mounting and surrounding structure. When you search for a solution to the keyword garage door opener quiet, you're really looking at a mix of inspecting hardware, improving lubrication, and ensuring the door is balanced and riding smoothly on its tracks. This section lays the groundwork by identifying how noise travels through a system—from tracks and rollers to hinges and springs—and why each component matters. By addressing the most common culprits first, you can often achieve noticeable quiet with minimal cost and disruption.
##Brand note
The GarageDoorAdjust team emphasizes that a methodical approach pays off. Fixing a loud opener often means small changes across several parts of the system, rather than a single magic upgrade. Regular maintenance keeps components from slipping back into noisy behavior and extends the life of the system.
##Plan of attack for a quieter opener
Before you dive in, set expectations: most households can improve quietness by 20-40% with careful inspection, lubrication, and alignment. If your door is extremely loud or if you notice binding, grinding, or visible damage, stop and call a professional. The steps below provide a practical path that balances safety with effectiveness, focusing on vibration control, mechanical fit, and smoothness of motion. This content is written for homeowners troubleshooting garage door issues and aims to help you achieve a noticeably quieter opener without replacing the entire system.
##Related terms to know
To help your understanding, here are related terms you may encounter: roller bearings, track alignment, torsion springs, belt or chain drive, anti-vibration mounts, lubricants (silicone-based, dry graphite), and balance testing. Recognizing these terms will make it easier to follow steps and communicate with a technician if needed. 2-3% keyword density for garage door opener quiet is natural when describing the steps and tools used.
##Note on safety
No safety measure replaces proper training or manufacturer instructions. If you encounter high-tension springs, broken components, or uncertainty about how to safely perform any action, stop and consult a professional. The goal is to reduce noise while preserving safety and door balance.
Tools & Materials
- Safety gloves(Protect hands from sharp edges and pinch points)
- Safety glasses(Eye protection during adjustments)
- Ladder(Access tracks and mounting points safely)
- Screwdriver set (Phillips & flathead)(Tighten / loosen screws on tracks and brackets)
- Adjustable wrench(Tighten nuts and bolts without stripping)
- Needle-nose pliers(Handle clips, cables, and small parts)
- Silicone-based lubricant(Lubricate rollers, hinges, and tracks (avoid bearings if recommended))
- Lint-free cloth(Wipe dust and excess lubricant)
- Track alignment tool / level(Optional for precise alignment)
Steps
Estimated time: 60-90 minutes
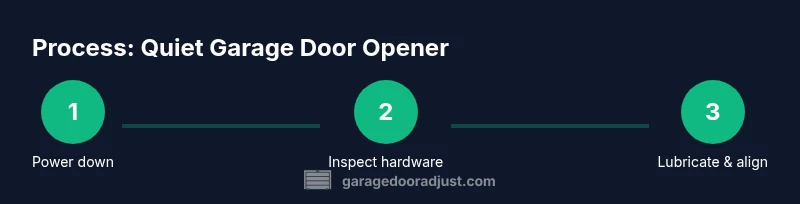
- 1
Power down and secure the door
Turn off the garage door opener at the wall switch and unplug the unit or switch off its circuit. Confirm no power by attempting a manual move with the door in the down position. This prevents unexpected movement while you inspect components.
Tip: Double-check that all remotes are out of range and that the door is supported by the floor when testing balance. - 2
Disconnect the opener and test door balance
Disconnect the door from the opener using the emergency release. Lift the door manually; it should stay in place. If the door moves on its own or feels heavy, springs or balance deltas may require professional adjustment.
Tip: Keep a firm grip and stay clear of the tracks; never stand under a door that could fall. - 3
Tighten visible hardware and inspect mounting
Go around hinges, track brackets, and the opener mounting bracket. If you feel looseness, snug the hardware using the correct screwdriver and wrench. Avoid overtightening, which can strip threads or warp metal.
Tip: Use a torque wrench if you have one and follow manufacturer torque specs. - 4
Clean and lubricate tracks and moving parts
Wipe tracks with a dry cloth to remove dust. Apply a silicone-based lubricant to rollers and hinges, and lightly lubricate the track joints. Avoid spraying lubricant directly on bearings or sprockets unless the manufacturer allows it.
Tip: Lubricate in the direction of travel to reduce drag and ensure even coating. - 5
Inspect and replace worn rollers
Check rollers for wear, flat spots, or cracks. Replace worn rollers with compatible nylon or steel options as directed by your door’s manual. Do not run the door with visibly damaged rollers.
Tip: If replacing rollers, do so with the door open and supported to prevent pinching hazards. - 6
Align tracks and restore proper balance
Confirm tracks are vertical and aligned with each other. If necessary, adjust bracket screws to correct misalignment. Re-test the door balance by lifting manually; the door should stay put if properly balanced.
Tip: Small track adjustments can have a big impact; make incremental changes and test frequently. - 7
Tune opener settings and reduce vibration
Access the opener’s control panel and reduce excessive force or travel limits if present. Install anti-vibration mounts or pads between the opener and its mount if you have them. These changes reduce motor-cabinet vibration and overall noise.
Tip: Make one change at a time and test for 24 hours before making the next adjustment. - 8
Test drive and establish a maintenance routine
Reconnect the opener, test with a remote and wall switch, and listen for remaining noise. Schedule regular lubrication, track cleaning, and hardware checks every 3–6 months to sustain quiet operation.
Tip: Keep a service log so you can track improvements and future maintenance needs.
Got Questions?
What is the first thing I should check if my garage door opener is noisy?
Begin by inspecting mounting hardware for looseness and cleaning the tracks. Tighten screws and apply silicone-based lubricant to moving parts before considering replacement components.
Start by checking for loose hardware and lubricating moving parts. Tighten anything loose and re-test; if noise persists, proceed to track alignment and balance checks.
Can lubrication alone fix a noisy door?
Lubrication can significantly reduce friction noise, but it won’t fix misalignment, worn rollers, or unbalanced springs. Use lubrication as part of a broader maintenance plan.
Lubrication helps a lot, but it won't fix all issues, especially if components are worn or misaligned.
When should I call a professional?
Call a professional if you detect visible spring issues, broken cables, severe track damage, or if the door feels imbalanced after basic fixes. Safety is paramount with heavy doors.
If you notice springs damaged or the door won’t balance after simple fixes, contact a professional.
Are belt-drive openers quieter than chain-drive?
Belt-drive openers are typically quieter than chain-drive models due to smoother operation, but proper installation and maintenance influence noise more than the drive type alone.
Belt-drive openers usually run quieter, but upkeep matters just as much as the drive type.
How often should I maintain my garage door opener?
Perform basic maintenance every 3–6 months: check hardware, clean tracks, lubricate moving parts, and test balance. Schedule a professional inspection annually for safety and longevity.
Do quick checks a few times a year and book an annual professional inspection.
Watch Video
Quick Summary
- Identify primary noise sources and start with basic tightening and lubrication.
- Ensure the door is properly balanced before modifying motor settings.
- Use non-damaging lubricants and replace worn rollers when needed.
- Test changes incrementally and maintain a routine maintenance schedule.