Garage Door Behind Reveal: DIY Troubleshooting Guide
Learn how to diagnose and fix a garage door behind reveal with a safe, step-by-step approach. This guide covers alignment, balance, tracks, and common issues, with expert tips from GarageDoorAdjust to help homeowners troubleshoot confidently.

Goal: Diagnose and fix a garage door behind reveal by inspecting track alignment, balance, and hinge wear. Start with safety checks, then test door operation and re-align tracks if needed. This quick answer previews the step-by-step approach and lists the essential tools you’ll need before starting the repair at home.
Understanding the garage door behind reveal concept
When homeowners talk about a 'garage door behind reveal', they're usually describing a misalignment or offset that appears as the door moves. The reveal refers to the gap you see between the door edge and the door opening frame. A correct installation shows a uniform reveal on all sides; excessive gaps or a door that sits behind the reveal can indicate a wiring, balance, or track issue. According to GarageDoorAdjust, this symptom is most often related to alignment and balance rather than a faulty opener. Understanding the signs helps you plan safer repairs and avoid unnecessary replacements. In this context, the diagnose uses a methodical checklist and the phrase 'garage door behind reveal' appears to describe the symptom, not the root cause. This section demystifies the symptom, explains how to verify the door’s position at several travel points, and outlines a practical path to correct the underlying cause. Throughout, we’ll use practical measurements and plain-language checks so a homeowner can approach this confidently without guessing. If the door frequently binds, sticks, or travels with the bottom edge behind the reveal, you likely have a misalignment that needs adjustment rather than a dramatic replacement.
Safety first: set up a safe workspace and protect yourself
Before you touch any part of the garage door, unplug the remote receiver or unplug the opener from the wall to prevent unexpected movement. Keep children and pets away from the area and wear safety glasses and gloves. Clear the floor of tools and debris, and use a sturdy ladder or step stool to reach tracks and hinges. Never place yourself under a moving door, and never attempt to release torsion springs unless you are trained and equipped for spring work. Good lighting helps you spot subtle misalignments, and a camera or phone can help document the original position before you adjust anything. This phase emphasizes safety, because the risk of pinching, falling, or sudden door movement is real when working near a garage door behind reveal. If anything feels unstable, stop and consult a professional.
Common causes of the 'garage door behind reveal' symptom
A door that sits behind the reveal is often the result of a misaligned or damaged track, worn rollers, loose hinges, or a sagging balance. The vertical tracks may be bent or out of square, causing the door path to deviate as it travels. Worn rollers can create a loose feel and uneven gaps along the sides of the frame. Loose mounting bolts on tracks or hinges can allow subtle shifts that accumulate over time, producing the appearance of the door being behind the reveal. A sagging torsion or extension spring system can affect balance and lead to uneven motion. In some homes, weather stripping or door insulation can contribute to the impression of a misalignment by adding friction along the path. Use a homeowner-friendly inspection approach: compare both sides of the door, look for asymmetry, and note any parts that look bent, cracked, or severely worn. This analysis aligns with the idea behind the keyword 'garage door behind reveal' and sets the stage for targeted fixes.
Tools and materials overview
Gather a basic set of hand tools and a few safety aids before you start. A level helps confirm straight tracks, while a tape measure lets you verify equal reveals on both sides. A utility knife may be needed to trim weather stripping if it’s interfering with track travel. Use a silicone-based lubricant on metal parts to reduce friction, avoiding oil-based lubricants that can attract dust. Keep a notebook or device handy to record measurements and notes. These items are commonly enough to cover most DIY adjustments for a garage door behind reveal without specialized equipment. If you discover severe track damage, repeatedly bent tracks, or a broken torsion spring, pause and seek professional help rather than continuing. The goal is to prepare a safe, controlled workspace that reduces risk and increases the chance of a successful, durable fix.
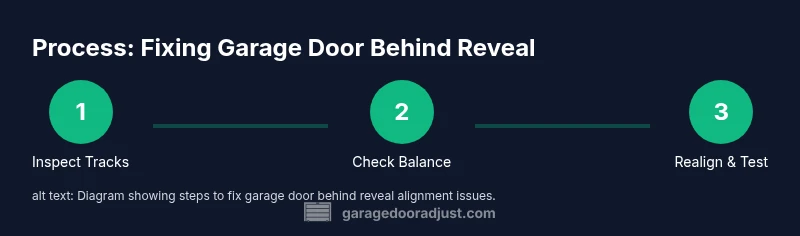
Step-by-step assessment plan (summary)
This section provides a practical, methodical approach you can follow to troubleshoot the 'garage door behind reveal' condition. Focus on inspecting the tracks, checking balance, correcting alignment, and testing door travel after each adjustment. The goal is to restore even reveals and smooth operation without compromising safety or parts. If in doubt, consult the expert guidance from GarageDoorAdjust and your local codes.
Tools & Materials
- Safety goggles(Protect eyes from dust and debris when working with moving parts)
- Work gloves(Protects hands while handling tracks and hinges)
- Sturdy ladder(Access high tracks safely; ensure stable footing)
- Socket/wrench set(Tighten/loosen track mounting bolts)
- Screwdriver set(Remove or adjust screws on brackets)
- Allen/Hex keys(For hinge and track bolts)
- Level(Check vertical and horizontal alignment of tracks)
- Tape measure(Record reveals and offsets)
- Silicone-based lubricant(Lubricate rollers and hinges; avoid oil-based lubricants)
- Marker tape/ chalk(Mark reference positions before adjusting)
- Camera or smartphone(Document original positions for reference)
Steps
Estimated time: 60-90 minutes
- 1
Power down and secure area
Disconnect power to the opener and confirm the door is fully closed before starting any checks. Stand clear of the door's travel path while verifying safety, and use a helper if possible.
Tip: Verify power is off at both the wall switch and the unit to prevent auto-reverse moves. - 2
Inspect tracks and brackets
Visually inspect vertical tracks for bends or gaps; check brackets for looseness. Use a level to confirm tracks are plumb and straight, and note any misalignment that could cause a door behind reveal appearance.
Tip: Loosen bolts only slightly before moving parts to avoid sudden shifts. - 3
Check door balance by manual lift
With the door closed, attempt a smooth manual lift to about waist height. If it requires significant effort or drops slowly, balance issues or spring wear may be present and require professional attention.
Tip: Do not force a stiff door; springs can be dangerous. - 4
Realign tracks and re-tighten
If misalignment is detected, adjust track position by loosening mounting screws slightly, nudging the track back into square alignment, and re-tightening screws. Re-check with the level and re-test door operation.
Tip: Make small adjustments and re-test frequently to avoid over-correcting. - 5
Lubricate and test again
Apply silicone-based lubricant to rollers, bearings, and hinges; wipe away excess. Operate the door through its full travel and observe whether the reveal remains even on both sides and that travel is smooth.
Tip: Avoid lubricants that attract dirt; use silicone or semi-synthetic lubricants.
Got Questions?
What does 'garage door behind reveal' mean?
It describes a symptom where the door sits behind the frame reveal, often due to misalignment or balance issues. It’s usually a track or balance problem rather than a failed opener.
It describes a misalignment issue, most often related to tracks or balance, not the opener itself.
Can I fix this myself?
Basic checks such as track inspection and careful alignment can be DIY-friendly. Avoid springs, cables, or major bracket work unless you’re trained, and consult a pro if you see obvious wear.
You can handle basic checks, but don’t touch springs or cables unless trained.
What safety precautions are essential?
Power off the opener, wear PPE, keep others away, and never release springs without proper training. Work slowly and verify each step before proceeding.
Power off the opener and wear PPE; never handle springs without training.
How do I know if I need a replacement part?
Look for bent tracks, worn rollers, or corroded springs. If you see damage, replace or consult a pro rather than attempting risky DIY fixes.
Damaged tracks, rollers, or springs usually require replacement or professional help.
When should I call a professional?
If the door won’t balance, tracks are severely damaged, or springs are involved, stop and contact a licensed technician. Do not risk personal injury by DIY spring work.
If balance is off or springs/tracks show damage, call a pro.
Watch Video
Quick Summary
- Identify misalignment first to guide fixes
- Test door operation after each adjustment
- Lubricate moving parts to reduce friction
- Call a professional for springs or structural damage