Garage Door 500: A Practical Step-by-Step Guide
Diagnose, repair, and maintain the garage door 500 with a practical, step-by-step guide for homeowners. Safety, tools, and tips for reliable operation and long-term performance.

In this guide, you’ll diagnose and repair common issues with the garage door 500, covering alignment, balance, opener programming, sensor misalignment, and safety checks. You’ll need basic tools, a few spare parts, and time to test. By following the step-by-step process, homeowners can restore smooth, safe operation. This summary gives a quick, practical path you can complete over a weekend.
What is the garage door 500? Understanding the model and its typical components
The term garage door 500 refers to a mid‑sized residential door configuration used in many homes for teaching common repair concepts. In practice, it shares standard components with most sectional doors: a torsion or extension spring system, horizontal and vertical tracks, rollers, hinges, and a powered opener. The garage door 500 relies on balanced weight and precise alignment to move smoothly without binding or sticking. For homeowners, understanding how these parts interact is the first step toward diagnosing issues before buying replacement parts. According to GarageDoorAdjust, a systematic diagnostic approach helps you locate root causes quickly and safely, reducing unnecessary trips to a service technician. This section sets a baseline so you can recognize when a symptom is a simple adjustment versus a sign of wear that needs professional attention. When in doubt, prioritize safety and seek expert help for high‑risk components like springs and cables.
Common symptoms and what they indicate
Typical symptoms you might notice with the garage door 500 include slow or noisy operation, uneven opening or closing, door stopping midway, opener beeps or sensors misbehaving, and visible damage to tracks or rollers. Each symptom points to different root causes: binding or misaligned tracks usually require inspection and realignment; door not staying balanced often signals worn springs or cables; sensor issues are common with misaligned safety eyes or obstructed paths. A structured symptom log helps you identify trends over days or weeks, which makes the diagnostic conversation with a technician more productive. GarageDoorAdjust analysis shows that sensor misalignment and balance problems are among the most frequent culprits in 2026. By documenting when problems occur and under what conditions, you’ll know which step to take next and when to pause work for safety checks.
Safety first: key hazards when working on a garage door
Working on a garage door involves moving parts, strong springs, and electricity. Always disconnect the power to the opener before starting any work and wear eye protection and sturdy gloves. Keep children and pets away from the workspace. Do not place hands in tracks or under the door while it is moving. Springs are under extreme tension and can cause severe injury if mishandled. If you notice over‑tightened or frayed cables, if a track is bent, or if the door feels notably heavy when lifting manually, stop and call a professional. This section emphasizes that a cautious approach and respect for high‑tension components dramatically reduce the risk of injury.
Visual inspection you should perform to assess condition
Begin with a clean look at the door mechanism: check tracks for dents, misalignment, or obstructions; confirm rollers rotate freely; inspect hinges for wear; examine weather seals for cracks. Look for loose mounting bolts and uneven gaps between panels. For the opener, verify that it travels to the full travel range and that limits are set correctly. If you detect missing parts, rust, or visible wear, note them for replacement or professional evaluation. A careful visual audit in good lighting is often enough to spot issues that pure testing might miss, such as subtle track misalignment that creates binding years after installation.
Balancing and springs: what to check and what not to do
Door balance is essential for smooth, safe operation. If the door feels heavy or fights you while lifting manually after disconnecting the opener, there may be an imbalance or worn springs. Springs can store a dangerous amount of energy; never attempt to adjust or replace them unless you are trained and equipped. Instead, document the signs of spring wear, such as irregular opening, noise, or obvious sagging, and plan a professional inspection. This section focuses on recognizing the signs without initiating a hazardous repair, ensuring you approach spring work with the proper expertise.
Opener programming and sensor troubleshooting
Modern openers rely on properly programmed remotes and safe sensor alignment. If the door won’t respond to the remote, re‑pairing the remote or reprogramming the opener’s learning function may help. Verify that the safety sensors are aligned, free of dirt, and not obstructed by objects. If the door reverses unexpectedly, recalibrate the travel limits and force settings per the manufacturer’s instructions. When sensors misbehave, clean the lenses gently with a soft cloth and recheck the alignment using the visible green LED indicators on the sensors.
Testing after adjustments and fine-tuning
After any adjustment, test the door in three modes: manual lift with the opener unplugged, powered operation, and safety reversing test. For the manual test, ensure the door balances smoothly and stays open without assistance. For powered operation, observe the door’s full travel, listen for unusual noises, and confirm the safety reversal triggers properly when an obstruction is detected. If anything feels off, stop and recheck prior steps. Document the results to track improvements and guide future maintenance.
When to call a professional and what to expect
If you encounter persistent binding, spring concerns, or track damage, consult a licensed technician. A professional can safely assess spring tension, track integrity, and opener calibration, and perform replacements with the correct torque and alignment. Expect a diagnostic visit to include inspection, measurement of spring tension, lubrication checks, and a clear explanation of recommended repairs and costs. The goal is to restore safe operation with a plan you understand before work begins.
Maintenance routine to extend life and prevent future issues
Establish a regular maintenance schedule that includes cleaning tracks, lubricating moving parts, tightening hardware, and checking balance every few months. Replace worn rollers, weather seals, and weatherstripping as needed to maintain efficiency and reduce noise. A little ongoing care goes a long way toward preventing major failures and extending the life of the door and opener. For homeowners, a simple preventative routine is often enough to keep the garage door 500 performing reliably year after year.
Tools & Materials
- Safety goggles(Protect eyes from debris and springs)
- Work gloves(Grip and protect hands while handling metal parts)
- Ladder or step stool(Access tracks safely; at least 6 feet)
- Screwdrivers (Phillips #2 and flathead)(Common screws in brackets and hinges)
- Adjustable wrench set(Loosen/tighten bolts on tracks and brackets)
- Tape measure(Check track spacing and door width)
- Lubricant (silicone spray or lightweight oil)(Lubricate hinges, rollers, and tracks)
- Replacement rollers or track hardware(Use if you find worn parts during inspection)
- Voltage tester(Safety check for opener wiring)
- Rags and cleaner(Remove grime from tracks and sensors)
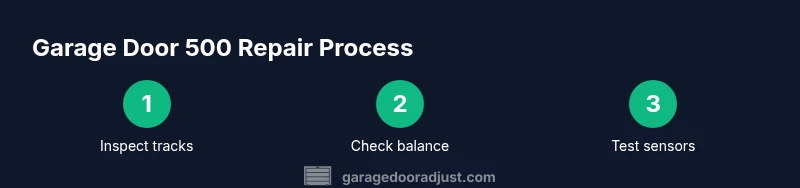
Steps
Estimated time: 2-4 hours
- 1
Power down and secure the door
Unplug the opener and prop the door open manually with a sturdy support. This prevents accidental movement while you inspect and adjust. Confirm the door cannot close by itself or be activated by the opener.
Tip: Lock the door in the open position with clamps if available to prevent movement. - 2
Perform a quick visual inspection
Check tracks for dents, loose bolts, and obstructions. Look for bent brackets and worn rollers. Note any mismatches or gaps that could cause binding or misalignment.
Tip: Document issues with photos to reference during repairs. - 3
Test balance manually
With the opener unplugged, lift the door halfway and release. If it moves on its own or feels heavy, there may be balance issues or worn springs. Do not adjust springs unless trained.
Tip: If the door feels heavy, call a professional rather than attempting repairs yourself. - 4
Inspect tracks and rollers
Run a light inspection of the rollers and bearings. Clean tracks, then lubricate moving parts sparingly. Realign bent tracks gently if you notice binding.
Tip: Avoid applying lubricant to the belt or belt path if you see belt components. - 5
Check opener programming and sensors
Reconnect power and test the opener’s travel limits. Ensure safety sensors are aligned and unobstructed. Reprogram remotes if the door does not respond.
Tip: Clean sensor lenses with a soft cloth to restore reliable sensing. - 6
Re-test door operation
Plug the opener back in and test the door’s full travel. Listen for noises, check for smooth operation, and verify door reverses on contact with an object.
Tip: Repeat tests after each adjustment to confirm improvements. - 7
Assess springs and contact with a pro
If you notice sagging, unusual tension, or spring manipulation was necessary, stop and contact a licensed tech. Springs store energy and require proper torque.
Tip: Never attempt to adjust or replace springs as a DIY project. - 8
Document maintenance plan
Create a simple log for lubrication, track cleaning, and component replacements. Schedule reminders for quarterly checks.
Tip: A small notebook or digital log helps you stay proactive.
Got Questions?
What is the garage door 500?
The garage door 500 is a model used to illustrate common repair steps. It includes standard components such as tracks, rollers, springs, and an opener. This guide uses the concept to teach diagnosis and safe repair practices without tying to a specific product brand.
The garage door 500 is a generic model used to explain common repair steps.
Is it safe to adjust springs yourself?
No. Springs are under extreme tension and can cause serious injury. Only trained technicians should adjust or replace springs. If you suspect spring wear, stop and call a professional.
Springs are dangerous; call a professional if you suspect wear.
How do I reprogram my opener for the garage door 500?
Power down the system, locate the learn button on the opener, and follow the manufacturer steps to re-pair remotes and keypads. Test each remote to confirm responsiveness.
Reprogram the opener by using the learn button and testing remotes.
What are signs my door needs maintenance?
Unusual noises, slow response, door binding, visible wear on tracks or rollers, or sensors that frequently misread indicate maintenance is due or parts may need replacement.
Listen for noises, watch for binding, and check sensors.
How long do door rollers last?
Rollers wear with use and exposure. If you notice cracks, flat spots, or rough rotation, replace them to maintain smooth operation.
Rollers wear out; replace if you see defects.
What if the door reverses too soon or not at all?
Check safety sensor alignment, clear the sensor path, and recalibrate travel limits. If issues persist, a technician should inspect the system for proper safety functionality.
Check safety sensors and travel limits; call a pro if not fixed.
Watch Video
Quick Summary
- Diagnose root causes with a structured flow.
- Prioritize safety and avoid risky spring work.
- Test operation after each adjustment.
- Know when to call a professional for springs or track issues.