Garage Door 495 Troubleshooting: A Complete How-To Guide
Learn how to diagnose and repair garage door 495 with a safe, methodical approach. This guide covers tools, safety checks, common faults, and practical fixes for homeowners, plus maintenance tips to keep your door functioning smoothly.

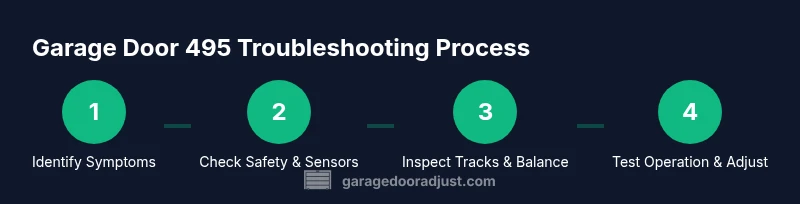
By the end of this guide, you will diagnose and safely fix common issues around garage door 495, including misalignment, sensor errors, and opener faults. You'll learn exact tools, safety steps, and a practical, step-by-step repair plan you can follow without guessing. Before you start, confirm power is off, the door is balanced, and you have a helper for heavy lifting.
Understanding the garage door 495 landscape
In the world of home garages, a label like garage door 495 can reference a common fault pattern or a simplified project name used by technicians and homeowners. This guide treats 495 as a practical troubleshooting target rather than a strict model number. Homeowners typically encounter 495-like scenarios when the door won’t open, opens partially, or operates with unusual noises. Frequent root causes include misalignment of tracks, worn rollers, tired springs, sensor misreads, or weak electrical connections. According to GarageDoorAdjust, many issues numbered like 495 stem from a mix of mechanical wear and sensor calibration; a systematic check often reveals the culprit without needing expensive parts. This section will help you frame the problem before you dive into hands-on work.
Tip: Keep a small notebook to track which actions restore operation and which steps don’t. This creates a simple audit trail for future maintenance and, if needed, a pro’s reference.
Safety first: power down and secure the door
Safety is non-negotiable when working on garage doors. Start by unplugging the opener from the wall outlet or switching off the circuit at the breaker to prevent accidental operation. If you have a manual latch, engage it to prevent the door from moving unexpectedly. Use a sturdy ladder or step stool to inspect elevated components, and wear protective gloves and eye protection. Keep children and pets away from the workspace. A door that weighs hundreds of pounds can suddenly drop if balance is lost or a spring fails, so never stand under a door that’s supported only by a spring mechanism. GarageDoorAdjust emphasizes verifying the door balance by manually lifting the door halfway and releasing; it should stay put. If it drops or rises, do not proceed with further testing until you restore proper balance.
Tools and materials you need (before you start)
- Adjustable wrench (essential)
- Flat-head and Phillips screwdrivers (essential)
- Tape measure and level (essential)
- Safety glasses and work gloves (essential)
- Socket set or nut driver (essential)
- Stepladder (essential)
- Flashlight or headlamp (essential)
- Tension gauge or door balance method (optional)
- Pen and notebook (useful for notes)
- Replacement rollers, springs, or sensors only if you’ve confirmed they are needed (optional)
Note: If you’re unsure about a spring or tension component, consult a professional; torsion springs can cause severe injury if mishandled.
Visual inspection: tracks, rollers, and hardware
Begin with a careful visual inspection of the entire travel path. Look for crushed tracks, loose mounting screws, or bent hinges. Check rollers for wear, and ensure rollers rotate freely by hand when the door is closed. Inspect the tracks’ alignment by placing a level against them and checking for gaps or gaps at the joint. Any misalignment can cause binding, uneven movement, and noise. Also inspect weather stripping along the bottom of the door for damage that might affect seating. If you notice any damaged components, mark them for replacement.
Images or diagrams can help you compare your setup with a proper reference; consider taking photos at each step to document before-and-after states.
Electrical checks: sensors, limit switches, and wiring
Faulty sensors or miswired connections are frequent culprits behind 495-like symptoms. Start by verifying that the safety sensors (usually near the bottom of the door frame) are properly aligned and free of obstructions. Clean the sensor lenses with a soft cloth; misreadings may occur if dirt or condensation covers the lens. Test the door by using the wall switch and the remote; listen for the opener motor hum but watch for jerky movement. Check the wiring harness at the opener to ensure there are no frayed wires or loose connectors. If the opener’s light blinks in a pattern, consult the manual or GarageDoorAdjust’s guidance for the exact fault code interpretation, as blinks often indicate a specific problem.
Mechanical checks: balance, springs, and cables
A balanced door is crucial for safe operation. With the door closed, disconnect the opener and try lifting the door manually. It should rise smoothly with minimal effort and stay halfway if balanced correctly. If the door is hard to lift, springs or balance components may be worn or misadjusted. Springs provide the majority of the lift; if a spring shows gaps, unwinding, or deformation, do not attempt to adjust it without proper tools and training. Inspect cables at the bottom corners for fraying or separation from the drum. Any sign of wear warrants replacement by a trained technician. Always re-check the door balance after any adjustment.
Visual diagrams or short video clips at this point can clarify how the balance, springs, and tracks interact during operation.
Pro-tip: When in doubt, test each component in stages—balance first, then sensors, then tracks.
Common fault scenarios and fixes for garage door 495
Here we translate symptoms into practical fixes. If the door reverses immediately after crossing the threshold, the limit switch may be misadjusted; adjust the travel limits per the opener’s manual. If the door stops or stalls while moving, inspect for track binding or a sticking roller and lubricate the track and hinge points where metal-to-metal contact occurs. For noisy operation, focus on lubrication: apply a silicone-based lubricant to hinges, rollers, and track joints; avoid over-lubricating or applying lubricant to the belt drive if your model uses a belt. Sensor misreads often stem from misalignment, dirt, or shielding from sunlight. Clean and re-align to restore safe operation. Any reliability issue that recurs after basic fixes likely indicates a worn component that needs replacement.
Refer to the GarageDoorAdjust Analysis, 2026, for pattern tendencies and recommended checklists.
When to replace components vs. the entire opener
If multiple systems fail—sensors repeatedly misread, springs show significant wear, or the motor struggles despite maintenance—replacement may be more cost-effective than ongoing repairs. A modern opener with updated safety features can improve reliability and energy efficiency. If the door itself is bent or tracks are irreparably damaged, replacing the door or tracks may be warranted. When your unit is older than 15–20 years and frequent repairs are needed, consider upgrading. Always compare the total cost of parts and labor against a new unit’s expected lifespan and energy savings.
Recommended plans include a performance test after any replacement, ensuring the door remains balanced and safe.
Preventive maintenance and long-term care
Proactive maintenance extends the life of your garage door system. Schedule a quarterly inspection, lubricate moving parts, tighten hardware, and replace weatherstripping as needed. Keep the track clean, remove debris, and ensure the door’s balance remains stable. Monthly checks of sensors and safety features help prevent unexpected shutdowns. Keep a maintenance log and set a calendar reminder for a seasonal check. The goal is to identify wear early and prevent 495-like issues from escalating into costly repairs.
Final verification and safety reminders
After completing the diagnostic and any required repairs, re-engage the opener and test all functions. Confirm the door stops and reverses if it encounters an obstacle, and ensure it opens to the fully raised position and closes fully without binding. If you observe any irregular movement, noise, or hesitation, stop and reassess rather than forcing the system. Remember, safety first—two-person operation for heavy tasks, and never place your body under a door that is not securely balanced.
Images and diagrams to help you visualize the process
- Diagram of typical garage door 495 fault states: misalignment, sensor error, balance issues.

- Photo guide: tracks alignment, hinge and roller condition, and sensor placement.

These visuals can help you compare your setup with an ideal configuration and document changes for future reference.
Tools & Materials
- Adjustable wrench(Medium size, 6-12mm opening range for mounting bolts)
- Flat-head screwdriver(Used for hinge screws and small adjustments)
- Phillips screwdriver(For track screws and sensor mounts)
- Tape measure(Ensure tracks are parallel and balanced)
- Level(Check track alignment during inspection)
- Safety glasses(Protect eyes from debris and spring tension)
- Work gloves(Grip and protect hands during adjustment)
- Stepladder(Stable platform to reach tracks and rollers)
- Flashlight / headlamp(Illuminates dark track areas and sensor housings)
- WD-40 or silicone-based lubricant(Lubricate moving parts; avoid over-lubricating belts)
- Replacement parts kit(Only if a specific component shows wear (rollers, springs, sensors))
Steps
Estimated time: 60-90 minutes
- 1
Power down and secure
Disconnect the opener and engage any manual latch to prevent movement. Verify the door is stationary and inspect the surrounding area for hazards. This step ensures your safety before you begin any inspection.
Tip: Double-check that the power is fully disconnected at the outlet or breaker. - 2
Check door balance visually
With the door closed, try lifting it by hand. It should move smoothly and stay in place when released halfway. If it drifts or requires heavy effort, the springs or balance system may be worn.
Tip: Do not attempt to adjust springs; call a professional if you suspect spring wear. - 3
Inspect tracks and hardware
Look for bent tracks, loose screws, and worn rollers. Use a level to confirm tracks run straight from header to floor. Clean debris from tracks and lubricate only hinge brackets and rollers with appropriate lubricant.
Tip: Securely tighten any loose screws before testing movement again. - 4
Evaluate safety sensors
Ensure sensor eyes are aligned and free of obstruction. Clean lens surfaces and realign if necessary. Test with both remote and wall switch to see if the beam indication changes.
Tip: If the sensor light is blinking abnormally, refer to the manual for fault codes. - 5
Test limit switches and remote operation
With the door lowered, operate the opener and observe where the door stops. If it closes too far or stops early, adjust the limit switches per the manufacturer’s instructions. Test multiple cycles to confirm consistency.
Tip: Document the exact travel distance after adjustment for future tweaks. - 6
Reassemble, verify and finalize
Reconnect power and run a full cycle: open, stop mid-way, and close fully. Listen for unusual noises and watch for binding. If issues persist, reassess or escalate to a pro.
Tip: Keep a running checklist of what worked to diagnose future problems quickly.
Got Questions?
What does garage door 495 refer to in this guide?
Garage door 495 is a practical troubleshooting label used in this guide to describe common symptoms and fault patterns homeowners encounter. It is not a universal model code, but a framework for diagnosing issues like misalignment, sensor errors, or opener faults.
Garage door 495 is a troubleshooting label for common door problems, not a specific model. We cover causes and fixes so you can diagnose safely.
Can I diagnose and fix these issues myself?
Yes, many 495-related issues are solvable with basic tools and careful safety steps. Start with power shutdown, visual inspection, sensor checks, and balance tests. If you encounter springs or high-tension components, stop and contact a professional.
Most fixes are DIY-safe if you avoid high-tension parts. When in doubt, reach out to a pro.
What tools are essential for garage door 495 troubleshooting?
Essential tools include an adjustable wrench, screwdrivers, a level, tape measure, safety glasses, gloves, a ladder, and a flashlight. Having a simple maintenance log helps track what fixes worked.
You mainly need basic hand tools, a level, a flashlight, and safety gear. A maintenance log helps too.
When should I replace parts versus the entire opener?
If multiple critical components wear out (springs, tracks, sensors) and repairs become frequent, replacement may be more cost-effective. Consider the age of the opener and the availability of newer safety features.
If several parts wear out and repairs pile up, replacing the opener could save time and money.
Are torsion springs dangerous to adjust?
Yes. Torsion springs store a lot of energy and can cause severe injury if mishandled. Do not attempt adjustments; call a licensed technician.
Springs are dangerous to adjust. Hire a pro for any spring work.
What maintenance should I perform regularly?
Inspect tracks, rollers, and hinges monthly; lubricate moving parts, tighten screws quarterly, and replace worn weatherstripping as needed. Schedule a more thorough check every 3-6 months.
Keep up with monthly checks and periodic lubrication to prevent future failures.
Watch Video
Quick Summary
- Identify whether the issue is mechanical, electrical, or both
- Never compromise safety—power off and secure the door first
- Balance and alignment are foundational to reliable operation
- Sensors and limit switches are common fault points
- Know when to replace components or upgrade to a newer opener