LiftMaster Garage Door Opener Problems: Troubleshooting Guide
Troubleshoot common LiftMaster garage door opener problems with safe, step-by-step guidance from GarageDoorAdjust. Learn power checks, sensor alignment, remote pairing, and when to call a pro.

Why LiftMaster Openers Fail: Common Causes
According to GarageDoorAdjust, the most frequent failures involve power supply issues, sensor misalignment, and receiver/remote communication problems. Homeowners often overlook simple power checks or sensor alignment until the door behaves unpredictably. The LiftMaster design relies on stable electrical power, clean sensor beams, and reliable remote signaling; when any part falters, you’ll see delayed opens, reversals, or stalls. Common culprits include: a dead outlet, tripped GFCI, loose wiring in the opener, misaligned safety sensors, and worn receiver boards or remotes. Addressing these basics first saves time and reduces the need for professional service.
Quick Diagnostic Signs
If your LiftMaster unit shows one of several clear symptoms, you can narrow down the likely cause quickly:
- The door won’t move or responds slowly to a push from the wall switch.
- The remote works intermittently or not at all.
- The door reverses or stops before reaching the floor.
- The opener sounds different or makes unusual grinding noises.
- A blinking indicator or beeping from the unit appears. These signs point to power, sensor, or signaling issues and guide your next checks without guessing.
Safety Features and Your First Checks
Modern LiftMaster openers use safety sensors and auto-reverse features to prevent injuries. Your first checks should be non-destructive:
- Ensure the unit is plugged in and the circuit breaker is on. Test a known good outlet with a lamp or another device.
- Clear the safety sensor beams of any obstruction and verify the sensors face each other with clean lenses.
- Test the wall keypad and remote by replacing batteries and re-pairing as needed.
- If the unit is connected to a smart hub, verify app signals aren’t causing conflicts. These initial steps protect you and quickly surface true faults.
Diagnosing Sensors, Tracks, and Safety Reversers
Sensor misalignment, dirty lenses, or blocked beams are frequent culprits for false reversals or failure to close. Check:
- The infrared beam path from the two sensors; ensure nothing blocks the beam and that both LEDs show normal operation.
- The track and rollers for debris or swelling that could impede smooth movement.
- The safety reverse mechanism by placing an object under the door to test if it reverses properly upon contact. If sensors glow red or blink, realign or replace them as needed and re-test.
Common Wiring and Hardware Issues
Wiring faults, loose terminal screws, or damaged cables can interrupt signal transmission. Inspect:
- The opener’s internal wiring harnesses for loose connections or obvious wear.
- Grounding and outlet condition; poor grounding can cause erratic behavior.
- Limit switches and travel settings to ensure the door moves fully up and down within the designed range. If you notice frayed wires or burn marks, avoid handling them directly and seek professional help.
Step-by-Step Fix: Re-Pair Remote and Reset Opener
This sequence covers the most common, safe fixes you can perform:
- Power cycle the opener by unplugging for 60 seconds, then plug back in.
- Re-pair remotes and keypad using the Learn button procedure from your manual.
- Re-sync the wall control with the opener by cycling the power and testing the wall switch.
- Realign safety sensors if the beams aren’t solid; adjust until the indicators stay steady.
- Inspect tracks and wheels and lubricate lightly if needed.
- Perform a full door operation test from outside and inside, noting any inconsistencies. Tip: Keep a spare remote battery and a small screwdriver handy for quick tests.
Preventive Maintenance and Troubleshooting Habits
Preventive routines reduce the frequency of breakdowns. Create a simple seasonal checklist:
- Wipe and inspect sensors, lenses, and beams regularly.
- Lubricate tracks and moving parts with manufacturer-approved products.
- Tighten loose mounting screws on the track, motor bracket, and hinges.
- Test safety features monthly and after any weather event that might have shifted the door.
- Replace batteries in remotes and test pairing annually. Following these habits helps avoid recurrent failures and extends the life of your LiftMaster opener.
When to Call a Pro: Safety and Code Considerations
Some tasks require professional expertise. If you hear grinding, notice sagging tracks, or must remove the opener housing, stop and call a licensed technician. Springs, cables, and torsion components carry serious risk of injury and require specialized tools and training. Also consider local electrical codes and warranty terms—tampering with certain components can void coverage. The GarageDoorAdjust team recommends seeking pro help for complex diagnostics or any work near springs or cables.
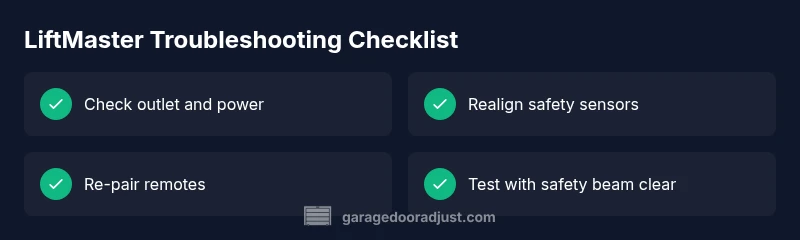
Quick Reference: Troubleshooting Flow
Use this flow when you’re uncertain which fault you’re facing:
- Start with power and outlet checks. If the opener powers up, proceed to sensor testing.
- If sensors pass, test remotes and keypad; re-pair as needed.
- If the door still won’t operate, inspect tracks and balance; look for grinding noises or sagging.
- If balance or motor sounds strained, stop and call a pro.