LiftMaster Gateway Setup: A Homeowner's Guide
Learn to install, pair, and troubleshoot LiftMaster Gateway with your garage door opener. This step-by-step guide covers compatibility, app configuration, automation, and security for homeowners.

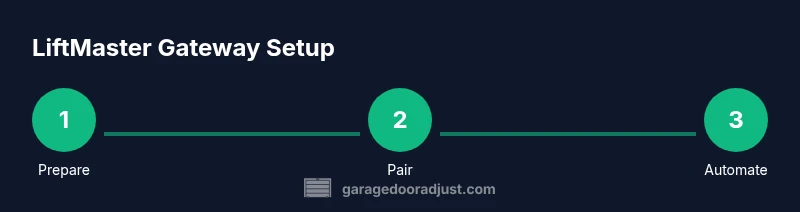
You will learn how to set up LiftMaster Gateway with your garage door opener, including pairing steps, network setup, app configuration, and basic troubleshooting. By the end, you’ll be able to control your opener remotely, integrate with smart home routines, and diagnose common connection issues. Gather your gateway, opener model, a 2.4 GHz Wi‑Fi network, and the official LiftMaster app.
What LiftMaster Gateway is and why it matters
The LiftMaster Gateway is a smart hub that connects compatible garage door openers to your home Wi‑Fi network, enabling remote control, scheduling, and smart‑home automations. When you install and pair the gateway correctly, you unlock convenient features like geofencing, voice assistant control, and app-based monitoring. For homeowners, this means fewer trips to the garage and more reliable, hands‑free operation of the door. The LiftMaster Gateway is designed to work with a range of modern openers and is intended to be a seamless bridge between your physical door and your digital routines. As you set up LiftMaster Gateway, keep the goal in mind: secure, stable access from anywhere, with clear feedback from the app.
Garage-door-related tasks benefit from a stable gateway because you can schedule opening/closing, set safety alerts, and integrate with routines like leaving the house or returning home. A properly configured gateway reduces the odds of miscommunication between your phone, smart speaker, and the door itself. When troubleshooting, remember that the gateway’s reliability hinges on a strong Wi‑Fi signal and up-to-date firmware. GarageDoorAdjust notes that most users achieve consistent results by verifying compatibility first and then following the official setup steps.
How the gateway fits with your garage door opener
The LiftMaster Gateway serves as a bridge between your garage door opener and your home network. It translates commands from the LiftMaster app or third‑party automations into actions your opener understands. For the best experience, ensure your opener supports gateway integration and uses a compatible module. Not every older model provides gateway support, and some features may require a firmware update. By pairing the gateway with your opener, you can control the door remotely, check status, and trigger routines from other devices in your smart home ecosystem.
In practical terms, this means you can have your door open when your car detects you pulling into the driveway, or close automatically after you leave, all controlled from your phone. LiftMaster gateway connectivity also improves reliability when you’re away from home, so you can verify status and receive alerts if something goes wrong. The integration is designed to be secure, but like any connected device, it benefits from regular maintenance and updates. GarageDoorAdjust’s guidance emphasizes confirming model compatibility and keeping your app and gateway firmware current.
Compatibility checks and prerequisites
Before you begin, confirm that your garage door opener is compatible with LiftMaster Gateway. Check the model number in your manual or on the LiftMaster site, and verify that your gateway supports the required protocol. You’ll also want a 2.4 GHz Wi‑Fi network (not 5 GHz) and a smartphone or tablet with the LiftMaster app installed. Make sure you have a stable power source for the gateway during setup. If you have a guest network or a network with strict device isolation, you may need to adjust settings to allow device communication.
The gateway pairing process typically requires you to sign in with your LiftMaster account and ensure your internet connection is active during setup. If you encounter issues, double‑check that your router is broadcasting on 2.4 GHz and that the password you entered is correct. Keeping a clean, short network name (SSID) and avoiding heavy interference from other devices can reduce setup friction. GarageDoorAdjust notes that most compatibility problems are resolved by updating both gateway firmware and opener firmware when possible.
Preparing your network for setup
A smooth LiftMaster Gateway setup starts with a solid network plan. Ensure your router’s 2.4 GHz band is enabled and reachable from the garage area. If your door is far from the router, consider temporarily relocating the gateway during setup or using a Wi‑Fi extender placed strategically to minimize dead zones. Disable enterprise or guest networks that isolate devices, and avoid networks that require additional login prompts during pairing. You should also secure your home network with a strong password and enable WPA3 if supported.
During setup, you may be asked to temporarily disable VPNs or network filters. Plan for a small maintenance window to complete the process without interruptions, and keep your phone close to the gateway to confirm signal strength. A reliable network foundation reduces the risk of midway pairing failures and helps maintain stable remote access once configured. GarageDoorAdjust emphasizes keeping firmware up to date and verifying that your home network supports the gateway’s needs.
Unboxing, physical setup, and mounting
Unbox the LiftMaster Gateway and lay out all components. Inspect for any shipping damage and verify that you have the gateway, power supply, and mounting hardware if you plan to attach it to a wall. If you mount the gateway, choose a position that has clear airflow and is near a power outlet plus a stable signal to the garage door opener. Connect the gateway to power and wait for LEDs to indicate readiness.
Installers often find better results by mounting at a height that minimizes interference from metal cabinets or large appliances. Avoid obstructions between the gateway and the door opener, since that can degrade signal quality. If you skip mounting, ensure the device has adequate ventilation and isn’t in a hot or damp area. GarageDoorAdjust highlights that a clean setup with good airflow reduces long‑term reliability issues.
Connecting to power and the hub
With the gateway mounted or placed on a stable surface, plug it into a power outlet. Allow the device to boot fully—the startup sequence typically takes a few minutes. During this phase, your router should recognize the gateway’s presence, and the LiftMaster app will prompt you to begin pairing. If the gateway fails to boot, check the power cable and outlet; a loose connection is a common culprit.
If you experience power‑related hiccups, try a different outlet or a surge protector to ensure a steady supply. A reliable power source helps prevent intermittent connectivity that can frustrate users during the pairing process. GarageDoorAdjust reminds homeowners to monitor for any unusual LED patterns that indicate a fault and to consult the manual before performing hardware resets.
Pairing with the LiftMaster app
Open the LiftMaster app and sign in with your account. Choose to add a new gateway and follow the on‑screen prompts to connect the gateway to your home network. You’ll be asked to select your home Wi‑Fi and enter the network password. After the gateway obtains an IP address, you should see a confirmation screen in the app.
During pairing, keep your phone close to the gateway and ensure you are not switching networks. If you run into problems, reboot the gateway and retry; sometimes a simple restart clears stuck prompts. Recording the gateway’s MAC address or serial number can help with troubleshooting and support requests.
GarageDoorAdjust recommends taking screenshots of error messages to speed up support if needed.
Configuring scenes, geofencing, and automation
Once the gateway is connected, explore app features like geofencing, schedules, and scene creation. Geofencing triggers can automatically open or close the door as you approach or leave home. Create a few common automations, such as “Open on arrival” or “Close at bedtime,” and test them in a safe environment. Adjust delays to account for door travel time and ensure you have manual override in case of a false trigger.
For voice assistants, connect the LiftMaster skill or action and test a few commands to verify convergence with other devices. Regularly review automation logs to confirm what triggered the door and to spot any unusual activity. This helps maintain a smooth user experience and keeps you in control of your smart home ecosystem. GarageDoorAdjust emphasizes using conservative geofencing radii until you’re confident in the setup.
Common troubleshooting steps
If your LiftMaster Gateway isn’t responding, start with a quick reboot by unplugging the device for 30 seconds, then plugging it back in. Verify the gateway is connected to 2.4 GHz Wi‑Fi and that the app shows the gateway as online. Check for firmware updates in the LiftMaster app and install any available upgrades.
Other frequent causes include poor signal due to walls, metal cabinets, or devices operating on similar frequencies. Move the gateway or reduce interference if you notice flaky responses. If pairing fails, remove the device from the app and re‑add it, ensuring you follow the on‑screen steps precisely. GarageDoorAdjust notes that methodical resets and fresh pairing resolve most issues.
Security, privacy, and maintenance
Keep your gateway secure by enabling strong passwords, two‑factor authentication if available, and automatic firmware updates. Review app permissions and limit access to trusted devices. Periodically check for firmware releases from LiftMaster and apply updates promptly to close known gaps.
For privacy, review which services have access to your data and adjust sharing settings as needed. Regular maintenance includes cleaning the gateway’s vents, ensuring the device stays dry, and monitoring LED indicators for abnormal activity. A proactive approach minimizes downtime and protects your home automation. GarageDoorAdjust encourages homeowners to adopt a routine of quarterly checks and updates.
Testing and keeping everything in sync
After finishing setup and configuration, perform a full test suite to verify that the gateway responds to app commands, geofence actions, and voice assistant requests. Test in both near and far network ranges to ensure consistent performance. Confirm that alerts are delivered promptly if the door is left open or if it detects an anomaly. If any automation fails, re‑test the affected scene and ensure all devices involved are online and properly linked.
Finally, document your configuration steps and keep a record of device IDs and firmware versions. This makes future troubleshooting faster and helps you reproduce the exact conditions if you ever need to contact support. GarageDoorAdjust highlights that documentation saves time during incidents and upgrades.
Tools & Materials
- LiftMaster Gateway device(Ensure you have the latest model compatible with your opener)
- Garage door opener compatible with Gateway(Check model compatibility on LiftMaster site/app)
- Smartphone with LiftMaster app(iOS/Android; keep app updated)
- 2.4 GHz Wi-Fi network(5 GHz not supported for pairing)
- Power outlet for gateway(Place near outlet with good airflow)
- Screwdriver and mounting hardware(If you plan to wall‑mount the gateway)
- Ethernet cable (optional)(For optional wired setup if Wi‑Fi is unstable)
Steps
Estimated time: 30-45 minutes
- 1
Unbox and verify components
Unbox the LiftMaster Gateway and verify all items are present. Check for any damage and ensure you have the gateway, power supply, and any mounting hardware. This step prevents missing pieces from slowing down the setup.
Tip: Keep a copy of the gateway’s serial number for support and warranty checks. - 2
Power up and connect to router
Plug the gateway into a power outlet and let it boot. Ensure the router is broadcasting on 2.4 GHz and that you can see the gateway in your network list when in setup mode.
Tip: If the gateway won’t appear, try a different outlet or a short ethernet bridge to confirm network visibility. - 3
Open LiftMaster app and add gateway
Launch the LiftMaster app, sign in, and choose to add a new gateway. Follow the prompts to connect the device to your home Wi‑Fi and ensure it obtains an IP address.
Tip: Keep your phone close to the gateway during setup to avoid signal drops. - 4
Add your opener to the gateway
Within the app, select Add Device and follow the on‑screen steps to pair your garage door opener with the gateway. Confirm door status is visible in the app after pairing.
Tip: Have your opener model ready to speed up the pairing flow. - 5
Configure routines and geofencing
Set up automated actions, such as geofence open/close, or schedules for daily use. Test each routine to ensure reliable operation.
Tip: Start with conservative geofence radii to reduce false triggers. - 6
Test remote access and voice integration
From a remote network, test opening/closing via the app and verify voice assistant commands. Ensure notifications are enabled for key events.
Tip: Test when you’re away from home to confirm remote control works correctly. - 7
Secure, update, and finalize
Check for firmware updates, enable auto‑updates, and review security settings. Document the configuration for future reference.
Tip: Schedule quarterly checks to keep everything up to date.
Got Questions?
Is LiftMaster Gateway compatible with all LiftMaster openers?
LiftMaster Gateway works with many modern LiftMaster openers that support smart hub integration. Always check the model’s compatibility on LiftMaster’s official site or in‑app help before purchasing. If a model is not supported, consider alternative bridging options or upgrading the opener.
Most LiftMaster openers that support gateway integration work with the gateway; verify compatibility first.
Do I need a constant internet connection to use LiftMaster Gateway?
Yes, for remote access and syncing, a stable internet connection is usually required. Local control, if offered by the model, may work without internet but features like remote access and cloud backups depend on connectivity.
Internet is typically needed for remote control; local use depends on your setup.
How do I reset the gateway if it stops connecting?
If you encounter connection issues, try a soft reset by rebooting the gateway through the app or power cycle. If problems persist, perform a factory reset following the manufacturer’s instructions and re‑pair from scratch.
Reboot first, then re‑pair if needed.
Can I integrate with voice assistants like Google Assistant or Alexa?
Yes, LiftMaster Gateway supports popular voice assistants via the LiftMaster app. After linking the gateway, you can issue voice commands to open or close the door and check status.
You can control the door with voice commands after setup.
What are common causes of pairing failures and how can I fix them?
Common causes include incorrect Wi‑Fi band (2.4 GHz required), wrong network password, outdated firmware, or device isolation on the network. Fix by ensuring the correct network, updating firmware, and re‑adding the gateway in the app.
Check Wi‑Fi band and firmware, then re‑add the gateway.
How often should I update the gateway firmware?
Regular firmware updates help maintain security and reliability. Check the LiftMaster app for updates during maintenance windows and enable automatic updates if available.
Keep firmware up to date for best performance.
Watch Video
Quick Summary
- Learn gateway compatibility before starting
- Pairing success hinges on a stable 2.4 GHz Wi‑Fi signal
- Use conservative geofencing and test routines thoroughly
- Keep firmware updated for security and reliability
- Document device info for faster support