How to Fit a Garage Door Draught Excluder: A Homeowner's Guide
Learn how to fit a garage door draught excluder to seal gaps, reduce drafts, and improve energy efficiency. Step-by-step guidance, tools, safety tips, and maintenance advice from GarageDoorAdjust.

You will learn how to fit a garage door draught excluder, including selecting the right type, measuring gaps, and installing it along the door bottom. You'll need basic tools, weather-stripping material, and a clean door surface. This guide covers step-by-step safety tips and maintenance considerations.
Why fitting a garage door draught excluder matters
According to GarageDoorAdjust, sealing the bottom edge of a garage door with a good draught excluder reduces drafts and helps maintain a stable interior temperature. This simple upgrade is especially beneficial for older garages where weather stripping has worn away or gaps have opened along the bottom panel. A properly chosen excluder also minimizes dust, pollen, and water intrusion during rain or snow, keeping the workspace drier and more comfortable. In addition to comfort, homeowners often notice lower energy bills once the door is well sealed, since the heater or air conditioner doesn’t have to compensate for cold air leaking in. This guide will walk you through selecting the right type, measuring gaps, and installing the excluder with safety in mind, so you can complete the job confidently in a weekend. The GarageDoorAdjust team found that a snug, correctly installed draught excluder is a reliable, low-cost fix that pays back over time.
Choosing the right draught excluder for garage doors
Garage doors come in various styles—sectional, up-and-over, and single-panel designs—and the bottom edge can vary in shape. The right draught excluder depends on your door type, climate, and how large the gaps are. Common options include: brush seals that glide with uneven gaps; rubber or vinyl bottom seals that compress evenly; and hybrid foam-rubber profiles that seal tightly while allowing door movement. For a metal or painted surface, choose a low-residue adhesive or a clip-on model to minimize damage. When shopping, measure the width of the bottom edge and any corners that might rub, then pick a product rated for garage use and compatible with exterior exposure. Keep in mind that some excluders are designed for interior use only, while others withstand moisture and temperature swings. GarageDoorAdjust recommends matching the excluder to the door’s profile and climate to maximize performance.
Measuring gaps and preparing the door surface
Before you buy or trim anything, prepare the work area and measure the gaps along the bottom edge. Close the door fully and use a ruler or measuring tape to note the widest gap at each corner and in the middle. Clean the bottom edge with a mild detergent and a clean cloth to remove dust, oil, and old residue. Allow the surface to dry completely, then wipe with an alcohol-based cleaner if the manufacturer recommends. If there are loose weather stripping remnants, remove them so the new excluder can sit flat. A clean, dry surface is essential for adhesive-backed excluders to stick firmly and for clip-on types to seat correctly. If the door has floor irregularities or a warped bottom plate, you may need to adjust the excluder length accordingly or consider a different product.
Step-by-step installation overview
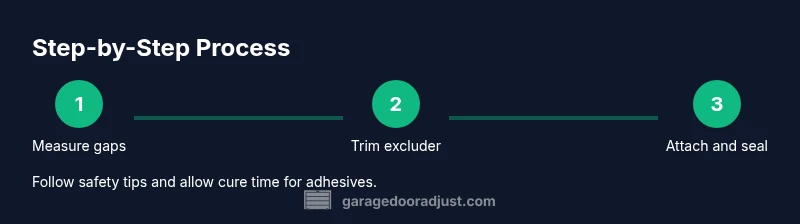
This section provides a concise overview of the steps you’ll perform, which are detailed in the STEP-BY-STEP block below. By following a logical sequence—measure, trim, fit, secure, test—you ensure a snug seal without hindering door movement. Expect to spend about 45–60 minutes for a typical single garage door. If you’re working in chilly or damp conditions, allow for extra drying time after any adhesive application. Always wear gloves and keep hands clear of moving parts. Ensure the door is closed and the opener is disconnected if you need to operate the door manually during installation. With the right tools and a careful approach, you can complete the project in a weekend without professional help, and the result will be a warmer, more energy-efficient garage.
Common mistakes and how to avoid them
Common errors include trimming the excluder too short, which leaves a gap, choosing a product not suited for exterior use, and applying adhesive to a surface that isn’t clean or dry. Another frequent issue is positioning the seal too high or too low, causing it to rub against the door or frame instead of sealing the gap. To avoid these mistakes, measure twice, trim once, and test the door’s full travel after installation. If you notice the seal compressing excessively or hindering movement, back off and reposition. Check for loose ends that could catch during operation, and if you must cut, do so gradually and test fit frequently.
Maintenance and long-term care
Inspect the draught excluder every season for signs of wear, cracking, or detachment. Clean it periodically to prevent dust buildup, which can reduce adhesion or seal effectiveness. Re-apply adhesive or reseal joints if the seal begins to peel away from the door edge. Lubricate the hinge and track areas separately, but avoid oils on the draught excluder material itself. If you live in a climate with heavy snowfall or rain, verify that the seal remains watertight and replace it if moisture has caused swelling or warping. Regular checks help you catch issues early and maintain the energy-saving benefits.
Final notes and expert verdict from GarageDoorAdjust
The GarageDoorAdjust team believes a well-fitted draught excluder is a practical, low-cost upgrade for most homes. As long as you select the right type, prepare the surface, and follow the step-by-step installation, you can achieve a durable seal that reduces drafts and improves comfort. The team’s verdict is to treat this as a maintenance task you check annually, not a one-time fix. If the door’s bottom edge is severely warped or the track shows damage, address those issues first or consult a professional. Remember, the goal is a snug seal that allows normal door operation without binding or excessive resistance.
Authority sources
- Energy.gov: Weatherstripping tips and home sealing (https://www.energy.gov/energysaver/weatherstripping)
- University extension resources on doors and weatherization (https://extension.illinois.edu)
- National Institute of Standards and Technology (NIST) general guidelines on energy efficiency and building performance (https://www.nist.gov)
Tools & Materials
- Garage door bottom draught excluder kit (brush, rubber, or vinyl)(Choose type compatible with door profile and measure the gaps)
- Measuring tape(Minimum 3-5 meters depending on door width)
- Utility knife or scissors(For trimming the excluder to fit)
- Cleaning cloths and mild detergent(Prepare surface; remove dust and debris)
- Isopropyl alcohol or mild solvent(Degrease and prep surface as recommended by the product)
- Adhesive or silicone sealant (if required by excluder)(Only if the kit requires adhesive; avoid excess squeeze-out)
- Screws, washers, and mounting hardware (if included in kit)(Use only if provided or needed for securing ends)
- Drill with appropriate bits and screwdriver bit(For screws or anchors if used)
- Safety gloves(Wear when cutting or handling sharp materials)
Steps
Estimated time: 45-60 minutes
- 1
Measure gaps and pick the excluder
Close the door fully and use a tape measure to assess the bottom edge. Note the widest gap and any high spots. Use these measurements to choose a draught excluder type (brush, rubber, or vinyl) that suits your door and climate.
Tip: Measure at multiple points along the edge to catch uneven gaps. - 2
Prepare the door surface
Clean the bottom edge thoroughly with a mild detergent and a lint-free cloth. If old residue remains, gently scrape or dissolve it with a compatible solvent. Ensure the surface is dry before applying adhesive.
Tip: A clean, dry surface ensures better adhesion and a longer-lasting seal. - 3
Trim the excluder to fit
Hold the excluder along the door edge and mark the cut line to fit the width. Use a sharp utility knife or scissors and trim slowly. Check fit frequently and trim small increments to avoid making it too short.
Tip: Trim conservatively; you can always shorten but can’t add material once cut. - 4
Position the excluder along the bottom edge
Place the excluder centered along the door’s bottom edge. Ensure it sits evenly from side to side and doesn’t interfere with floor clearance or door movement.
Tip: Avoid compressing during placement; leave a tiny gap for expansion in temperature extremes. - 5
Attach the excluder
Apply adhesive to the back of the excluder if required by the kit and press firmly onto the door edge. If your kit uses screws, line up the mounting points and tighten evenly without over-tightening.
Tip: Wipe off excess adhesive immediately to prevent staining the door. - 6
Seal ends and corners
Ensure the ends meet the door jambs cleanly. Use corner trims or additional sealant to close any gaps where the edge meets the frame.
Tip: Test each corner by closing the door gently to confirm no binding occurs. - 7
Test door operation
Fully open and close the door several times to verify smooth operation and seal contact. Look for rubbing, binding, or gaps that open during travel and adjust as needed.
Tip: If binding occurs, re-check alignment and trim or reposition the excluder slightly. - 8
Finish and clean up
Remove any masking, wipe away residue, and allow adhesive to cure according to product instructions. Store extra materials for future maintenance.
Tip: Ventilate the area if using solvent or adhesive that emits fumes.
Got Questions?
Is it safe to install a garage door draught excluder myself?
Yes, with basic tools and careful steps. Ensure the door is secured and the opener is disconnected if you work manually. Follow the manufacturer’s instructions for your chosen excluder.
Yes, you can install it yourself if you follow the steps and keep the door secure while you work.
What types of draught excluders work best for garages?
Common options include brushes, rubber, and vinyl seals. The best choice depends on door type, gap size, and exposure to moisture.
Brush, rubber, or vinyl seals each have pros; your climate and door type decide what works best.
Will it affect door balance or operation?
When installed correctly, a draught excluder should not affect door balance or operation. If you notice binding, adjust alignment or seek professional help.
If installed properly, it shouldn’t affect how your door moves. If you see binding, recheck the fit.
How do I know if I trimmed enough or too much?
Trim gradually and test full movement. There should be a snug seal without rubbing or excessive resistance.
Trim a little, test, and adjust as needed to avoid gaps or binding.
How often should I replace a draught excluder?
Inspect seasonally and replace if worn, cracked, or peeling away from the door edge.
Check it yearly and replace when worn for best results.
Can I use a draught excluder with an automated garage door opener?
Yes, but ensure the excluder does not interfere with the door’s travel path or sensors. Choose a profile designed for automated doors.
Yes, just make sure it doesn’t touch the sensors or interfere with movement.
Watch Video
Quick Summary
- Seal the bottom edge to cut drafts and improve comfort.
- Choose the excluder type to match door profile and climate.
- Measure accurately and test travel before finalizing.
- Secure properly and check ends for gaps.
- Perform annual checks for wear and re-seal as needed.