How to Fit a Garage Door Motor to an Existing Door
Learn how to fit a garage door motor to an existing door with a practical, step-by-step guide. Includes compatibility checks, mounting, wiring, safety features, and final testing for safe operation.

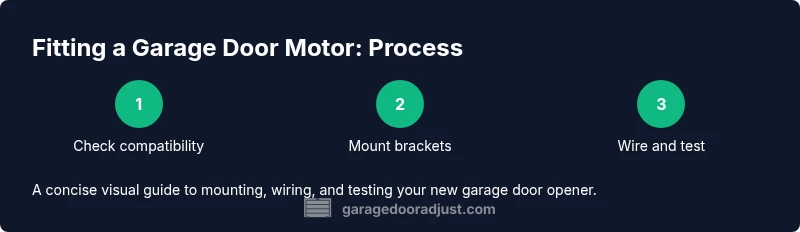
Yes, you can fit a garage door motor to an existing door by selecting a compatible opener kit and adapting the mounting brackets for your door type. First confirm the door weight, track configuration, and rail length, then gather essential tools and safety gear. Follow these steps to install, wire, and test the opener safely.
Assessing Compatibility and Choosing the Right Motor
According to GarageDoorAdjust, start by confirming compatibility between your existing door and the motor kit. Analyze door type (torsion vs extension springs), weight class, track height, and mounting options. The best motor for an existing door will specify a weight range that covers your door and includes a compatible rail length and bracket kit. If uncertain, consult manufacturer specs or GarageDoorAdjust Analysis, 2026. A motor with adjustable torque and built-in safety features like auto-reverse will save headaches later. Ensure the ceiling clearance is sufficient for the rail and that the mounting area is unobstructed. Finally, verify that the kit includes all brackets, fasteners, and rail adaptors to fit your door without fabricating new parts.
Preparing the Workspace and Safety Precautions
Before you begin, clear the workspace and shut off power to the existing door opener circuit at the breaker. Wear safety glasses and gloves, and keep children and pets away. Inspect the door balance by manually lifting when the springs are at rest; a poorly balanced door can cause opener strain. Gather your tools and lay out hardware in labeled containers. Measure distances for rail placement and mark drill holes on the ceiling and wall framing. Finally, read the motor kit's installation manual and confirm compatibility with your door and track.
Installing the Motor: Mounting Brackets and Rail to the Ceiling
Mount the mounting brackets to the ceiling or wall according to the kit instructions, ensuring the brackets are level and aligned with the door track. Attach the rail to the motor, then lift and secure the motor housing to the brackets. Use a helper if the motor is heavy. Check that the rail is perfectly plumb and that there is equal distance from the door to the roller brackets on both sides. Tighten bolts gradually to avoid bracket deformation. This step requires careful alignment to ensure smooth operation and quiet performance.
Wiring, Programming, and Testing the System
Connect the motor to the existing power supply following the kit's wiring diagram; do not modify house wiring beyond what the manual allows. Install safety sensors on either side of the door track and connect them to the opener as directed. Program the remote controls and wall switch, then perform a controlled test: lower the door slowly, check auto-reverse at resistance, and listen for odd noises. If the door binds or the track rubs, stop and re-align before proceeding. Finally, test in multiple modes (manual, auto, obstacle) and ensure sensor beams are unobstructed.
Final Checks and Maintenance Plan
With the opener installed and tested, perform a final balance check: disconnect the door and let it rest to confirm the springs hold balance. Lubricate moving parts with a light garage door lubricant, avoiding excessive lubrication on tracks. Label the power-off procedure and create a simple maintenance schedule: quarterly track checks, annual spring inspection, and prompt replacement of worn parts. Keep the owner's manual in an accessible location; log any changes to settings or sensor positions.
Tools & Materials
- Electric drill with assorted bits(Focus on wood and metal bits; 1/4 inch chuck)
- Socket/wrench set(Bolt and nut sizes compatible with motor kit)
- Screwdrivers (Phillips and flat-head)(For brackets and covers)
- Tape measure(Verify distances for rail and brackets)
- Level(Keep brackets and rail plumb)
- Pencil and markers(Mark drilling points and alignment lines)
- Safety glasses and gloves(Personal protection while installing)
- Ladder or scaffolding(Safe access to ceiling mounting points)
- Voltage tester or breaker off method(Ensure circuit is de-energized before wiring)
- Mounting hardware kit (brackets, screws, rail adapters)(Included with motor kit)
- Wire cutters/strippers(Electrical wiring tasks and trimming)
Steps
Estimated time: 2-4 hours
- 1
Determine compatibility and plan layout
Assess door type and weight, track height, and mounting options. Create a layout diagram showing bracket placement and rail path before you drill.
Tip: Double-check weight range and rail length before purchasing. - 2
Power down and prepare workspace
Shut off the circuit feeding the opener, disconnect the sensor wires if present, and clear the area. Ensure the door is in the down position and secured.
Tip: Lock the door in down position with clamps or wedges. - 3
Mount ceiling brackets and rail
Install brackets on joists, level them, and attach the rail to the motor. Ensure alignment with the door track.
Tip: Use a helper to lift the motor safely. - 4
Attach motor to brackets and align
Mount the motor housing to brackets, connect the rail, and verify smooth travel with the door. Adjust as needed.
Tip: Check clearance around the rail for obstructions. - 5
Connect door arm and trolley
Attach trolley to the rail and connect the door arm to the trolley and door bracket. Adjust for correct engagement.
Tip: Make sure there is no binding when moving manually. - 6
Wire, program, and test
Connect wiring per diagram, program remotes and wall controls, install sensors, and test operation. Run through several cycles and check safety features.
Tip: Test auto-reverse with an obstacle and at low speed.
Got Questions?
Do I need a professional to fit the motor?
Not always, but if you're unsure about wiring or springs, hire a pro. Improper installation can cause injury or door damage.
You can if you're confident with electrical work and tools; otherwise, hire a pro.
What safety features should I verify?
Auto-reverse, safety sensors, and manual release should function correctly. Test these before regular use.
Make sure auto-reverse, sensors, and the release work.
How long does installation take?
Most installations take 2-4 hours depending on door type and mounting complexity.
Usually a few hours.
Can I reuse existing tracks and brackets?
If compatible with the new motor, you may reuse but ensure alignment and weight support.
You might reuse parts if the kit supports your rails and brackets.
What maintenance after installation?
Lubricate moving parts regularly, inspect springs and tracks annually, and replace worn components.
Keep it oiled and check annually.
What if the door is unbalanced?
Do not attempt long-term use; balance the door or call a pro.
If the door isn’t balanced, stop and call a professional.
Watch Video
Quick Summary
- Plan compatibility before starting
- Power down and secure the workspace
- Ensure precise mounting for smooth operation
- Program remotes and sensors after installation
- Schedule periodic maintenance