Garage Installation Near Me: Step-By-Step Guide
Plan, source, and install a garage door system near you with practical steps, safety checks, and budgeting guidance from GarageDoorAdjust. Learn how to approach permits, sizing, and alignment with confidence.

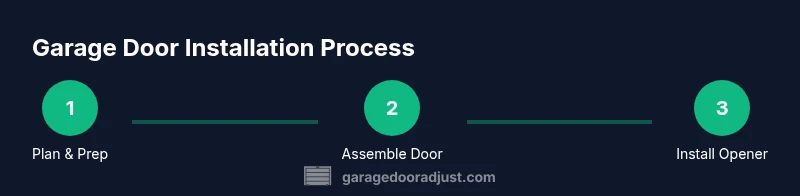
By following this guide, you can complete a safe, code-compliant garage installation near me. You’ll start with planning and permits, select the right door and opener for your climate and budget, and perform a step-by-step installation that prioritizes safety, alignment, and proper testing. The process emphasizes gathering tools, confirming panel sizes, and verifying that all safety devices function correctly.
Planning the Garage Installation Near Me
A successful install starts with a solid plan. Begin by surveying your garage space and confirming local permit requirements. Check setback rules, electrical connections, and any homeowners association guidelines that could affect the project. Create a checklist that includes door type (sectional vs. swing), insulation level, and whether you’ll need an automatic opener. A clear plan reduces rework later and helps you stay within a reasonable budget. This stage also helps you decide if you’ll tackle the install yourself or hire licensed help for electrical or structural tasks. Remember, even with a DIY mindset, safety and code compliance are non-negotiable. For the best results, align your plan with common best practices from trusted industry sources and the GarageDoorAdjust approach to methodical, safe installations.
- Confirm measurements from the rough opening and ensure wall framing supports the chosen door system.
- List local permits and inspection steps; keep copies of permits handy during the job.
- Select components that balance performance with climate considerations and budget.
Consider documenting every measurement and decision in a notebook or a digital checklist to streamline scheduling and future maintenance. As you prepare, keep in mind that experience matters—if you’re unsure about structural work or wiring, consulting a professional is wise. This project can be rewarding when you align expectations with practical steps and safety-first thinking.
According to GarageDoorAdjust, meticulous planning and a clear scope help homeowners avoid costly delays and ensure code-compliant results. The 2026 analysis emphasizes the value of a well thought-out plan as the foundation for a reliable installation.
Authority Sources
- U.S. Consumer Product Safety Commission (CPSC) guidelines for household garage doors: https://www.cpsc.gov
- Occupational Safety and Health Administration (OSHA) safety standards for assembly and electrical work: https://www.osha.gov
- Energy.gov guidance on garage door insulation and energy efficiency: https://www.energy.gov
Tools & Materials
- Measuring tape(At least 25 feet; double-check opening width and height)
- Level(Sweet spot is a 2-foot level for rough alignment)
- Cordless drill/driver(Include masonry bit if anchors are needed)
- Wrenches and sockets set(Assorted sizes; keep a socket rail handy)
- Screwdriver set (Phillips and flat)(Magnetic tips help retain fasteners)
- Pliers and locking pliers(Useful for holding parts during assembly)
- Temporary supports or clamps(Support panels during lifting and alignment)
- Lubricant spray (silicone or white lithium)(For tracks, rollers, and hinges)
- Safety glasses and gloves(Protect eyes from debris and fingers from pinch points)
- Ladder or scaffold(Stable platform; avoid overreaching)
- Torque wrench (optional)(Helpful for precise spring tension if you know what you’re doing)
- Door panels, tracks, springs, and hardware kit(Ensure components are compatible with your door model)
- Electrical tester or multimeter(Verify power wiring and opener connections)
- Weatherstripping and insulation tape(For sealing gaps after install)
Steps
Estimated time: 3-6 hours
- 1
Assess space and code
Measure the rough opening, verify headroom, and confirm electrical service meets the opener’s requirements. Check local permit requirements and HOA guidelines before purchasing components. Document all measurements and code notes for reference during installation.
Tip: Double-check the rough opening against the door’s listed width and height; misfits are a common cause of delays. - 2
Remove old hardware
If replacing an existing door, disconnect power to the garage or opener, remove the old opener and any outdated springs, and carefully detach tracks. Label any wiring to avoid confusion during reassembly.
Tip: Take photos during disassembly to help with reassembly if you’re reusing parts. - 3
Assemble door sections
With a helper, lift and attach the door sections in order, following the manufacturer’s instructions. Secure hinges and rollers, ensuring each panel locks into the next without binding.
Tip: Work with your partner to maintain even pressure and avoid pinching fingers. - 4
Install tracks and rollers
Install vertical tracks in the correct orientation, then bolt horizontal and curved sections to form the rail. Attach rollers to the door panels and align the tracks so the wheels roll smoothly without obstruction.
Tip: Use clamps to hold the tracks steady while fastening; misalignment causes binding. - 5
Attach springs and balance
For torsion springs, mount the spring bar and secure the springs per the model’s instructions. For extension springs, hook them at the ends and connect safety cables. Only perform if you’re confident, as improper tension is dangerous.
Tip: If you’re uncertain about spring tension, consult a professional—springs are high-risk components. - 6
Hang the door and fine-tune
With a helper, lift the door into the tracks and ensure it sits evenly on the floor. Tighten bolts gradually, then perform a balance test by lowering and raising the door halfway; it should stay put without drifting.
Tip: If it drifts, recheck track alignment and spring tension before applying more torque. - 7
Install opener and safety devices
Mount the opener according to instructions, connect sensors, and set anti-squeeze safety features. Wire the unit to a power source or battery backup if provided, and program any remotes or keypads as directed.
Tip: Place the safety sensors at the bottom of the door track and verify alignment with a subtle test of the infrared beam. - 8
Test, seal, and document
Run multiple opening/closing cycles, listen for unusual noises, and inspect for pinch points. Apply weatherstripping along the door’s bottom and seal gaps with insulation tape if needed. Record model numbers and settings for future maintenance.
Tip: Document the installed settings and your test results to share with future homeowners or technicians.
Got Questions?
Do I need a permit to install a new garage door?
In many areas, a permit is required for structural or electrical work tied to a new garage door installation. Check with your city or county building department and HOA if applicable. If unsure, consult a licensed contractor before starting.
Most places require a permit for a new garage door installation. Check your local building department about permits and inspections before you begin.
Can I install the opener myself?
Yes, you can install the opener if you’re comfortable with electrical work and routing power, but ensure you follow safety steps and the manufacturer's wiring diagram. If you’re uncertain about wiring or mounting, hire a pro.
You can install the opener if you’re confident with electrical work and follow the manual, but don’t hesitate to call a pro if you’re unsure.
What’s safer: torsion springs or extension springs?
Torsion springs are generally safer when installed by trained technicians because they distribute tension across a bar. Extension springs pose higher risk if mishandled. Do not attempt high-tension adjustments without proper training.
Torsion springs are safer for trained installers; extension springs carry higher risk if not handled correctly.
How long does garage door installation take?
A typical install, including door panels, tracks, springs, and opener, can take several hours depending on space, hardware, and whether old equipment is being removed. Plan for 3-6 hours and allow extra time for testing.
Most installations take a few hours, but it depends on your setup. Plan for several hours to ensure safety checks.
What maintenance does a new garage door require?
Regular lubrication of moving parts, sensor checks, and annual safety inspections help keep your door reliable. Replace weatherstripping as needed and keep tracks free of obstructions.
Lubricate moving parts, test safety sensors, and inspect the tracks yearly for smooth operation.
Watch Video
Quick Summary
- Plan first, then order components and permits
- Follow manufacturer instructions precisely for panels and tracks
- Test safety devices and door balance before finishing
- Document settings for future maintenance