Garage Door Opener Home Depot Installation: Step-by-Step Guide
Learn how to install a garage door opener purchased from Home Depot with a safe, methodical approach. This guide covers compatibility checks, tool lists, step-by-step mounting, wiring, programming remotes, testing, and maintenance for a reliable, long-lasting setup.

This guide helps homeowners complete a garage door opener home depot installation safely and successfully. You’ll verify compatibility, assemble and mount the unit, connect wiring, mount the rail, program remotes, and test the system. Expect a 2-4 hour process depending on door type, electrical access, and your DIY experience.
Why this guide matters
According to GarageDoorAdjust, a structured install checklist reduces errors, safety risks, and callbacks when mounting a new garage door opener sourced from Home Depot. This guide is written for homeowners who want control over the installation, while still honoring manufacturer instructions and local code requirements. You’ll learn how to assess your door, pick the right model, prepare the space, and execute the install with proper safety practices. The goal is a quiet, reliable opener that operates smoothly with your existing wiring and hardware, and that you can troubleshoot confidently if needed.
Home Depot offers a wide range of openers, from belt-driven quiet models to torsion-based heavy-duty units. The GarageDoorAdjust team emphasizes planning, measuring, and following the manual step-by-step to reduce misalignment and performance issues later on. By preparing in advance and using a tried-and-true sequence, you’ll shorten downtime and avoid common mistakes that lead to nuisance beeps, misaligned tracks, or unsafe door behavior.
Compatibility and preparation
Before you buy or start the installation, confirm key compatibility points: door height, door width, spring type, existing electrical outlet proximity, and ceiling clearance. A compatible opener should match the horsepower rating for your door weight and track length, and the rail length should extend properly from the ceiling bracket to the trolley. Home Depot’s installation guides and model specifications typically cover these items, but you should cross-check against your door’s measurements and the opener’s manual. In addition, clear the garage floor of obstacles and ensure the power source is accessible without overloading the circuit. The GarageDoorAdjust team recommends dedicating a single circuit if possible to avoid tripping during operation.
Tools and materials overview
Having the right tools on hand saves time and reduces the risk of mistakes. A typical installation requires a drill with bits, a stud finder, a level, a measuring tape, a ladder, and a screwdriver set. You’ll also need a voltage tester, adjustable wrench, pliers, wire nuts, and safety gear such as glasses and gloves. Check the opener’s hardware kit for any model-specific fasteners and brackets. Preparing a clean workspace and gathering all items before you begin is a hallmark of a smooth install and helps prevent mid-project trips to the hardware store.
Choosing the right opener from Home Depot
Opener options vary by drive type (belt vs chain), horsepower, and features (wifi connectivity, battery backup, smart programming). Belt-driven models are typically quieter and well-suited for attached garages, while chain-driven units offer rugged performance at a lower price. Consider additional features such as smartphone control, remote programming, vacation mode, and compatibility with existing remotes. Compatibility with your existing track and header is essential, as is ensuring that the unit’s rail length fits your ceiling height. The GarageDoorAdjust team notes that selecting a model with a strong safety system and modern sensors pays off in long-term reliability.
Step-by-step overview of installation workflow
This section provides a high-level narrative of the installation process, to complement the detailed steps in the STEP-BY-STEP block. Expect to prepare the space, assemble the rail and brackets, mount the header bracket, install the rail, attach the trolley, and wire safety sensors and power. You’ll then mount the opener, connect the rail to the door, secure the safety eyes, and perform initial testing. Throughout, follow the manufacturer’s instructions and your local codes. The workflow emphasizes safety, alignment checks, and proper torque on fasteners. GarageDoorAdjust stresses documenting measurements before you begin to minimize rework.
Electrical safety, wiring, and safety features
Electrical work requires caution: always disconnect power before handling any wiring, and verify there is no current with a tester. Run the wall control and sensor wiring according to the model’s diagram, ensuring that the photoelectric sensors are placed at the proper height and angle. Install the safety sensors away from heat sources and moving parts to prevent false trip conditions. Grounding and proper conduit routing help prevent shock hazards and electrical noise that can affect performance. You should also verify your local codes regarding garage wiring and any required permits. The GarageDoorAdjust team reiterates that safety is non-negotiable and that following the manual minimizes risk.
Programming remotes, keypads, and safety checks
After mounting and wiring, program the remotes and pair any keypads with the opener. This typically involves pressing a learn button on the unit and following prompts on each remote. Test all controls from different locations to confirm reliable operation, including the wall control, remotes, and any smart integrations. Calibrate travel limits and force settings per the model’s instructions to ensure the door stops at the correct height and does not bind. The brand recommends keeping a spare remote handy and labeling remotes to avoid confusion during family use.
Testing, calibration, and maintenance after install
Perform a thorough test of all functions: open, close, force limits, auto-reverse, and lock mode if available. Listen for grinding noises and check that tracks remain aligned after operation. If the door shows resistance, pause and re-check alignment and fastener torque. Schedule regular lubrication of moving parts and inspect springs and cables for signs of wear. Finally, store product manuals and receipts for warranty claims and future maintenance. The GarageDoorAdjust team highlights that a well-maintained system reduces the risk of sudden failure and prolongs the opener’s lifespan.
Authority sources and next steps
For safety standards and best practices, consult reputable sources: OSHA guidance on garage electrical safety, the U.S. Department of Energy for energy-efficient garage door operation, and university extension resources for installation tips. These references help homeowners understand the broader context of safe, code-compliant installation. GarageDoorAdjust recommends cross-referencing model-specific manuals with these sources to ensure you’re meeting current safety and performance expectations.
Final checklist before launch
Before you power on the system, confirm that the door balance is correct, rails are secure, and all fasteners are tightened to spec. Ensure the door can be opened and closed smoothly with and without the opener, both manually and with the operator. Verify that safety sensors are aligned and nothing blocks their path. Keep children and pets away during the initial tests, and have a helper ready to assist with heavy components. The GarageDoorAdjust team would remind homeowners to perform a final run-through in a dry, clear area to catch any missed steps.
Tools & Materials
- Power drill with bits(Phillips and flat head bits; 1/8in to 5/16in sizes depending on fasteners)
- Stud finder(For locating ceiling joists to support brackets)
- Level(Laser level or bubble level for accurate alignment)
- Tape measure(To verify rail length and ceiling height)
- Ladder or scaffold(Stable, two-person support if needed for heavy components)
- Safety glasses(ANSI-rated eye protection)
- Gloves(Grip and cut protection)
- Wrench set and pliers(Open-ended and adjustable wrenches, plus needle-nose pliers)
- Screwdrivers(Flat and Phillips head, assorted sizes)
- Wire nuts and electrical tape(For sensor wiring and basic electrical connections)
- Voltage tester(Confirm no power is present during wiring)
- Torque wrench(Useful for verifying fastener torque on some models)
- Pencil and marker(Mark mounting locations and reference points)
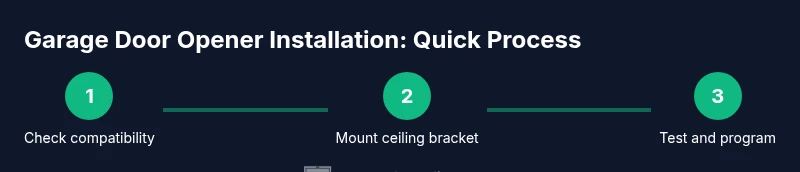
Steps
Estimated time: 2-4 hours
- 1
Read the manual and prep space
Review the product manual and model-specific instructions. Clear a workspace, lay out components, and check that you have all necessary hardware. Confirm your ceiling height and door type so you can choose the correct rail length and mounting brackets.
Tip: Double-check model compatibility against your door size and track length before beginning. - 2
Shut off power and confirm wiring is safe
Locate the circuit breaker for the garage and switch it off. Use a voltage tester to confirm no current is present at the outlet. This ensures your safety when handling electrical components and wiring.
Tip: Always test with a tester after turning off the breaker to avoid shocks. - 3
Mount the ceiling bracket and header
Secure the ceiling bracket to a joist or solid surface and install the header bracket. Ensure the bracket is level and aligned with the door opening so the rail will run smoothly.
Tip: Use a level to verify the bracket stays perfectly vertical during mounting. - 4
Assemble and install the rail sections
Assemble rail sections per the manufacturer’s instructions and attach them to the header bracket. Extend the rail toward the garage door, ensuring there is sufficient clearance and that the trolley will move freely.
Tip: Avoid forcing rail sections; connect them gently and snugly to prevent misalignment. - 5
Mount the opener and attach the rail
Lift the opener and secure it to the ceiling mounting bracket. Attach the rail to the trolley and secure any rail fasteners. Make sure the opener is centered and balanced for smooth operation.
Tip: Ask for a helper when handling heavy components to prevent injuries. - 6
Install safety sensors and power wiring
Position the safety eyes on opposite sides of the door, aligned at the specified height. Run power and sensor wires according to the diagram, securing wires away from moving parts.
Tip: Keep wires away from sharp edges and ensure proper strain relief at entry points. - 7
Program remotes and wall control
Use the opener’s learn button to pair remotes and wall controls. Test each remote from different zones in the garage to confirm reliable operation.
Tip: Label remotes to prevent confusion among household members. - 8
Test operation and calibrate travel limits
Open and close the door to verify smooth motion. Adjust travel limits and force settings per the unit’s instructions so the door stops correctly and reverses if necessary.
Tip: Make small offset adjustments to avoid over-tightening limits.
Got Questions?
Do I need an electrician to install a garage door opener?
Most 120V garage door opener installations do not require a licensed electrician if you have a dedicated circuit and a reachable outlet. If you must run new wiring or modify the service, consult a qualified electrician and follow local codes.
Most homeowners can install it themselves if they have basic electrical skills; otherwise, get a pro for wiring changes.
Can I install a garage door opener myself even if I’m not experienced?
Yes, for many models, especially belt-driven variants, with careful reading of the manual and adherence to safety steps. If you encounter unfamiliar wiring or heavy lifting, pause and seek professional help.
You can DIY if you’re comfortable with electrical work and mechanical assembly, but don’t hesitate to hire a pro if you’re unsure.
Will my existing tracks and door work with a new opener?
Compatibility depends on the rail length, drive type, and mounting hardware. In many cases, an adapter or new rails are required. Always verify with model specifications and the garage door’s measurements.
Check the opener’s compatibility guide and measure your current tracks before buying.
What safety features should I expect in a modern garage door opener?
Modern openers include automatic reversal, photoelectric sensors, manual release, and secure remotes. These features help prevent injuries and ensure safer operation for children and pets.
Look for automatic reverse and safety sensors for safer daily use.
How long does installation typically take?
A typical installation takes a few hours, depending on door type, ceiling height, and whether wiring requires adjustments. Plan for several hours and allocate extra time for testing and calibration.
Plan for a few hours to complete the install and test it thoroughly.
Watch Video
Quick Summary
- Plan before you buy and install to prevent misfits.
- Verify door size and track compatibility with the chosen opener.
- Follow safety steps and test thoroughly before regular use.
- Program remotes and sensors correctly to ensure safe operation.