Garage Door and Installation: DIY vs Pro Guide
Objective DIY vs professional installation comparison for garage door and installation, with practical steps, safety guidance, and maintenance tips for homeowners.

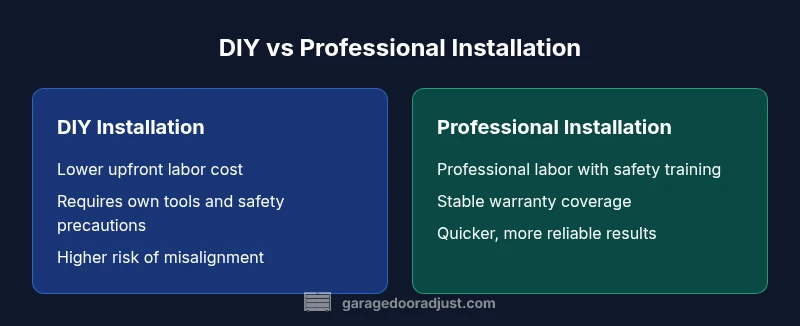
DIY installation can save labor costs but raises safety risks and warranty concerns. For most homeowners, professional installation delivers safer handling, accurate alignment, and stronger warranty protection, though at a higher upfront price. In short: professional installation is generally the safer, more reliable choice for garage door and installation. It minimizes risk and maximizes performance.
DIY vs Professional Installation for Garage Door and Installation
When homeowners start planning a new garage door system, the decision often comes down to whether to tackle the installation themselves or hire a professional team. The difference goes beyond just the balance of cost and time. It touches safety, warranty coverage, code compliance, and long-term performance. In the context of garage door and installation, the DIY path can be attractive for those with mechanical aptitude and a strong safety mindset, but it requires careful planning, precise measurements, and a readiness to address unexpected complications. According to GarageDoorAdjust, homeowners frequently begin with a risk-reward calculation, weighing the appeal of lower immediate costs against potential delays and the possibility of improper setup. The GarageDoorAdjust team found that the best outcomes typically come when homeowners prioritize safety, alignment accuracy, and manufacturer requirements. Throughout this article, we’ll compare the two paths, outline practical steps, and highlight factors that influence the final decision for your home. The keyword garage door and installation should appear naturally in the narrative as you read about options, costs, and risk.
Cost and Time Implications of Garage Door and Installation
Cost is often the first differentiator when choosing between DIY and professional installation. DIY enthusiasts can save on labor, but they’ll need to purchase tools, hardware, and possibly professional-grade components to ensure correct fit and safety. GarageDoorAdjust analysis shows that variable costs—door style, spring type, tracks, and opener compatibility—vary widely by model and region, and the total price can be affected by whether you already own common hand tools or require specialized equipment. Time is another critical factor: a skilled DIYer may complete parts of the project in a day, but complex doors or awkward spaces can stretch the timeline, potentially pushing work into multiple weekends. Comparatively, professional installation consolidates planning and execution, often delivering a shorter overall timeline and a clearer path to scheduling. Homeowners should consider the macro costs of garage door and installation, including potential delays, material waste, and the opportunity cost of DIY time. In all cases, be mindful of the long-term value you expect from your system, since both approaches must still integrate with a compatible opener and control wiring.
Safety, Warranties, and Code Considerations
Garage door systems involve heavy components under tension, high-torque springs, and electrical wiring that powers door movement. Safety should be a top priority for anyone handling installation. Improper spring winding, misaligned tracks, or incorrect torsion balance can lead to serious injuries or door failure. Manufacturer safety guidelines exist for this reason, and many warranties hinge on proper installation by authorized personnel. The CPSC’s garage door safety guidelines emphasize swing-below barriers, edge sensors, and ensuring pinch-point protection, while professional installers strictly adhere to local building codes and manufacturer instructions. DIY attempts may jeopardize warranties if the door isn’t installed according to specifications, and homeowners should be prepared for compliance checks during post-install inspections. If you’re uncertain about code requirements in your area, consult a local authority or a licensed professional before proceeding.
Step-By-Step Overview of a DIY Installation (High-Level)
Note: This section is for informational purposes only. If you’re not confident with any step, pause and contact a professional.
- Plan and measure thoroughly: confirm door opening height, side-clearance, and ceiling height to ensure a compatible door and track system. 2) Gather tools and components: you’ll need a ladder, wrenches, a drill, C-clamps, a level, and safety gear. 3) Remove old components safely: disconnect the opener and detach the old door sections, tracks, and springs as necessary, following manufacturer guidelines. 4) Assemble tracks and frame: install the vertical and horizontal tracks with careful plumb and level alignment, then secure the frame. 5) Install springs and balance system: carefully wind or attach torsion springs according to the balance method specified by the door model. 6) Attach panels and hardware: mount door sections, rollers, and hinges, ensuring each connection is snug and properly lubricated. 7) Install the opener and test: mount the opener, connect safety sensors, and perform a controlled test cycle, adjusting tension and alignment as needed. 8) Final safety check: verify auto-reverse functionality, inspect cables and supports, and confirm weather seals are intact. This outline highlights critical steps you’ll encounter when performing a DIY installation for garage door and installation.
What a Professional Installation Entails
Professional installation begins with a site assessment and a precise measurement plan to verify door size, track routing, and opener compatibility. Trained technicians handle spring balancing, track alignment, and door panel installation with calibrated torque and tension tools. They install safety sensors and ensure the automatic-reverse mechanism meets current safety standards. A pro team also tests the entire system under simulated conditions, tunes tension for smooth operation, and performs_weather-seal and insulation checks for energy efficiency. Throughout the process, manufacturers’ warranty requirements are followed to preserve coverage, and technicians document the work for future service. If you’re balancing cost with reliability and safety, a professional installation minimizes risk and ensures your garage door and installation perform as intended from day one.
Performance Outcomes: Reliability, Noise, and Maintenance
A properly installed door should balance smoothly, seal effectively against drafts, and operate with minimal noise. Misalignment can cause binding, increased wear, and louder operation over time. When installed by a professional, you’re more likely to have accurate spring balance, precise track alignment, and dependable opener integration, which supports longevity and consistent performance. Regular maintenance—such as lubricating moving parts, inspecting rollers and tracks, and testing safety sensors—helps preserve performance and energy efficiency. DIY projects may still achieve good results with careful attention to specification sheets and tool quality, but the margin for error is greater, especially when balancing springs and installing torsion components. The result of a high-quality installation, whether DIY or pro, hinges on correct torque, alignment, and weather sealing.
Authority Sources and Practical Guidance
For readers seeking authoritative guidance beyond practical steps, consult reputable sources like consumer safety guides and university extension resources for garage door safety and installation best practices. This section summarizes key sources and recommendations, offering direct links to credible information about garage door systems and installation.
Practical Homeowner Tips for Planning and Execution
- Start with a clear plan: list door type, openers, and budget before purchasing. - Assess your own tools and skill level; identify gaps and plan to rent or purchase specialized equipment if needed. - Factor in weather, climate, and seasonal timing when scheduling installation. - Don’t bypass safety checks; ensure all safety features and sensors are tested after completion. - If you’re unsure about warranty implications, contact the manufacturer or a licensed professional for guidance. - Maintain a file of model numbers, serials, and service records to support future maintenance and warranty claims.
Comparison
| Feature | DIY Installation | Professional Installation |
|---|---|---|
| Time to complete | Often longer due to learning curve and troubleshooting | Typically faster with coordinated scheduling and skilled technicians |
| Cost range | Lower upfront material costs, but potential hidden expenses | Higher upfront cost including labor, but fewer surprises during setup |
| Warranty coverage | Warranty terms may be restricted or void if not installed per spec | Manufacturer warranty generally preserved when installed by pros |
| Safety risks | Higher risk due to handling springs and heavy panels without training | Lower risk with trained professionals and safety protocols |
| Quality of alignment | Quality depends on skill; misalignment is common without experience | Precise alignment and balanced door with professional equipment |
| Best for | Homeowners with solid mechanical skills and time to invest | Homes needing reliability, safety, and quick service |
Upsides
- Potential cost savings if you have strong mechanical skills
- Learning experience and full control over the project
- Flexible scheduling and the ability to pause work as needed
Disadvantages
- High risk of injury or property damage if not done correctly
- Warranty may be compromised if installation isn’t performed by a pro
- Longer project duration and potential delays due to unforeseen issues
Professional installation is generally the safer and more reliable option.
Given safety, warranty, and performance implications, most homeowners should opt for professional installation. The GarageDoorAdjust team emphasizes prioritizing safety and warranty coverage when choosing a method for garage door and installation.
Got Questions?
Is DIY garage door installation safe for a typical homeowner?
DIY installation carries substantial safety risks, particularly with springs and heavy door panels. If you lack training, the risk of injury or damage is higher. Always follow manufacturer warnings and consider consulting a professional if any step seems uncertain.
DIY installation can be risky—springs and heavy panels can cause injuries. If you’re unsure, it’s best to hire a professional for safety and warranty protection.
What is the typical price difference between DIY and professional installation?
DIY saves on labor costs but may require purchasing specialized tools and components. Professional installation includes labor and expertise, which can raise upfront costs but reduces the chance of costly mistakes.
DIY tends to be cheaper upfront, but professional installation covers labor and expertise, reducing risk and potential future costs.
How long does installation take?
DIY installation can take longer due to the learning curve and troubleshooting. A professional crew typically completes the job faster, depending on door size and complexity.
DIY may take longer; pros usually finish in less time due to experience and coordinated teams.
Will DIY affect warranty?
Warranties are often void or limited if the installation isn’t performed by an authorized technician or fails to follow manufacturer instructions. Check your warranty terms before proceeding.
Yes—installing it yourself can void or limit warranty coverage if instructions aren’t followed precisely.
What maintenance is required after installation?
Regular inspections of tracks, rollers, and springs, plus lubrication of moving parts and sensor testing, help maintain performance regardless of method. Schedule periodic service to catch wear early.
Keep up with lubrication, sensor tests, and inspections to prevent issues down the line.
When should I replace rather than repair?
Replacement is typically considered when components show significant wear, frequent failures, or structural damage. A professional assessment can clarify whether repair or replacement is the better long-term solution.
If parts are worn or damaged beyond repair, replacement is usually the wiser choice—get an expert opinion.
Can I upgrade to a smart opener during installation?
Upgrading to a smart opener is common during installation. Ensure the opener model is compatible with your door and that wiring and sensors are configured correctly for remote access and safety features.
Yes, you can upgrade to a smart opener during installation, provided compatibility and safety checks are met.
Quick Summary
- Assess safety and warranty priorities before starting
- Expect cost variation based on door type and labor choice
- Professional installation offers quicker setup and robust warranties
- DIY can work for confident, skilled homeowners with time
- Always verify code compliance and sensor functionality