How to Install and Troubleshoot Digidoor 3 Garage Door Opener
Master installation, adjustment, and troubleshooting for the digidoor 3 garage door opener with safety checks, essential tools, calibration tips, and maintenance guidance.

The digidoor 3 installation and troubleshooting guide walks you through safe setup, alignment, and calibration of the garage door opener. You’ll learn essential safety checks, wiring basics, and maintenance steps to keep the unit running smoothly. Gather the right tools, disconnect power before starting, and follow the step-by-step process for reliable operation.
What is the digidoor 3 and why it matters
The digidoor 3 is a modern garage door opener designed for straightforward DIY installation and dependable everyday performance. It emphasizes safety sensors, quiet operation, and intuitive setup to help homeowners achieve reliable door operation with minimal friction. According to GarageDoorAdjust, this model prioritizes precise sensor calibration and user-friendly wiring so troubleshooting remains approachable for non-professional installers. Understanding how the digidoor 3 integrates with your existing door and track system is the first step toward a successful install or repair. In this section, we’ll explore what makes the digidoor 3 distinct, how its components fit together, and what outcomes you should expect after installation.
Safety and risk awareness when working with garage doors
Garage doors are heavy and spring-loaded, which means improper handling can cause severe injury. Always disconnect power before touching any electrical components, and never operate the door while a component is exposed. Pinch points around the hinge and rollers require careful attention to avoid finger injuries. The digidoor 3 includes safety sensors designed to stop movement if an obstacle is detected; ensure these sensors are properly aligned, unobstructed, and tested before regular use. If you have children or pets, establish a dedicated workspace and establish clear boundaries to prevent accidental activation while you work.
Planning compatibility and space preparation
Before you unbox the digidoor 3, measure the door height, track width, and ceiling clearance. Confirm that your current tracks are in good condition and that the door is balanced; an unbalanced door can cause the opener to work harder or fail prematurely. The digidoor 3 is designed to work with standard torsion or extension springs, but you should verify compatibility with your door’s hardware. Prepare the workspace by clearing tools, laying down a clean path, and positioning a stable ladder. A well-prepped area reduces delays and lowers the risk of accidental damage or injury during installation.
Understanding the control wiring and sensor layout
The digidoor 3 uses a simple control circuit with a wall-mounted control panel, safety sensors on opposite sides of the door, and a secure power source. Take time to review the wiring diagram in the manual before you connect anything. Keep wiring neat, avoid tight bends, and use proper strain relief so cables don’t pull loose over time. The boundary sensors should be mounted at the bottom corners of the door opening, with their cables routed away from moving parts. A clean, organized setup reduces troubleshooting time when you test the opener later.
Maintenance planning and routine checks
Once installed or repaired, a maintenance routine helps prolong the life of the digidoor 3. Periodically inspect tracks for debris or wear, lubricate moving components as recommended, and verify sensor alignment after any adjustment. Routine checks include testing the door’s auto-reverse feature, confirming force settings, and inspecting weather seals near the bottom track. Keeping a simple maintenance log can help you spot trends and address issues before they become major failures. Regular maintenance also preserves safety, reducing the risk of injury and ensuring dependable operation.
Troubleshooting workflow after installation
If the door behaves erratically after installation, adopt a structured troubleshooting flow: verify power and remote operation, test sensors, confirm track alignment, and re-check limit settings. When a problem arises, start with the simplest possible cause: a loose connection or obstructed sensor. The digidoor 3’s safety features should automatically stop the door if it detects an obstruction; if that happens repeatedly, re-check the sensor alignment and ensure nothing is interfering with the beam. By following a methodical approach, you’ll quickly isolate the issue and restore smooth operation.
Putting it all together: best practices for long-term reliability
A successful digidoor 3 installation combines deliberate preparation, careful wiring, and regular maintenance. Follow the manufacturer’s torque and alignment specifications, keep tracks clean, and test safety features monthly. Document any changes you make so you can revert if needed, and never bypass safety sensors to save time. With careful setup and ongoing checks, you’ll achieve consistent performance and improved peace of mind for your home.
Final considerations for a professional finish
If you encounter difficulties beyond your comfort level, consult a qualified technician for a hands-on assessment. Even with a user-friendly model like the digidoor 3, some installations benefit from professional calibration and safety checks. The goal is a secure, quiet opening that performs reliably over years of use, with predictable operation in varying weather conditions.
Tools & Materials
- Digidoor 3 opener unit(Main power unit and mounting hardware included in kit)
- Power drill with screwdriver bits(Phillips #2 or equivalent; ensure bit is magnetized)
- Voltage tester(Verify hot wires before handling any wiring)
- Safety goggles(Protect eyes from debris and moving parts)
- Work gloves(Grip securely and protect hands during handling)
- Measuring tape(Accurately measure track length and mounting points)
- Ladder (6 ft or taller)(Safe, stable platform for reaching the door opener area)
- Level(Ensure mounting and rail are square to avoid binding)
- Marker or pencil(Mark drilling points and alignment references)
- Wrench set(Tighten mounting bolts and hardware securely)
- Cable ties and wire nuts(Neatly organize and terminate wiring)
- Lubricant/grease(Use as needed on moving parts per manual)
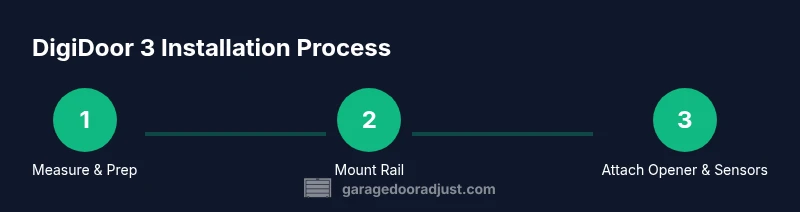
Steps
Estimated time: 90-150 minutes
- 1
Disconnect power and prepare workspace
Switch off the circuit at the breaker and unplug any power source to the existing opener. Clear the area under the door, lay a drop cloth if needed, and set out all tools for quick access. This ensures your safety and reduces the chance of accidental movement during setup.
Tip: Double-check power at the outlet with a voltage tester before touching any live components. - 2
Mount the mounting bracket and rail
Attach the main mounting bracket to the ceiling or wall as specified by the digidoor 3 manual. Use a stud finder to locate solid support and drive screws firmly. Align the rail with the doorway opening so the door’s travel path remains straight.
Tip: Use a level to ensure the bracket and rail are perfectly plumb; misalignment causes binding later. - 3
Hang the digidoor 3 unit on the rail
Lift the opener and attach it to the rail using the provided hardware. Ensure the unit is centered relative to the door and remains level to avoid uneven motion. Secure all fasteners, but avoid overtightening which can strip threads.
Tip: Ask a second person to help lift the unit to reduce the risk of injury. - 4
Install safety sensors and wiring
Position the infrared safety sensors at each bottom corner of the door opening and route the wiring back toward the opener. Use wire nuts and cable ties to protect and tidy the wires. Keep sensors pointed directly at each other with an unobstructed beam.
Tip: Do not let wires rest on moving parts or pins; secure them away from the track path. - 5
Connect rail to brackets and align tracks
Secure the track ends to the bracket assemblies and check that the tracks are vertical with consistent gaps. Adjust the rollers and guides as needed so the door travels smoothly without wobble. Verify that the track length matches the door height and the opener’s mounting position.
Tip: A misaligned track can cause premature wear or jam the door during operation. - 6
Test run and calibrate limits
Reconnect power and perform a light test run using the wall control. Listen for jerky movement and watch for proper auto-reverse and stopping points. Use the limit and force adjustments per the manual to prevent damage and improve safety.
Tip: Test a few cycles at slow speed first; gradually increase to normal operation once motion is smooth.
Got Questions?
Is digidoor 3 compatible with my existing tracks and doors?
Compatibility depends on your door type, track width, and spring system. Check the manual for supported configurations and confirm that the door is balanced before installation. If you’re unsure, consult the digidoor 3 compatibility guide or contact support.
Compatibility depends on your door and track. Check the manual and balanced door before installing. If unsure, contact support.
Do I need professional help to install digidoor 3?
Many homeowners complete the installation with careful adherence to the provided steps and safety precautions. Some setups, especially with complex springs or nonstandard tracks, benefit from professional calibration. Assess your comfort level, then proceed or hire a qualified technician.
Most homeowners can install it themselves if they follow instructions, but complex setups may need a pro.
What safety features does digidoor 3 include?
The digidoor 3 includes infrared safety sensors that reverse door motion on obstacle detection, plus manual cut-off and secure wiring practices. Ensure sensors are aligned, unobstructed, and tested after any adjustment.
It has infrared safety sensors that reverse on obstacles and requires proper sensor alignment.
How long does installation typically take?
Typical installation ranges from 90 to 150 minutes depending on door size, track complexity, and whether wiring requires a new outlet or upgrading existing wiring.
Most installs take about 1.5 to 2.5 hours depending on the setup.
What maintenance does digidoor 3 require?
Perform periodic track cleaning, sensor alignment checks, and lubrication of moving parts per the manual. Keep weather seals intact and run monthly tests of safety features.
Do routine track cleaning, sensor checks, and monthly safety tests.
What should I do if the opener won’t move after installation?
First, verify power and battery status, then recheck limit settings and sensor alignment. If unresolved, disconnect and rewire sections suspected of being faulty, or consult the safety guide for troubleshooting flow.
Check power, sensors, and limits; rewire suspected faulty sections; consult the troubleshooting flow if needed.
Watch Video
Quick Summary
- Plan space and safety first before starting.
- Verify sensor alignment for reliable safety features.
- Calibrate limits after initial testing.
- Follow the step-by-step guide for best results.
- Maintain a routine to ensure long-term reliability.