Privacy Garage Door Screen: Step-by-Step DIY Guide
Learn to install a privacy garage door screen with a clear, step-by-step approach—from measuring and material selection to mounting and maintenance. A homeowner guide by GarageDoorAdjust, 2026.

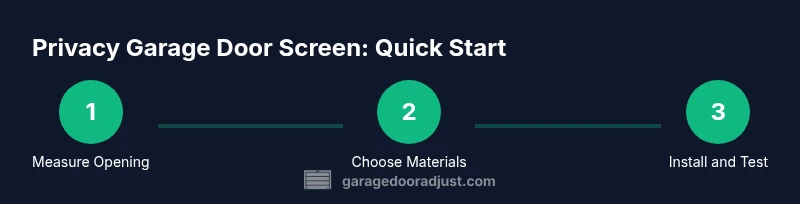
Goal: install a privacy garage door screen to block external views and glare while preserving airflow and access. You’ll learn how to measure openings, choose durable materials, select mounting hardware, and secure a snug fit. This guide is designed for homeowners doing a DIY install with common tools.
Why Privacy Garage Door Screens Matter
Privacy is a common concern for homeowners with visible street-facing garages. A privacy garage door screen provides a barrier that obscures interior activity from passersby while still allowing airflow and natural light to filter through. According to GarageDoorAdjust, these screens can reduce glare and improve comfort without compromising the door’s operation. GarageDoorAdjust Analysis, 2026 notes that many homes gain a calmer exterior appearance and better daylight control by using screens designed for overhead doors. When you choose a privacy garage door screen, you’re balancing privacy, ventilation, and aesthetics. Key considerations include the screen’s privacy level, material durability, and how the system will mount to existing tracks or framing. Plan to measure carefully, select a material that resists tearing, and budget for hardware that won’t corrode in varying weather.
- Privacy plus airflow: screens should obscure sightlines but not trap heat.
- Material choice impacts longevity and washability.
- Proper mounting prevents sagging and reduces wind load on the door.
If your goal is to maintain a clear view when closed while blocking peering eyes from the outside, a privacy garage door screen is a practical solution that complements most standard overhead doors.
Privacy Screen Options and Trade-offs
There are several ways to implement a privacy garage door screen, each with advantages and trade-offs. Framed screen panels offer a rigid, durable look and are easier to tension in high-wind areas. Retractable screens provide flexibility, converting your door into an open garage when you want a full view. Mesh-based fabrics, such as vinyl-coated polyester or fiberglass, balance privacy with airflow and light diffusion. Darker colors tend to maximize perceived privacy, while lighter hues can soften glare. If you live in a region with strong sunlight, consider UV-stabilized fabrics to prevent fading.
When choosing between static screens and retractable systems, think about how often you need access to the vehicle and whether you want temporary privacy for seasonal use. For shared driveways or homes with adjacent windows, a high-opacity option will likely deliver the most consistent results. In every case, ensure compatibility with your door’s track system and hardware. The right choice aligns with weather conditions, maintenance preferences, and how often you plan to adjust the screen.
Measuring for a Perfect Fit
Accurate measurements are the foundation of a durable, well-fitting privacy garage door screen. Start by measuring the door opening at three points across the width: left, center, and right. Record the smallest measurement to avoid oversized screens that won’t fit. Do the same for the height at the top, middle, and bottom; use the narrowest height to guide your screen length. Most overhead door screens require some clearance for tracks and weather stripping, so add a 1/2–1 inch buffer on all sides unless the product specifies otherwise. If you’re dealing with unusual door configurations or obstructions, map out the relevant points on a diagram before purchasing.
To ensure accuracy, take measurements with the door fully closed and the tracks unobstructed. Have a helper confirm readings to catch any modest discrepancies. Precise measurements prevent frustrating fit issues and reduce the need for reordering parts later.
- Measure width in multiple places and record the smallest value.
- Measure height at top, middle, and bottom; use the smallest.
- Account for track width and weather-stripping clearance.
As a practical tip, mark your measurements on a sketch or note card to cross-check against packaging instructions before ordering a kit.
Materials and Privacy Levels
Choosing the right materials is key to maintaining privacy while preserving airflow and durability. Materials commonly used for privacy garage door screens include vinyl-coated polyester and fiberglass mesh, both offering good tear resistance and weatherability. A tighter weave provides more privacy but can slightly reduce airflow; a looser weave increases ventilation but may reveal more interior activity. Consider color and opacity: darker tones offer higher privacy at a glance, while mid-tone grays and charcoals balance privacy with visibility from inside the garage.
Other factors to consider are UV resistance, washability, and compatibility with your door’s mounting system. Some screens come with a built-in tensioning system or magnetic edges that simplify installation. If you want a screen that remains appealing year-round, prioritize durable fibers, water resistance, and fade resistance. Your goal is a screen that lasts through seasonal changes without needing frequent replacement.
- Vinyl-coated options resist moisture and maintain color.
- Fiberglass meshes offer flexibility and durability.
- Dark colors generally yield higher perceived privacy.
By selecting the right fabric and weave, you can tailor privacy levels to your climate and neighborhood requirements.
Hardware, Mounting, and Compatibility
Most privacy garage door screen installations rely on an existing frame, tracks, and mounting hardware. Start by evaluating whether you’ll install the screen inside the frame or on the exterior side. Exterior mounting protects the interior from weather exposure but requires more careful alignment. Inner mounting can simplify access to the door but may be more exposed to wind. For compatibility, verify that the screen kit includes appropriate rails, corner brackets, fasteners, and finishing caps for your door type. If you already have a manual or powered opener, confirm that the screen does not interfere with safety sensors or remote operation. A well-secured screen should tension evenly across the width, with no sag in the center or along the edges.
Safety note: never modify electrical components or sensors. Use corrosion-resistant hardware in exposed environments and replace any worn parts promptly to avoid failure during storms or high winds.
- Verify compatibility with your door’s tracks before purchasing.
- Use weather-resistant hardware for outdoor exposure.
- Plan for minimal obstruction to sensors and safety zones.
Installation Plan: DIY vs Professional Help
A DIY install can be straightforward for standard doors, especially with a screen kit that provides rail profiles and pre-cut lengths. If you have a door with unusual dimensions, thick insulation, or multiple tracks, you may benefit from professional installation to ensure precise alignment and tensioning. GarageDoorAdjust recommends starting with a dry run: lay out components, mock-fit rails, and check clearances without fastening anything. If you’re unsure, contact a local installer who specializes in garage doors or screen systems. For the hands-on homeowner, follow the step-by-step instructions provided with your kit and keep a simple margin for adjustments.
No matter which path you choose, keep safety front and center. Disconnect any nearby power sources when cutting or drilling, wear eye protection, and work with a partner to handle large panels or rails. A careful approach reduces rework and preserves functionality of the door.
- DIY is feasible for standard openings with a kit.
- Consider professional help for complex door configurations.
- Always follow safety precautions and local codes.
Maintenance, Cleaning, and Longevity
Maintaining a privacy garage door screen extends its life and keeps it looking good. Rinse with mild soap and water to remove dust, pollen, and grime. Avoid abrasive cleaners that can degrade the fabric; use a soft brush for stubborn spots. Inspect the screen and mounting hardware every 3–6 months for signs of wear, such as fraying edges, loose screws, or sagging sections. Tighten, re-seat, or replace components as needed to maintain privacy and airflow. If you notice wind damage after a storm, re-tension the screen and check for bent rails or misaligned tracks that could affect operation. A well-maintained screen continues to protect privacy without compromising door performance.
- Clean regularly to prevent staining and fiber wear.
- Check hardware and rails for corrosion or loosened fittings.
- Re-tension or replace parts to preserve fit and privacy.
Common Pitfalls and Safety Considerations
Avoid common mistakes that undermine privacy or damage the door. Avoid measuring only once; re-check measurements, especially if the door shifts or settles over time. Do not overtighten edges or fasteners, which can warp frames or stress the fabric. Ensure that the screen does not block the door’s manual or automatic operation, and keep sensors unobstructed. If you live in high-wind areas, ensure the frame is rated for outdoor exposure and that the screen remains taut during gusts. Finally, choose a design that aligns with your local climate and sun exposure to maintain privacy without overheating the interior.
- Double-check measurements and fit before final installation.
- Do not over-tighten hardware or distort the frame.
- Ensure safety sensors and moving parts are not obstructed.
- Pick a wind-rated option if you live in exposed locations.
Additional Notes and Quick Start Tips
If you’re new to garage door installations, start with a basic, open-frame kit and a manageable panel size. This approach minimizes errors and builds confidence for more complex setups later. Always read the manufacturer’s instructions for your specific screen type and hardware, and keep a simple toolkit handy during the project. Remember that a properly fitted privacy garage door screen protects your privacy while preserving the door’s functionality, making your garage more comfortable year-round.
Tools & Materials
- Measuring tape(at least 25 ft (7.6 m) for multiple openings)
- Pencil or permanent marker(for accurate markings)
- Scissors or utility knife(for trimming fabric edges)
- Staple gun or heavy-duty tape(for attaching fabric to rails)
- Screwdriver set(for mounting brackets)
- Drill with bits(for pilot holes and fasteners)
- Level(keep rails straight)
- Safety glasses(eye protection during cutting/drilling)
- Privacy screen fabric or mesh panel(choose opacity for privacy level)
- Rail sections or frame tracks(pre-cut to door width)
Steps
Estimated time: 1-2 hours
- 1
Measure the opening accurately
With the door closed, measure the width at three points and record the smallest value. Do the same for height at top, middle, and bottom. This ensures a screen that fits without rubbing the tracks or weather-stripping.
Tip: Have a helper verify measurements to catch small discrepancies. - 2
Choose screen type and materials
Select a screen fabric and opacity that balances privacy with airflow. Darker colors maximize privacy; UV-stable fabrics resist fading. Ensure compatibility with your mounting rails.
Tip: Prefer materials with moisture resistance for outdoor exposure. - 3
Prepare mounting rails and frame
Lay out rails on a clean surface and mark drilling points. Use a level to ensure straight tracks. Pre-install brackets where possible to simplify final mounting.
Tip: Do a dry fit before fastening; slide panels to check alignment. - 4
Attach rails and align
Secure rails to the door frame or surrounding wall per kit instructions. Check that rails sit plumb and evenly spaced. Tighten fasteners but do not over-tighten.
Tip: Use a spare clamp to hold rails during initial alignment. - 5
Install the privacy screen fabric
Attach the fabric to rails using staples or tape as directed. Ensure fabric tension is even and edges are secure to prevent sagging.
Tip: Begin at the top corners and work toward the center for uniform tension. - 6
Test operation and adjust tension
Open and close the door to verify clearance and screen operation. If the screen binds, adjust the tension or reposition rails. Recheck all fasteners after a short test.
Tip: Keep a small amount of play to allow door movement without tearing fabric.
Got Questions?
What is a privacy garage door screen, and how does it work?
A privacy garage door screen is a fabric or mesh panel installed over the door opening to obscure interior views from outside while allowing air and light to pass through.
A privacy garage door screen is a fabric panel that blocks views from outside while letting air move through.
Can I install a privacy screen on any garage door?
Most standard overhead doors can accommodate a privacy screen with proper mounting hardware. Some tracks may require customization for clearance.
Most doors work, but you might need custom rails for unique tracks.
What maintenance does a privacy garage door screen require?
Clean with mild soap and water, inspect for tears every 3-6 months, and tighten fittings as needed to keep it taut.
Clean it periodically and check for wear; re-tighten fittings as needed.
Are privacy screens safe with automatic openers?
Yes, when installed correctly and with sensors and moving parts kept clear of obstruction.
Yes—install correctly and keep sensors clear.
How long does installation take?
Most DIY installations take between 1 and 3 hours depending on door size and screen type.
Usually between one and three hours.
What are common mistakes to avoid?
Avoid incorrect measurements, overtightening, and using improper hardware, which can cause misalignment or fabric damage.
Don’t guess measurements and don’t over-tighten the fittings.
Watch Video
Quick Summary
- Measure carefully before buying.
- Choose privacy level that matches your needs.
- Mounting with proper hardware prevents sagging.
- Regular maintenance extends screen life.