High Lift Garage Door Conversion Kit: A Homeowner's How-To
Learn how to safely convert your standard garage door to a high lift system using a conversion kit. This comprehensive guide covers compatibility, tools, step-by-step installation, safety checks, and maintenance—backed by expert insight from GarageDoorAdjust and reputable safety sources.

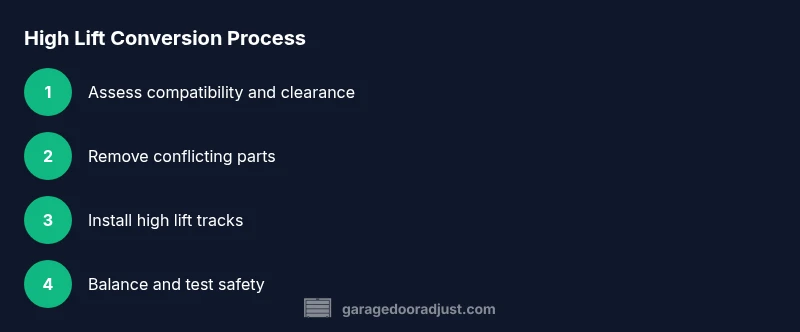
With a high lift garage door conversion kit, you can gain valuable ceiling clearance for storage or tall vehicles by raising the door height. This upgrade requires a compatible door, a high-lift track system, the proper springs/balance, and a compatible opener. According to GarageDoorAdjust, plan for careful measuring, compatibility checks, and a thorough safety inspection before you begin.
What is a High Lift Garage Door Conversion Kit
A high lift garage door conversion kit is a set of components designed to adapt a standard overhead door to operate on a higher track, increasing the vertical space between the door and the ceiling. This is especially useful if you have tall vehicles, large storage systems, or cabinetry above the door opening. The kit typically includes higher tracks, modified brackets, rollers, upgraded springs or a different balancing method, and sometimes a compatible opener or conversion brackets. Importantly, you must ensure your existing door frame, torsion or extension springs, and garage door opener can safely work with the higher lift configuration. In practice, the upgrade is most effective on doors that already balance well and have adequate headroom for the new track geometry. When performed correctly, the modification can maximize usable space while preserving smooth operation and safety, but it does require precise measurements and adherence to the manufacturer’s instructions.
When to Consider a High Lift Conversion
Not every garage door is a good candidate for a high lift conversion. Consider this path if you: need more overhead clearance for vehicles, plan on installing tall storage racks, or want to optimize a compact garage layout. Before committing, perform a feasibility check: confirm the current door’s panel type, track height, and ceiling clearance, and verify the door opener’s compatibility with higher lift settings. If your door has damaged panels, bent tracks, or unbalanced springs, address those issues first or consult a professional. GarageDoorAdjust recommends evaluating the overall structure, including ceiling joists and wall anchors, to ensure it can support the new track system over time.
Key Components Typically Included in a Conversion Kit
A typical conversion kit contains higher track sections, new vertical and horizontal track brackets, modified or extended rollers, longer torsion springs or alternative balancing hardware, conversion brackets, and sometimes a new jamb seal or weatherstripping. Some kits also include a revised center bracket and track spacers to ensure proper alignment. It is essential to use components specified for your door width, panel configuration, and existing spring system. Do not mix parts from different manufacturers unless the kit explicitly supports cross-compatibility. Always verify warranty implications with the door manufacturer before proceeding.
Compatibility and Clearance Considerations
High lift installations demand accurate measurements and a clear understanding of clearance. You’ll need sufficient ceiling height to accommodate the taller tracks plus a safe margin for headroom and any insulation or lighting fixtures. Check for obstacles such as attic access, sprinkler heads, and electrical conduits near the door head. Also confirm that your door’s drive system (manual, torsion spring, or extension spring) can be safely rebalance to the new height. If the track angle changes significantly, you may need additional brackets or redesigned anchors. When in doubt, contact the kit manufacturer for precise compatibility charts and a list of compatible door models.
Planning Your Workspace and Safety Protocols
Before touching a tool, lay out a safe work area: clear the garage of clutter, set up a sturdy ladder, and ensure you have a helper. Wear safety glasses and gloves, and keep a stable stance while working with heavy components. Use a scaffold or lift for overhead tasks if needed, and keep a fire extinguisher nearby in case of incidental sparks from drilling or grinding. Mark electrical lines and shut off power to the door opener at the breaker to prevent accidental operation during installation. A well-lit, organized workspace reduces risk and speeds up the process.
Structural Modifications: What Might Be Required
A high lift conversion may necessitate reinforcing the header, adding new jamb brackets, or adjusting the wall anchors to support the higher track. Some garages require re-positioning torsion springs or changing the spring winding system to maintain balance. If the existing opener is not compatible with the higher lift, you may need a different opener or a conversion kit designed to pair with your current model. Always check local codes and consult the door or opener manufacturer’s installation manual for any required permits or inspections.
Installing the Track System and Brackets
This step involves removing the old tracks and installing the new high lift tracks according to the kit’s diagram. Start with the vertical tracks, confirm plumb using a level, and secure them to the door framing. Then attach the horizontal tracks, ensuring they meet the correct angle and alignment for smooth operation. Install any required brackets and spacers, and verify that the rollers track cleanly without binding. Do not force components into misalignment; misalignment can cause premature wear or dangerous failures. This stage benefits from a second pair of eyes to double-check alignment.
Balancing, Springs, and Safety Testing
If the kit uses a different balancing approach, you’ll need to install or adjust springs to match the new track height. This step is critical for door balance and safety. After installing the springs, gently test the door balance at several points along its travel. If the door feels heavy or off-balance, do not proceed; re-check spring tension and track alignment. Reconnect the opener only if it’s confirmed to be compatible with the higher lift. Finally, test manual backup operation to ensure the door can be opened and closed smoothly in a power outage.
Final Checks, Lubrication, and Maintenance
Lubricate all moving parts with a light, manufacturer-approved garage door lubricant focusing on rollers, tracks, hinges, and springs. Check for unusual noises or binding and tighten hardware as needed. Recheck alignment after a few cycles and adjust as necessary. Perform a safety check: place a 2x4 on the door jamb below the track to test for pinch points, and ensure automatic reversal features work correctly. Schedule a professional inspection if you notice any consistent issues.
Common Mistakes and How to Avoid Them
Rushing the alignment, neglecting load-bearing considerations, and ignoring safety interlocks are common mistakes. Always follow the kit’s instructions precisely, take accurate measurements, and verify compatibility with your current opener. Avoid mixing parts from multiple manufacturers unless explicitly supported. If you’re unsure at any step, pause and consult the kit documentation or contact a qualified technician. Safety is non-negotiable when dealing with heavy, high-tension hardware.
Next Steps and Maintenance After Install
After completion, maintain a regular inspection routine: check track alignment monthly, lubricate annually, and test the auto-reverse feature weekly. Keep a spare set of hardware and brackets from the kit in case of future maintenance. Finally, document the install with notes and photos for warranty and future service references. Ongoing maintenance helps preserve safety and performance over time—especially important for high lift configurations.
Authority Sources and Safety Guidelines
Drawing from established safety guidelines helps ensure a responsible installation. Always reference the manufacturer’s installation manual and local codes. For general safety standards and garage door maintenance guidance, reputable sources include: • OSHA safety resources. • University extension programs for home improvement and safety. • Consumer safety publications that address garage door hardware and operation.
Tools & Materials
- High lift conversion kit specific to your door model(Ensure kit is designed for your door width, panel configuration, and existing spring system.)
- Compatible high lift track sections (vertical and horizontal)(Check that tracks fit your ceiling height and provide the required clearance.)
- New or modified brackets and spacers(Required to secure tracks and maintain proper alignment.)
- Rollers and hinges compatible with high lift geometry(Choose components rated for your door weight.)
- Torsion springs or balanced system aligned with new height(Only use springs specified by the kit; improper tension is dangerous.)
- Measuring tools (tape measure, level, square)(Precise alignment is critical for safety.)
- Drill, bits, and wrenches set(Secure fasteners and adjust components accurately.)
- Ladders, clamps, and stands(Support overhead work safely; never rely on a single person.)
- Safety gear (gloves, safety glasses, hard hat)(Personal protection is essential when handling heavy hardware.)
- Lubricant designed for garage doors(Apply to moving parts for smoother operation.)
- Marker, tape, and protective cover(Label fasteners and protect flooring during work.)
Steps
Estimated time: 4-8 hours
- 1
Assess site and confirm compatibility
Measure the ceiling clearance, door width, and track mounting points. Compare with your kit’s requirements to confirm compatibility before removing any parts. Verify opener compatibility if you plan to reuse your existing opener.
Tip: Take precise measurements from the centerline of the door to the ceiling and note any obstructions that could affect track height. - 2
Disconnect power and secure the door
Shut off the garage door opener at the wall and disconnect the opener from power. Use C-clamps to secure the door in the open position and prevent accidental movement while you work.
Tip: Never work under a door or track that could move unexpectedly; ensure helpers stand clear of the door path. - 3
Remove conflicting hardware
Remove existing tracks, rollers, and any hardware that would interfere with the high lift system. Keep fasteners organized to match the new layout.
Tip: Label fasteners and keep track of removed parts so you know what goes where later. - 4
Install vertical and horizontal high lift tracks
Mount vertical tracks plumb with the door frame, then install horizontal tracks at the correct angle as per the kit instructions. Use level to verify alignment across both planes.
Tip: Check for plumb in both directions; a misaligned track causes binding and premature wear. - 5
Attach brackets, spacers, and rollers
Secure the upgraded brackets and spacers, then install rollers into the new tracks. Ensure the rollers roll smoothly within the tracks without binds.
Tip: Do not overtighten; snug and level is enough to keep components aligned. - 6
Balance the door with the new springs
Install the springs or adjust balancing hardware to match the new lift height. Check manufacturer torque specs and safety guidelines for tensioning.
Tip: Spring adjustment is hazardous; if you’re unsure, pause and consult a professional. - 7
Reconnect the opener or plan a replacement
If your existing opener supports high lift configurations, reconnect and test. If not, plan for a compatible model or a dedicated high lift opener.
Tip: Some openers require recalibration or new safety sensors for high lift setups. - 8
Test door operation and safety features
Cycle the door several times manually and with power, listening for unusual noises and watching for tracking issues. Test auto-reverse to confirm safety interlocks function correctly.
Tip: Always test the safety reversal with a safe object to ensure a true reversal. - 9
Lubricate, finalize, and document
Lubricate all moving parts, tighten hardware, and record the installation details for future maintenance or warranty questions.
Tip: Keep a copy of the kit model and installation notes with the garage door manual.
Got Questions?
Is a high lift conversion kit suitable for my door?
Suitability depends on your door’s model, track clearance, and spring balance. Check the kit's compatibility charts and verify that your existing door can be rebalanced safely. If the door is damaged or out of balance, address those issues first.
Look at your door’s model and clearance. If you’re unsure, consult the kit’s compatibility guide or contact a professional.
Do I need a professional to install a high lift kit?
Professional installation is strongly recommended for high lift conversions due to high-tension springs and precision alignment requirements. A qualified technician can ensure safe balance, proper track geometry, and reliable operation.
Most people benefit from professional installation to ensure safety and proper alignment.
Will this affect my garage door opener?
Some openers support high lift configurations, while others do not. If your opener isn’t compatible, you may need a new opener designed for higher lift or a bundled kit that includes an opener-compatible solution.
Check your opener model and the kit’s guidance on compatibility.
How long does installation typically take?
A typical at-home conversion ranges from several hours to a full day depending on door type and installer experience. Plan for tools, accurate measurements, and potential adjustments.
Set aside a block of time and don’t rush the alignment steps.
What safety checks should I perform after installation?
Test manual operation, balance, and auto-reverse safety features. Inspect tracks for binding, verify fasteners are tight, and lubricate moving parts. If any issue persists, consult a professional.
Do a slow manual test first, then a few powered cycles with safety checks.
Can I revert back to a standard lift later?
In many cases, reverting requires a different set of parts and rebalancing. Check warranty and kit documentation for revertibility before starting.
Some setups are one-way; verify options with the installer or manufacturer.
Watch Video
Quick Summary
- Plan compatibility before purchasing a kit
- Verify safe clearance and load-bearing capacity
- Follow the kit instructions precisely for track alignment
- Test door balance and safety features after installation
- Maintain the system with regular inspections and lubrication