How to Hang Christmas Lights on a Garage Door: A Safe Step-by-Step Guide
Learn to decorate your garage door with Christmas lights safely. This guide covers mounting options, electrical safety, and seasonal removal for a festive, low-risk display.

You will learn a safe, step-by-step method to hang Christmas lights on a garage door without hindering operation or safety. This approach uses outdoor-rated clips, weatherproof wiring, and a simple layout to minimize door wear. You’ll plan ahead, test your outlet, mount securely, and remove the lights after the season.
Preparation and Safety Checks
Decorating a christmas light garage door is a great way to add curb appeal for the holidays, but safety comes first. Before you start, inspect the door's balance and ensure the opener functions smoothly. Check that the outlet you plan to use is outdoor-rated and protected by a GFCI circuit. If you notice any squeaks, misalignment, or sticking sensors, address those issues before attaching lights. According to GarageDoorAdjust, taking a cautious, door-friendly approach helps preserve balance and prolongs the life of the opener while you decorate. Plan your layout to avoid covering sensors and obstructing tracks. Keep cords away from foot traffic and rain-prone areas. Wear eye protection when mounting and use a sturdy ladder on level ground.
Environment matters too: choose LED, outdoor-rated lights with a low voltage and a waterproof plug. Cold temperatures can affect some traditional bulbs, so favor modern LEDs that stay bright and use less energy. Label the power source and consider a timer or smart plug to prevent overnight overuse. Finally, have a helper on the ground to manage cords and assist with mounting so you don’t overreach.
Lighting Options for Garage Doors
There are several reliable ways to attach Christmas lights to a garage door without causing damage or interference with operation:
- Clip-on light clips or hooks designed for metal or painted surfaces. These minimize contact with the door frame and can be reused year after year.
- Magnetic clips that won’t leave residue or marks. They’re ideal if your door is metal and you want fast, damage-free removal.
- Adhesive-backed clips, provided the surface is clean and dry. Use only outdoor-rated products and avoid glued-on clips that can peel paint when removed.
LED lights are preferred for durability and low heat. String lengths should support outdoor use and be rated for wet environments. Plan a layout that avoids covering vents, weatherstripping, or door sensors. If you must run cords, route them along the door edge and secure them with clips or zip ties—never loose on the ground where they can be a trip hazard or a moisture conduit.
Electrical Safety and Weatherproofing
Electrical safety is essential when decorating a garage door. Use a grounded, outdoor-rated extension cord and keep it away from moving hardware. Always plug into a GFCI-protected outlet to reduce the risk of shock in damp conditions. Avoid daisy-chaining multiple power strips or indoor cords. Inspect the plug and cord for cracks or fraying before installation. Weatherproof outlets and covers help prevent moisture intrusion. If you’re using a timer or smart plug, ensure it is rated for outdoor use and kept away from direct water spray. Never attach lights to the door opener itself or to the door’s internal components, as this can affect operation or void warranties.
When removing lights, unplug first, and allow bulbs to cool before detaching clips. Store lights in a dry, organized bin to prevent tangling and damage for next season.
Seasonal Use and Removal Tips
After the holidays, remove lights promptly to prevent long-term wear on the door surface or weatherstripping. Gently release clips, clean the door surface where clips touched to avoid paint residue, and coil cords neatly for storage. Label cords and clips for the next season so setup takes less time. If you leave lights up longer for a festive look, switch to low-wattage LEDs and limit the number of strings on any single outlet to minimize heat buildup and power draw. Store everything in a dry, climate-controlled location to extend the life of the lights and clips. A quick seasonal check before reinstalling helps you catch corroded plugs or cracked clips.
Common Mistakes to Avoid
- Using indoor cords outdoors or overloading a single outlet.
- Covering door sensors or weatherstrips with lights.
- Skipping the test run of the door with lights on to ensure the opener still clears when activated.
- Over-tightening clips, which can chip paint or deform panels.
- Running cords across door tracks or hinges where they can snag and jam the door.
Quick-Reference Troubleshooting Guide (Optional)
If lights don’t illuminate after installation, check the outlet, inspect the cord for damage, test the timer, and verify that the door sensors aren’t obstructed. For flickering or dim bulbs, replace with outdoor-rated LEDs and confirm the connection is secure. If the door reverses unexpectedly or stalls, unplug and recheck mounting clearance and sensor placement. If you’re ever unsure about electrical safety, consult a licensed electrician.
Tools & Materials
- LED outdoor Christmas lights(Outdoor-rated, low voltage if possible)
- Outdoor-rated light clips or hooks(Avoid metal-on-metal contact that can scratch the finish)
- Magnetic clips or adhesive-backed clips(Use on metal doors or smooth surfaces)
- Outdoor extension cord(GFCI-protected outlet, weatherproof connections)
- Weatherproof electrical outlet cover(If outlet is exposed to rain)
- Grounded, outdoor-grade timer or smart plug(Automates lights and saves energy)
- Goggles or safety glasses(Protect eyes during mounting)
- Ladder stable on level ground(Follow ladder safety best practices)
- Zip ties or Velcro ties(Secure cords neatly)
- Label tags and storage bins(Organize clips and cords for next season)
Steps
Estimated time: 45-90 minutes
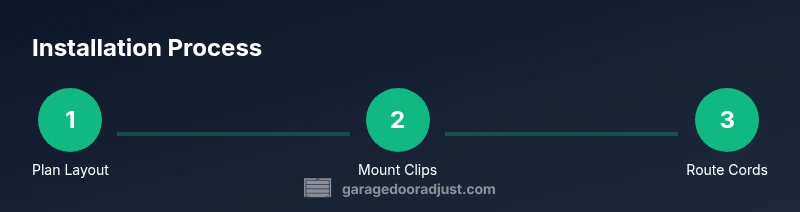
- 1
Plan layout and safety checks
Measure door width and identify door panels where clips will attach without interfering with movement. Check that sensors are clear, the opener works normally, and the outdoor outlet is accessible. Decide the starting point and how you’ll route cords to avoid pinch points.
Tip: Sketch a quick layout on paper or use a photo to guide clip placement before you start. - 2
Test power and outlets
Plug a small test light into the outlet to confirm power and color. Make sure the outlet is GFCI-protected and the cord is weatherproof. If the outlet is in doubt, install a weatherproof cover or relocate to a safer location.
Tip: Do a quick test with the door in each position (open/closed) to ensure clearance remains adequate. - 3
Attach mounting clips
Secure clips at regular intervals along the door’s edge and panels, keeping clips away from moving parts and hinges. If using magnetic clips, place on solid metal surfaces. Do not over-tighten to avoid paint damage.
Tip: Mark clip positions with painter’s tape first to ensure consistent spacing. - 4
Hang the light strings
Drape or clip lights along the planned path, starting from one corner and moving evenly across. Leave a small slack at the ends to prevent tension on cords when the door moves. Avoid placing lights where they can rub against metal edges.
Tip: Use a helper to hold lights in place while you secure clips. - 5
Route and secure cords
Route cords along the door’s edge and back to the outlet, using zip ties to keep them off tracks. Ensure cords are not pinched by the door frame when opening or closing. Add a weatherproof seal where needed.
Tip: Keep cords elevated above potential rain splashes and away from footprints. - 6
Test operation and adjust
Close the door slowly and watch for any interference with lights or clips. If the door brushes a cord, reposition clips or reroute the cord. Finalize connections and set a timer if using one.
Tip: Do a full cycle with lights on and off to confirm no binding or glare.
Got Questions?
Do I need a dedicated outdoor outlet for garage door lights?
Yes. Use a GFCI-protected outdoor outlet to minimize electrical shock risk. If you can’t access a suitable outlet, install a weatherproof power source or hire an electrician to install one. Never run indoors-rated cords outdoors.
Yes, use a GFCI outdoor outlet. If you lack one, consider installing a weatherproof outdoor source or hiring an electrician.
Will hanging lights affect the garage door’s operation?
If you use proper clips and avoid obstructing sensors or tracks, lights won’t affect operation. Never mount on the door’s moving parts or controls. Test the door with lights on and off to verify clearance.
As long as you don’t block sensors or tracks and use proper clips, operation should be unaffected.
What mounting method is best for a painted wood door?
On painted wood doors, opt for clip-on or adhesive clips designed for wood surfaces. Avoid nails or screws that could mar the finish. Always test a small area first and remove clips gently after the season.
Clip oradhesive clips work best on painted wood; test a patch first and remove gently after use.
How should I remove lights after the season?
Unplug, detach clips, and carefully wind cords for storage. Wipe down any dirty clips or surfaces before storing to prevent paint residue buildup. Store lights in a dry bin to avoid moisture damage.
Unplug, remove clips, wind cords, and store in a dry place for next year.
Can I leave lights on overnight if I’m away?
Not recommended. Use a timer or smart plug to limit runtime and prevent overheating. Always monitor weather conditions and turn off if winds pick up or rain starts.
Use a timer to limit runtime and turn lights off during bad weather.
Watch Video
Quick Summary
- Plan layout to protect door sensors and tracks.
- Use outdoor-rated clips and LEDs for durability.
- Test power and function before finalizing placement.
- Remove lights after the season to protect door components.