Halloween Decoration for Garage Door: Safe, Festive Guide
Learn how to decorate your garage door for Halloween safely with lightweight decor, removable mounting, and a step-by-step plan. Get tips on materials, timing, and removal to protect your door and the vibe you want.

This guide helps you achieve a safe, eye-catching halloween decoration for your garage door using lightweight, removable decor and surface-safe mounting. You’ll learn planning, material choices, safe attachment methods, and quick removal to protect your door and keep your home festive. Follow the step-by-step plan for a smooth setup and clean takedown.
Halloween Decoration for Garage Doors: A Quick Overview
Decorating a garage door for Halloween is a great way to boost curb appeal without a full exterior remodel. The key is to balance visuals with surface safety and weather resilience. In this guide, you’ll see practical ideas that work on steel, wood, and fiberglass doors, plus lightweight props that won’t risk paint or sealant. From spooky silhouettes to friendly pumpkins, the goal is to create a welcoming, seasonal vibe that remains durable through typical fall weather. According to GarageDoorAdjust, homeowners prefer decorations that are easy to install and remove, allowing quick seasonal updates while preserving door integrity. This article blends design concepts with actionable steps you can execute this weekend, aligning with your safety and budget goals. By the end, you’ll know what to buy, how to mount, and how to store decorations for next year.
Design Principles for a Garage-Door Halloween Look
When choosing a theme, aim for contrast and visibility. Bright orange and black elements work well against a dark garage door or neutral siding. Consider silhouettes of bats, witches, or haunted houses for a night-time silhouette against porch lighting. If you want a playful vibe, opt for friendly pumpkins, faux cobwebs, and blinking LEDs that illuminate from the door’s edge. Always keep the main safety sensors and the door’s travel path clear, so you don’t interfere with automatic opening or closing. The GarageDoorAdjust team recommends testing the setup under wind conditions typical for your area to ensure stability and safety.
Material Choices: Lightweight, Weather-Resistant, and Removable
Choose materials designed for outdoor use, with lightweight construction to minimize wind hazards. Options include EVA foam cutouts, krija-printed decals on removable vinyl, and fabric banners with grommets. For mounting, favor exterior-safe mounting strips or removable double-sided tape that won’t peel paint when removed. Battery-powered LEDs add glow without cords, and solar-powered options can be a good choice if you have sufficient sun exposure. Ensure all items are rated for outdoor use and are labeled as removable so you can take them down without harming the surface. GarageDoorAdjust’s guidance emphasizes lightweight, non-adhesive options when possible to protect finishes and resurface longevity.
Safety First: Placement, Sensors, and Weather Awareness
Never obstruct safety sensors, lighting fixtures, or the door’s moving path. Keep cords away from hinges and tracks, and avoid heavy props that could swing and strike the door or cause imbalance. Check weather forecasts and plan for wind, rain, or snow. Use weatherproof materials and ensure decorations are secured but easily removable if conditions worsen. If you use lights, choose low-heat LED options. A simple rule: if it feels top-heavy or noisy in a breeze, remove or adjust before a real wind event.
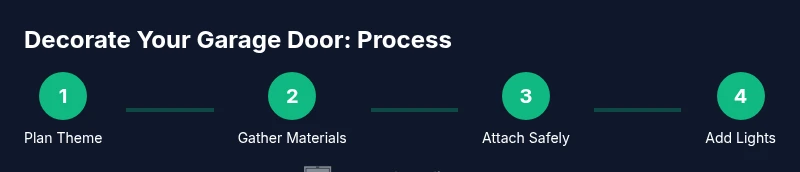
Step-By-Step Install Overview (Plan, Attach, Light, Tidy)
A planned approach reduces risk and makes takedown faster. Start with a clean door surface and map where each decorative element will go. Attach lightweight pieces first to confirm spacing, then add accents. Use removable mounting strips for a clean finish and minimal paint contact. Add lighting that doesn’t pull power from the door mechanism. Finally, store components in labeled containers for easy reuse, keeping seasonal planning simple for next year.
Budgeting and Timing: What to Expect
A modest garage-door Halloween setup can be designed in under a couple of hours with a $20–$60 budget for lightweight decor, mounting supplies, and LED lighting. If you want more elaborate silhouettes or seasonal signage, factor in up to $100–$150. Consider buying in advance after Halloween for future years when items go on sale, and reuse components that are in good condition. Planning ahead helps you spread the cost and reduces the need for last-minute trips to the store.
Maintenance and Removal: Protecting Your Door After Halloween
Removal should be quick and gentle to avoid stripping paint or finish. Peel mounting strips slowly, and use a hairdryer on low heat to loosen adhesive if needed. Clean the door surface with mild soap and water to remove residue, then store pieces flat and organized. Inspect the surface for any minor scratches or scuffs and touch up if necessary. By documenting how you assembled your setup, you’ll have a smoother process next year, with more polished results.
Visual Examples and Setup Checklist
Use a simple checklist to stay organized: theme chosen, materials gathered, mounting method tested, lighting installed, safety checked, and removal plan ready. For visuals, you can sketch a quick layout or photograph the door before and after decoration. The goal is a cohesive look that reads well from the curb while keeping maintenance low and safety high. GarageDoorAdjust suggests focusing on silhouettes and lighting to maximize impact with minimal hardware.
Accessibility and Inclusion Considerations
Ensure that decorations do not obstruct walkways or accessibility paths for visitors. If you have steps or a driveway incline, choose low-profile pieces instead of tall, heavy props. Use color contrasts that are easy to see from a distance, especially for guests with visual impairments. Inclusive design keeps your Halloween display welcoming to all visitors.
Final Thoughts: Keeping the Look Seasonal Yet Reusable
A well-planned garage-door Halloween display can be repurposed for other events with minimal changes. Lightweight props, reusable LED accents, and neutral silhouettes can transition to fall harvest or general night-time curb appeal. As we approach 2026, the emphasis remains on quick installs, safe removal, and the opportunity to celebrate with neighbors in a way that protects your door’s finish and your budget. The GarageDoorAdjust team remains committed to practical, surface-friendly decorating strategies that homeowners can confidently execute.
What to Do If Your Door Isn’t Compatible with Standard Decor
Not all garage doors accept exterior decals or mounting strips easily. If your door has a glossy paint finish or a high-insulation panel, test a small area first and select adhesive products labeled as safe for delicate surfaces. For metal doors with preexisting coatings, you may prefer lightweight fabric banners or magnetic silhouettes that won’t require surface contact. When in doubt, consult a local professional or test a temporary mount on an inconspicuous area to protect the finish.
Tools & Materials
- Removable exterior-safe mounting strips(Strong enough to hold lightweight decor; leaves minimal residue when removed)
- Removable double-sided outdoor tape(Choose weatherproof, paint-safe adhesive; test on small area first)
- Scissors(For trimming decals and fabric pieces)
- Measuring tape(Plan spacing and symmetry before applying decor)
- Pencil or chalk(Mark attachment points without leaving permanent marks)
- Ladder or stable step stool(Be cautious on slippery surfaces; have a spotter if needed)
- Battery-powered LED lights(Low-heat, weatherproof, and battery-operated)
- LED fairy lights or solar-powered lights(Choose warm colors for a friendly glow)
- Soft cleaning cloth and mild soap(Wipe door surface before applying decals)
Steps
Estimated time: 60-90 minutes
- 1
Assess door surface and plan
Inspect the door finish and weather conditions. Decide on a theme and map where each element will go on the door to avoid clutter. This pre-step prevents rework later.
Tip: Take a before photo to guide placement and symmetry. - 2
Gather lightweight decor and mounting
Choose lightweight silhouettes, decals, and fabric banners rated for outdoor use. Collect removable mounting strips and weatherproof tape so you don’t interrupt the project midway.
Tip: Test a small piece on a hidden area to confirm residue behavior. - 3
Prep the door surface
Wipe the door with a mild soap solution and dry completely. Clear the area from the hinges and sensors to maintain function and safety.
Tip: Avoid harsh cleaners that could dull paint or sealant. - 4
Attach primary elements
Place the main silhouettes using removable mounting strips, spacing evenly. Start from the center and work outward to maintain balance.
Tip: Use a level or string guide to ensure straight lines. - 5
Add lighting accents
Install battery-powered LEDs along the door edges or behind silhouettes for glow. Ensure cords are secured and do not interfere with door movement.
Tip: Keep lights away from door tracks and sensors. - 6
Finalize and test
Check stability with a light breeze, test the door’s open/close path, and confirm nothing blocks safety sensors. Make adjustments if needed.
Tip: Simulate a windy condition to ensure no pieces fly loose. - 7
Plan for takedown
Create a quick-removal plan and label storage containers. Protect the door finish by wiping residue after removal.
Tip: Document what was used and where it went for next year.
Got Questions?
Is it safe to decorate a painted garage door with decals and tape?
Yes, if you use removable, exterior-safe mounting strips or tape and avoid nail or screw attachments. Test on a small area first and follow manufacturer guidelines for removal to prevent paint damage.
Yes, use removable mounting strips and test a small spot first to protect the paint.
Can I reuse Halloween decorations next year?
Absolutely. Lightweight decals and fabric banners are often reusable if stored properly. Check for any weather-related wear and replace anything stretched or faded.
Yes, with proper storage and checks for wear.
What about weather and wind? Will decorations stay put?
Weather can affect adhesion. Use weatherproof, removable materials and secure lighter items with mounting strips designed for outdoor use. Remove or reinforce if forecast calls for high winds.
Weather matters; use outdoor-safe mounting and be ready to reinforce or remove if windy.
How do I remove the decorations without damaging the door?
Gently peel mounting strips and use a hairdryer on low heat to soften residue. Clean surfaces with mild soap afterward to restore the door’s finish.
Peel slowly and use a bit of heat to soften adhesive, then clean the area.
Should I avoid decorating doors that house a power opener?
Yes. Do not place heavy props near the motor or interfere with the sensor path. Use lightweight items and keep cables away from moving parts.
Avoid heavy props near the opener; keep cables away from moving parts.
What if my door has a glossy finish or special coating?
Test first and consider non-adhesive options like magnetic silhouettes or fabric banners that minimize surface contact. If unsure, consult a professional.
Test first and consider non-adhesive options or consult a pro if unsure.
Can I use extension cords outdoors for lighting?
Opt for battery-powered or solar-powered lighting to avoid outdoor extension cords, reducing trip hazards and electrical risk.
Prefer battery or solar lighting to avoid cords outdoors.
Watch Video
Quick Summary
- Plan the theme and layout before attaching anything.
- Use removable mounting to protect door finish.
- Prioritize safety sensors and door movement.
- Choose lightweight, weatherproof decorations.
- Reserve time for easy takedown and storage.