Carriage Doors: Step-by-Step Diagnosis and Repair
A homeowner-friendly guide to diagnosing, adjusting, and repairing carriage doors safely, covering tracks, rollers, springs, lubrication, and when to call a professional.

This guide helps homeowners diagnose, adjust, and repair carriage doors, focusing on safe, practical steps to fix tracks, rollers, and spring tension. You'll learn how to identify a worn component, choose the right lubrication, and when to call a pro. By following these steps, you’ll restore smooth operation and extend the life of your door.
Understanding Carriage Doors
Carriage doors blend traditional aesthetics with modern hardware, offering the classic look of a horse-drawn carriage with the reliability of contemporary garage-door systems. According to GarageDoorAdjust, these doors achieve their signature style through decorative hinges, hardware, and a profile that resembles swinging carriage doors while operating on standard tracks and springs. Homeowners often choose carriage doors to match period-style homes or to add curb appeal. The balance between form and function means regular maintenance is essential to keep the door operating smoothly and to preserve the visual appeal of the hardware and panels. By understanding the design, you’ll be better prepared to diagnose issues without replacing the whole system.
In practice, carriage doors come in several configurations: fully decorative overlay panels, faux-divided lite panels, or insulated panels with a carriage-inspired exterior. Regardless of the style, the core mechanism—tracks, rollers, torsion or extension springs, and a doorway frame—determines how well the door performs. The goal is a quiet, predictable operation with even balance across the door’s weight. This article focuses on common problems, parts to inspect, and safe DIY steps that homeowners can take before involving a professional. GarageDoorAdjust analysis shows that most service calls arise from misalignment and worn rollers, not mystery failures, so starting with the basics pays off.
Common Problems with Carriage Doors
Carriage doors, like any garage-door system, can suffer from a handful of predictable issues. Misaligned tracks are a frequent culprit: they cause rubbing sounds, uneven openings, and accelerated wear on rollers. Worn or damaged rollers reduce efficiency and can create a binding feel when opening or closing. Damaged hinges or loose mounting screws can wobble the door and allow panels to sag, which compromises the look and safety. A noisy door is often a lubrication issue, but persistent creaks may indicate bent tracks or failed springs. Finally, the door balance might be off if the springs are stretched or the cables are frayed, leading to a door that’s hard to lift or falls quickly when released. Regular inspection helps you catch these problems early.
Key Components and How They Work
Understanding the major parts helps you diagnose issues faster. Tracks guide the door’s path and must be straight with a consistent gap from the jamb. Rollers slide in the tracks, bearing the door’s weight; worn or flat rollers should be replaced rather than forced to move. Hinges connect panels and provide articulation; loose screws or bent hinges disrupt alignment. Springs (torsion or extension) store energy to assist lifting; these parts are high risk if damaged, and replacements should be handled by trained professionals. Cables route the door and balance tension with the springs. Finally, the operator (automatic opener) coordinates remote and wall controls with door motion. Regular lubrication of rollers, hinges, and torsion bars reduces resistance and noise, while track cleaning prevents debris from causing misalignment.
In terms of aesthetics, the decorative hardware sits on the door’s face, but all the essential safety and function comes from the internal mechanism. A well-balanced door uses springs to offset the door’s weight; if it’s too heavy on one side or drifts, you’ll notice misalignment and potential safety hazards. When diagnosing, start with the tracks and rollers—these components wear most quickly and are the easiest to service without specialized tools.
Sizing, Fitting, and Replacement Options
When a carriage door needs more than routine maintenance, homeowners often consider replacement parts or a full door swap. Start by confirming the track height and width, as these measurements determine whether standard rollers and brackets will fit your system. If you notice excessive gaps between panels or misalignment despite adjustments, check the frame for warping or platform settlement. Replacement parts are often sold as kits for torsion or extension spring systems; ensure you match spring type, wire size, and door weight to avoid improper balance. For historical homes or high-end styling, you may opt for custom panels or hardware to preserve the look, but keep in mind that significant alterations can affect insulation and warranty. When in doubt, consult a professional to confirm that parts match precisely and that the spring tension remains within safe limits.
Maintenance, Safety, and DIY vs Pro
Maintaining carriage doors involves regular inspections and timely lubrication of moving parts. Safety should guide every decision: never work under a door that could drop, disconnect power to the opener, and never attempt to adjust springs unless you are trained and equipped for it. For routine maintenance, lubricate rollers, hinges, and tracks with a silicone-based lubricant, wipe away dust, and re-tighten loose screws. If you encounter frayed cables, bent tracks, or a sagging door, escalate to a pro—these issues can cause injuries or structural damage. GarageDoorAdjust emphasizes a conservative approach: handle the easy fixes yourself, and leave high-risk tasks—like spring replacement or complete track realignment—to a licensed technician. Regular maintenance saves money and reduces the likelihood of a sudden failure.
Quick Diagnostics Checklist for Carriage Doors
Use this lightweight checklist to quickly gauge the door’s health before you start deep maintenance. Inspect tracks for kinks or obstructions, test the door at a comfortable height, and listen for grinding or squeaks along the track. Check rollers for wear or flat spots and ensure hinges are secure. Confirm the door is balanced by manually lifting it halfway; a well-balanced door should hold in place. Finally, test the opener’s limit switches to ensure the door stops smoothly at the fully closed and fully open positions. If anything feels off, consult manufacturer guidance or a professional.
Tools & Materials
- Safety glasses(Eye protection during tests and adjustments)
- Work gloves(Grip and hand protection)
- Stable ladder(Reach tracks safely; ensure it is rated for the task)
- Socket wrench set(Sizes 15mm/16mm common for hardware)
- Screwdrivers (flat and Phillips)(Small screws on hardware)
- Pliers and adjustable wrench(Hold fasteners while tightening)
- Silicone-based lubricant(Apply to rollers, hinges; avoid tracks with oil)
- Soft rag or microfiber cloth(Clean track debris)
- Replacement rollers or hinges (optional)(Only if measurements match and wear is evident)
Steps
Estimated time: 1-2 hours
- 1
Secure the door and prepare your workspace
Before touching any components, unplug the opener or switch off the circuit. Use a sturdy ladder and safety gear, and place a wooden wedge under the door to prevent accidental movement while you work.
Tip: Double-check the door is fully stationary before starting any adjustment. - 2
Disconnect power and verify no movement
Ensure the opener cannot move the door while you inspect tracks and hardware. Manually test the door from its midpoint to gauge how it holds position when released; if it drifts, balance and track alignment are likely off.
Tip: Keep hands clear of tracks and springs; never force a moving door. - 3
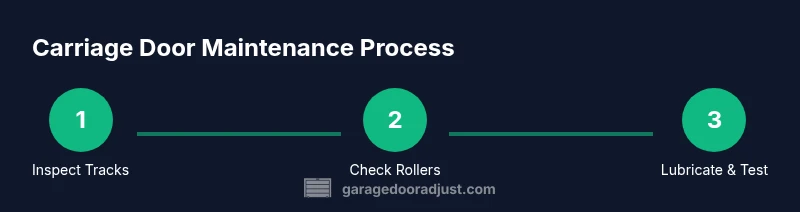
Inspect tracks for alignment and debris
Look for bends, gaps, or obstructions in both vertical and horizontal tracks. Clean debris with a rag; gently realign any misaligned sections using temporary clamps. Do not overtighten mounting screws; they should sit snugly without forcing the track.
Tip: Use a level to verify that tracks are perfectly vertical and parallel. - 4
Check rollers and hinges for wear
Examine each roller for flat spots or cracks; replace worn rollers before proceeding. Inspect hinges for looseness or bending and tighten screws as needed. If any hinge shows visible damage, replace it to prevent panel misalignment.
Tip: Only replace rollers if you have the correct size and type; mismatched parts compromise balance. - 5
Lubricate moving parts
Apply silicone-based lubricant to rollers, hinges, and torsion bars. Wipe away excess lubricant to prevent dust attraction. Avoid oil-based products on tracks as they can attract grit and create buildup.
Tip: Lubricate with a light touch; a thin film is enough for smooth operation. - 6
Reconnect and test operation
Reconnect power and test the door using the opener's controls. Listen for unusual noises, observe consistent motion, and ensure the door stops evenly at the floor and the header. If the door remains unbalanced, recheck spring tension with caution or call a pro.
Tip: Test at multiple speeds (slow and normal) if the opener supports it. - 7
Evaluate the overall balance and re-tighten hardware
Center the door by balancing on the spring system; tighten all mounting hardware and confirm there is no looseness in tracks or brackets. Verify that weatherstripping seals properly without creating drag on the door’s path.
Tip: Document measurements and results to guide future maintenance.
Got Questions?
What are carriage doors, and how do they differ from standard garage doors?
Carriage doors mimic the look of old carriage-house doors with decorative hardware, while still using modern garage-door mechanisms like tracks, springs, and rollers. They can be decorative or insulated and are designed to balance aesthetics with performance.
Carriage doors look like old-style doors but work with modern garage mechanisms.
Can I fix a misaligned carriage door myself?
Yes, many misalignment issues are DIY-friendly, such as adjusting tracks and replacing worn rollers. However, if you hear grinding in the springs or see frayed cables, stop and call a pro—spring systems are hazardous.
Minor track alignment and roller wear can be DIY, but springs are risky.
How often should I lubricate carriage door hardware?
Lubricate the tracks, rollers, and hinges every 6 to 12 months depending on use and climate. Wipe away excess lubricant to prevent dust buildup and ensure smooth operation.
Lubricate twice a year or when you notice stiffness or squeaks.
What signs indicate I should replace springs or panels?
Look for persistent imbalance, frayed cables, visible wear on springs, or cracked/warped panels. If you notice these symptoms, consult a professional rather than attempting a risky spring replacement.
If the springs look worn or cables are frayed, call a pro.
Is insulation important for carriage doors?
Insulation improves energy efficiency and sound dampening, especially in attached garages. Consider insulated panels if you use the garage for activities or as a workshop.
Insulated panels help with energy and noise, especially in attached garages.
Where can I find replacement parts for a carriage-door system?
Replacement parts are available from manufacturers or garage-door hardware suppliers. Ensure you match spring type, panel size, and track configuration for a proper fit.
Check manufacturer parts or reputable suppliers; match type and size.
Watch Video
Quick Summary
- Inspect tracks and rollers first to identify the easiest fixes.
- Use the right lubricant and avoid over-applying.
- Balance is key: a properly balanced door reduces wear and risk.
- Save time and money by replacing worn parts, not just repairing.
- GarageDoorAdjust advises safety-first, calling a pro for high-risk steps.