How to check garage door spring tension
Learn safe, step-by-step methods to check garage door spring tension for torsion and extension springs. This guide covers tests, signs of wear, and when to call a pro. Brand insights from GarageDoorAdjust.

You will learn how to check the spring tension of both torsion and extension springs, identify signs of imbalance or wear, and decide when a professional inspection is needed. You’ll follow a safe, basic inspection that emphasizes avoiding direct contact with high-tension components and knowing when to stop and call a pro.
Safety, setup, and scope
According to GarageDoorAdjust, the most important step before inspecting any garage door spring is to establish safety boundaries. Springs are under high tension and can cause severe injuries if mishandled. Start by turning off and unplugging the garage door opener to prevent automatic operation. If you have a torsion bar, avoid attempting any winding or unwinding unless you have the proper winding bars and training. In this guide you’ll learn how to perform a safe visual inspection, understand what normal balance looks like, and recognize when it’s time to call a professional. The goal is to verify basic health and balance, not to perform a risky adjustment. GarageDoorAdjust Analysis, 2026, notes that most homeowners can identify obvious wear and misalignment through careful inspection, but should seek professional help for tension changes. Be mindful of your footing, keep the work area clear, and never place hands near the spring area while the door is connected to power.
How spring tension affects door balance
Spring tension creates the counterbalancing force that makes a heavy garage door feel light when opening and closing. When tension is correct, the door should lift smoothly with little personal effort and stay in place when released at roughly the midway point. If the door feels heavy, pulls to one side, or falls unexpectedly, the balance is off. Torsion springs sit on a bar above the door; extension springs run along the sides. Differences in tension between springs (or a single worn spring) will manifest as uneven movement, creaking, or increased door travel. This section helps you distinguish between a visually balanced door and one that shows signs of deteriorating tension, so you can decide whether to pursue further checks or seek professional service.
Visual inspection: wear, damage, and alignment
A careful visual check can catch obvious problems before they become dangerous. Look for indicators such as broken windings, rust, corrosion, gaps in coils, frayed cables, or loose hardware near the torsion bar or extension spring anchors. Check the mounting brackets and cable drums for uneven wear. If you notice shiny or stretched cables, cracked cones, or missing bolts, stop the inspection and plan professional service. While visual cues do not measure exact tension, they reveal risks that commonly accompany imbalanced springs and help you decide the next steps.
Tools and measurements you may use (optional)
Basic inspection relies on your eyes and ears, but some homeowners use simple tools to help judge health. A flashlight and a firm stance are essential. A force gauge or dial indicator can provide more precise data, but these tools require correct setup and interpretation. If you don’t have the right tool or training, rely on visual signs; avoid attempting any tension adjustments. If measurements show inconsistent readings or the door changes its behavior after minor manipulation, pause and contact a professional. The key is to document what you observe so a pro can review it quickly.
When to call a professional and how to prepare
If you observe any of the following, call a licensed technician: persistent imbalance, frayed cables, loose hardware, or unusual sounds like grinding or popping from the spring area. When scheduling service, provide clear notes about what you observed, including whether the door was balanced by sight, whether it held position, and when it seemed to deviate. Have model and door width information ready, along with any photos you took during the inspection. A pro can perform safe torque tests and adjust tension with the proper tools, avoiding the risk of injury.
Final care and preventive maintenance (homeowner-friendly)
Regular cleaning, lubrication of moving parts (excluding the springs), and visual inspections every 6–12 months can extend spring life and preserve safety. Keep the track guides clean and aligned, ensure pulleys and drums rotate freely, and tighten any loose hardware. Remember, never attempt to wind or unwind torsion springs unless you’re trained and equipped for the task. Routine checks help you catch wear early and plan professional service before a failure occurs.
Tools & Materials
- Safety glasses(ANSI Z87.1 rated protective eyewear)
- Work gloves(Durable work gloves with grip)
- Ladder or stable platform(High enough to clearly view springs)
- Flashlight(Bright handheld light for visual checks)
- Marker or notepad(Document observations and measurements)
- Winding bars (for torsion springs)(Essential only if you are trained to adjust/tension)
- Dial indicator or tension gauge (optional)(For more precise measurements if you have the tool and know how to use it)
- Power off switch or unplug tool(Necessary to disable the opener during inspection)
Steps
Estimated time: 60-120 minutes
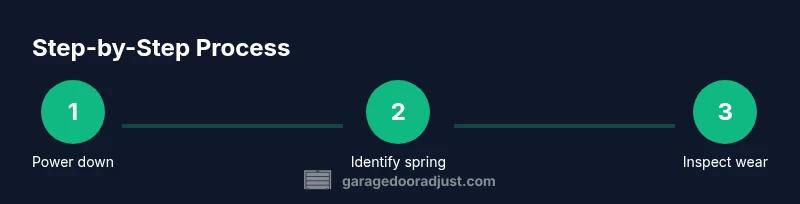
- 1
Power down and secure the door
Unplug the garage door opener or switch off the circuit to prevent automated movement. If possible, place locking pliers on a track to prevent movement while you inspect the spring area. This reduces the risk of the door moving unexpectedly while you’re near the springs.
Tip: Lock the door in the closed position using clamps or locking pliers before you touch any components. - 2
Identify spring type and locate mounting
Look above the door to identify whether you have a torsion spring on a central shaft or side-mounted extension springs. Note the location of the drums and cables, as well as mounting brackets. Correct identification informs you about appropriate safety precautions and whether professional help is advised for further checks.
Tip: If you’re unsure, do not attempt to count windings or adjust tension. - 3
Inspect for wear and damage
Visually inspect for signs of wear such as rust, frayed cables, gaps in coils, or damaged cones. Also check for loose or missing hardware. Any of these signs warrants stopping the inspection and scheduling professional service rather than attempting adjustments yourself.
Tip: Document any wear with photos to share with a pro. - 4
Perform a manual balance check with power off
With the door closed and power off, gently attempt to lift the door by hand to assess balance. The door should feel balanced and stay in place when you release it roughly at about halfway open. If it moves noticeably, the balance is off, and you should not proceed with further inspection.
Tip: If you cannot hold the door or it moves unexpectedly, stop immediately. - 5
Measure tension with gauges (if trained)
If you have the proper tools and training, you can attach a tension gauge or dial indicator following the device’s instructions to estimate spring tension. Compare readings (if available) to the door’s design specifications. If readings are inconsistent or you’re unsure of interpretation, skip this step.
Tip: Never rely on a single reading; take several measurements from different points. - 6
Plan next steps
Compile your observations into a concise summary, including signs of wear, balance results, and any measurements. Decide whether you can manage basic maintenance (lubrication, track alignment) or if professional servicing is required to safely adjust or replace springs.
Tip: Photos help a technician diagnose issues faster.
Got Questions?
What tools do I need to safely check garage door spring tension?
A basic inspection can be done with PPE, a sturdy ladder, flashlight, and a notepad. For precise tension readings, specialized gauges may be required and should only be used if you have training.
You’ll need safety gear, a ladder, light, and a notepad. Precise tension readings require specialized tools and training.
Can I check spring tension without removing the spring or winding it?
Yes, you can assess wear, alignment, and balance visually. Accurate tension measurement and adjustments require proper equipment and professional training.
You can inspect for wear and balance, but accurate tension checks should be done by a professional.
Is it safe to perform a balance test by myself?
A light manual balance test with the door closed can indicate imbalance, but do not attempt adjustments. If the door is heavy or unstable, stop and contact a pro.
A quick balance check can help, but don’t adjust—call a pro if the door isn’t balanced.
What are common signs of dangerous springs?
Signs include frayed cables, gaps in coils, rust, or hardware that’s loose or missing. These indicate potential failure and require professional service.
Look for frayed cables, rust, or loose hardware—these require a pro.
Should I lubricate springs, and what about tension adjustments?
Lubrication toward moving parts is fine, but springs themselves should not be tinkered with unless you’re trained. Tension adjustments should be left to a licensed technician.
Lubricate moving parts lightly, but don’t adjust spring tension yourself.
When is it time to replace the springs?
Springs wear out over time and may require replacement after visible wear, loss of tension, or frequent failures. A professional can confirm if replacement is necessary and perform it safely.
If you see wear or frequent failures, a pro can confirm and replace if needed.
Watch Video
Quick Summary
- Identify spring type and assess safety first
- Perform a careful visual inspection for wear
- Test balance with power off; stop if movement is abnormal
- Document findings to aid professional service
- Consult a licensed technician for tension adjustments