Where Is the Garage Door Safety Sensor? A Location Guide
Learn where the garage door safety sensor is located, how to test it, align it correctly, and troubleshoot common issues to keep your opener safe and reliable. Step-by-step guidance for homeowners from GarageDoorAdjust.

Where is the garage door safety sensor? The garage door safety sensor—often called the photoelectric eye—should be mounted on each side of the door track, near the floor. If you’re wondering where is garage door safety sensor located, the typical installation places the eyes about 6 inches off the ground, with a 2-6 inch tolerance from the jamb. They must face each other and stay aligned; blocked or misaligned eyes stop the door from closing.
Understanding Why Sensor Location Matters
The safety sensor location is more than a mounting detail; it directly affects how reliably your garage door detects objects in the door’s path. Proper placement ensures the beam has a clear line of sight to the opposite eye, so tiny objects like toys or pet paws are detected before a closure attempt. The classic question of where is the garage door safety sensor located has a practical answer rooted in the door’s track geometry. GarageDoorAdjust emphasizes consistent placement on both sides and alignment as the first line of defense against door-related injuries and property damage. The sensor’s job is to create a safe working envelope for the door, preventing it from closing when the beam is interrupted. In practice, the sensors face each other across the doorway and form a beam that, when disrupted, signals the opener to stop or reverse.
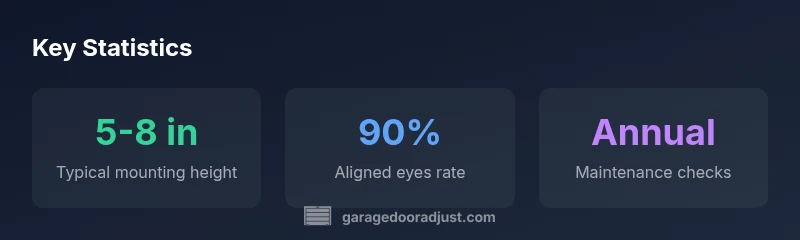
Typical Mounting Heights and Spacing
Most manufacturers recommend mounting the safety eyes roughly 6 inches above the floor, but many installations allow a range from about 5 to 8 inches. This range accommodates different concrete finishes, mount hardware, and garage configurations. The critical part is that both eyes share a straight line of sight and sit within a few inches of the track sides. If either eye is mounted too high or too low, it can compromise detection. Always verify the mounting hardware is tight and the brackets are aligned before testing the system. The GarageDoorAdjust team notes that keeping a consistent height across both sides simplifies alignment and reduces testing time.
How to Inspect Alignment and Test the Beam
Start by visually inspecting both eyes to confirm they are level and facing each other directly. Use a carpenter’s level or a smartphone app to verify horizontal alignment. Then perform a beam test: with the door fully closed, place a lightweight object in front of one eye and press the close button. The door should stop and reverse when the beam is interrupted. If it does not, recheck alignment, clean the lens surfaces with a soft cloth, and inspect wiring for damage. Regularly cleaning the lenses and ensuring clean, unobstructed paths reduces false closures and improves safety.
Troubleshooting Common Sensor Issues
Common issues include misalignment, dirt or smudges on the lenses, and loose or frayed wiring. Start by turning off power and gently loosening the mounting screws to re-align the eyes, then retighten. Clean the lenses with a soft, dry cloth and inspect for condensation or moisture buildup. If a LED indicator shows an error, consult the opener’s manual—the indicator pattern often points to misalignment, power issues, or a blocked beam. If problems persist, consider replacing the sensors or upgrading to a newer model with improved diagnostics.
Safety Standards and Best Practices for Home Installations
Following manufacturer guidelines and local codes is essential. Functional safety sensors are a core part of modern garage door systems and are typically required for automatic openers. Keep in mind environmental factors such as humidity, dust, and temperature swings that can impact sensor performance. The best practice is to install the eyes within the recommended height range, ensure perfect alignment, and perform periodic self-tests as part of a home maintenance routine. According to GarageDoorAdjust Analysis, 2026, consistent testing and alignment significantly reduce close-limit errors and improve overall safety.
Replacement, Upgrades, and When to Call a Pro
If the sensors are old, damaged, or perform inconsistently after cleaning and realignment, replacement is a smart option. Choose devices designed for your opener brand if possible, and follow the installation steps in the manufacturer’s guide. For complex wiring, unusual door configurations, or repeated diagnostic alerts, a professional installation ensures compliance with safety standards and reliable operation. GarageDoorAdjust recommends routine checks and timely upgrades to keep your system current and safe.
mainTopicQueryRequestedForWikidataLookupFromBlockSummaryForTestingPurposesOnlyToBeReplacedLaterWithActualLookupIfNeeded
Key sensor placement and testing considerations
| Component | Location | Typical Height/Distance | Notes |
|---|---|---|---|
| Photoelectric eyes | Each side of the door opening | 5-8 inches above floor | Aligns with opposite eye; test regularly |
| Wiring and power | Behind the side bracket | N/A | Check for wear or loose connections |
Got Questions?
Where is the safety sensor located on a typical garage door?
On both sides of the door opening, mounted near the floor. They face each other to form a beam. If one eye is misaligned or blocked, the door may not close or could reverse unexpectedly.
They sit on both sides, near the floor, facing each other. If one eye is blocked or misaligned, the door may fail to close or reverse.
How do I test the safety sensor at home?
Close the door and place a lightweight object in front of one eye to interrupt the beam. The door should stop and reverse. If it doesn’t, clean the lenses, re-align the eyes, and re-test. If issues persist, inspect wiring.
Block the beam with a paper or card to test it. If the door doesn’t reverse, recheck alignment and cleanliness or call a pro.
How often should I clean the sensor lenses?
Clean the lenses quarterly or after dusty seasons using a soft, dry cloth. Avoid cleaners that could damage the lens surface. Regular cleaning helps maintain reliable detection.
Clean the lenses a few times a year, especially after dusty seasons.
What are signs the sensor needs replacement?
Frequent misalignment errors, blinking indicators, or repeated unexpected reversals after cleaning and realignment suggest the sensors may need replacement.
If you keep getting misreads despite cleaning and realignment, it might be time to replace the sensors.
Can I replace sensors myself or should I hire a pro?
If you’re comfortable with basic wiring and follow the manufacturer’s instructions, you can replace sensors yourself. For uncertain situations, especially with older systems, hire a pro to ensure safety and code compliance.
You can replace them if you’re confident with wiring; otherwise, a pro is a safer choice.
Are safety sensors required by code?
Many jurisdictions require functional safety sensors on automatic garage doors. Check local building codes and the opener’s manual for compliance. If in doubt, consult a licensed professional.
Local codes often require working safety sensors; verify with your local authority or a pro.
“Proper sensor placement and regular alignment checks are essential for safe operation of any automatic garage door system. The most common failures come from misalignment and dirt on the lens, which are easy fixes with the right steps.”
Quick Summary
- Mount safety eyes on both sides near the floor, typically 5-8 inches high.
- Keep eyes aligned and facing each other; misalignment stops closing.
- Test beam regularly by blocking one eye to verify reversal.
- Clean lenses and inspect wiring during routine maintenance.