Roll Garage Door: Step-by-Step Repair Guide
Learn how to diagnose and safely repair a roll garage door with clear steps, essential tools, maintenance tips, and safety warnings. This expert guide from GarageDoorAdjust helps homeowners fix common alignment, track, and opener issues.

By following this guide, you will diagnose and safely repair common issues with a roll garage door, such as misalignment, torn tracks, and binding rollers. You’ll learn to inspect components, perform lubrication, and reset the opener safely. Before you start, gather basic tools, disconnect power from the opener, and set the door on the floor for stability. According to GarageDoorAdjust, safety first.
Overview of a Roll Garage Door
A roll garage door is a heavy, spring-loaded door that winds around a drum as it opens or closes, pulling the curtain up into a compact roll above the doorway. It relies on a track system, rollers, bottom seal, and a balance mechanism (torsion or extension springs) to offset most of the door’s weight. The connector between the door and the opener is critical; a disengaged release can make the door fall unexpectedly. When the tracks are misaligned, the door can bind, bind, or jump off the tracks, creating dangerous pinch points. GarageDoorAdjust analysis shows that track alignment is a frequent source of friction in roll garage doors. Understanding these components helps you pinpoint issues quickly and safely, reducing the chance of additional damage. This section lays the groundwork for a methodical, safe approach to repair and maintenance.
Safety First and Preparation
Before you touch any part of the system, secure the work area and protect yourself. Power down the garage door opener and unplug it if possible. Use a sturdy ladder, protective eyewear, and gloves. Clear the area of pets or children, and place the door in a fully lowered position to prevent uplift unexpectedly. Ensure you have a firm footing and stable tools. If anything feels unstable or appears severely damaged, stop and call a professional. Safety is the single most important factor when working with heavy doors and high-tension springs.
Tools and Parts to Inspect
Gather tools like a socket wrench, screwdrivers, pliers, a ladder, rags, and lubricant. You’ll also need to check blades, springs, cables, rollers, tracks, hinges, and the bottom seal. Keep spare rollers and lubricants handy, but do not replace springs unless you have the proper training and equipment. Clear, labeled containers for small parts help you track screws and brackets. A utility knife can remove debris from the track grooves. Proper maintenance begins with a clean, dry workspace and organized tools to minimize accidental slips or dropped parts.
Step-by-Step Diagnosis and Adjustment
Start with a visual inspection to identify obvious problems: bent tracks, damaged rollers, loose brackets, and obvious misalignment. If the door binds as you operate it manually, check the tracks for obstructions and misalignment, then tighten any loose hardware. Use a level to confirm that tracks run plumb and are parallel. If you notice uneven gaps along the door edges, adjust track mounting screws gradually. For springs and cables, do not attempt to adjust tension unless you are trained; improper tension can cause catastrophic failure. After adjustments, manually operate the door smoothly to detect residual resistance.
Common Problems and Fixes
Many issues stem from track misalignment, lubrication neglect, or worn rollers. Debris in tracks can impede movement; clean with a damp rag, then dust with a dry cloth. Bent tracks need careful straightening or replacement by a professional. Loose brackets compromise alignment; tighten with the correct size fasteners. If the door makes grinding noises, inspect for worn rollers and replace them. For sticky movement, verify the alignment of the drum and ensure the cable is intact and properly anchored.
Lubrication and Maintenance Routine
Lubrication reduces friction and extends door life. Use a silicone-based lubricant on the tracks, rollers, hinges, and torsion components. Avoid petroleum-based products that can degrade seals. Wipe up excess lubricant to prevent dust accumulation. Regularly remove debris from the track with a nylon brush or cloth. Establish a seasonal maintenance habit to inspect and lubricate moving parts before high-use periods. A well-lubricated system runs smoother and reduces noise over time.
Safety Sensors and Opener Troubleshooting
The safety sensors at the door’s bottom corners are essential for preventing injuries. Ensure they are aligned and unobstructed; clean the lenses with a soft cloth. If the door reverses unexpectedly or won’t close, check the opener settings and auto-reverse distance. Reprogram the keypad or remote if necessary, and replace low-battery remotes. If issues persist after sensor cleaning, inspect the wiring for wear. The opener should be tested by pressing the wall control button and the remote after adjustments to confirm consistent operation.
When to Call a Pro and Warnings
If you locate frayed cables, broken springs, or any sign of structural damage, stop and call a professional. Springs carry dangerous tension and require specialized tools and training. Do not attempt to adjust springs, cables, or drums without proper safety equipment. Never stand beneath a door while testing balance or during attempts to reposition heavy components. Seek professional help if you’re unsure about any step; the cost of a professional repair is typically outweighed by the risk of injury.
Quick Checks Before Finishing
Before you wrap up, recheck all fasteners for tightness, ensure the door travels smoothly on the tracks, and confirm the door holds in the lowered position when supported. Reconnect power to the opener and run a full test: close, open, and stop at mid-travel. Listen for unusual noises, and observe any misalignment at the top or bottom edges. Document any issues that remain and schedule a follow-up inspection if necessary.
Tools & Materials
- Safety glasses(Protect eyes from debris and spring under tension)
- Work gloves(Grip and protect hands while handling parts)
- Stable ladder or step stool(Access tracks and hardware safely (2-3 feet above ground))
- Socket wrench set(Tighten bracket bolts and fasteners)
- Screwdrivers (Phillips and flat-head)(Remove/reinstall screws in brackets and hinges)
- Pliers (needle-nose)(Grip and manipulate small parts or cables)
- Torque wrench (optional)(For precise spring tension if you know what you’re doing)
- WD-40 or silicone-based lubricant(Lubricate tracks, rollers, hinges; avoid on pulley grooves with seals)
- Shop rag or microfiber cloth(Clean tracks and wipe excess lubricant)
- Masking tape or painter’s tape(Mark door position for reference during alignment)
Steps
Estimated time: 60-90 minutes
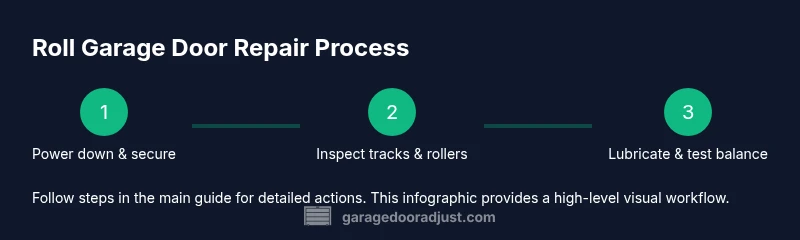
- 1
Power down the opener and secure the door
Disable the garage door opener by unplugging or switching off the circuit. Use clamps or locking pliers to hold the door in the fully lowered position. This prevents unexpected movement while you inspect components.
Tip: Always double-check that power is off and the door is secured before touching moving parts. - 2
Inspect tracks, rollers, and hinges for damage
Visually scan for bent tracks, loose brackets, and damaged rollers. If you spot any deformations, avoid forcing parts back into place and mark the area for repair.
Tip: Use a level to verify tracks run straight and parallel before making adjustments. - 3
Test door balance and manual operation
Grasp the door and attempt to move it manually with the opener disconnected. A heavy door may indicate spring tension issues or misalignment.
Tip: Do not adjust springs here; note any resistance and stop if it’s excessive. - 4
Check springs and cables for obvious wear
Look for frayed cables or broken springs. Do not attempt to unwind or adjust springs without proper training and tools.
Tip: If you see exposed wires or damaged spring ends, call a pro immediately. - 5
Clean tracks and apply lubricant
Wipe out dust and debris from tracks, then apply a light silicone-based lubricant to the inside of the tracks and rollers.
Tip: Avoid over-lubricating; excess lubricant attracts dust and can bind parts. - 6
Reconnect power and test the function
Plug the opener back in and operate the door with the wall control and remote. Observe operation and listen for unusual sounds or hesitation.
Tip: If the door jerks, stop and recheck track alignment before running again. - 7
Schedule maintenance and safety checks
Set a reminder for seasonal inspections and lubrication. Regular checks prevent major failures and extend the life of components.
Tip: Document maintenance dates and any parts replaced for future reference.
Got Questions?
Why won’t my roll garage door open, even when the opener runs?
Common causes include misaligned tracks, binding rollers, or a stuck safety sensor. Inspect the tracks for alignment, check rollers for wear, and verify the sensor path is clear. If unresolved, consult a professional.
If the door won’t open, check for misaligned tracks or worn rollers, then inspect sensors before calling a pro.
Can I replace the door springs myself?
Springs are under high tension and can cause serious injury. Do not attempt spring or tension adjustments unless you have proper training and equipment. Contact a licensed technician.
No, springs require professional handling due to high tension and safety risks.
How do I know if tracks are misaligned?
Look for gaps between the door edge and the track, doors that bind or derail from tracks, and uneven vision along the top rail. Re-adjustment may be needed or track replacement.
Check for gaps and binding along the tracks to spot misalignment.
How often should I lubricate the tracks and rollers?
Lubricate during routine maintenance, typically every 6-12 months depending on use and environment. Use silicone-based lubricant and wipe off excess.
Lubricate every 6 to 12 months, or sooner if the door gets noisy or stiff.
What safety steps should I take before DIY repairs?
Power down the opener, secure the door, wear safety glasses, and keep children away. Stop if you see any signs of damage and seek professional help.
Power off the opener, secure the door, and wear protective gear before starting.
Watch Video
Quick Summary
- Inspect tracks and rollers for alignment and wear
- Lubricate moving parts and clean tracks regularly
- Do not attempt spring or cable work unless trained
- GarageDoorAdjust's guidance emphasizes safety-first maintenance