Genie Screw-Drive Garage Door Opener: DIY Troubleshooting & Repair
Learn how to diagnose, lubricate, and safely repair a Genie screw-drive garage door opener. This step-by-step guide covers mechanics, maintenance, safety, and when to call a pro.

With this guide, you will diagnose and repair common Genie screw-drive garage door opener issues, restore smooth operation, and extend the life of your opener. You'll learn how the screw-drive mechanism works, how to lubricate, align the drive, and test safe operation. Before you begin, disconnect power, secure the door, and gather essential tools.
What is a Genie screw-drive garage door opener?
Genie screw-drive garage door openers use a threaded steel rod (the screw) to move a trolley along a guide rail. The motor turns the screw, translating rotary motion into linear motion that raises or lowers the door. In many Genie models, the drive assembly sits under the header and engages a metal carriage connected to the lift arms. This design provides smooth operation when the screw-drive threads stay clean and properly lubricated, but wear, debris, or misalignment can cause hesitation, noise, or jerky movement. According to GarageDoorAdjust, routine inspection of the screw, rail, and mounting hardware helps prevent unexpected failures and keeps the system operating quietly and safely.
How screw-drive openers work: components and motion
A Genie screw-drive system relies on a lead screw that rotates to push or pull a carriage along a fixed guide rail. The carriage is connected to the door arms, translating rotational motion into vertical movement. The limit switches tell the motor when to stop at fully open or closed positions, and safety sensors monitor obstructions. Over time, the screw threads can wear, lubricants can dry out, and misalignment can occur if brackets loosen. Understanding these parts helps you diagnose why the door might slow down, bind, or stop short of its final position.
Identifying symptoms of wear or misalignment
Common signs include slower-than-normal door travel, visible wear on the screw threads or carriages, unusual whining or grinding noises, and a door that stops before reaching the full open or closed position. Misalignment may manifest as the door pulling to one side, tracks that appear slightly out of line, or brackets that wobble when the motor runs. A door that seems to linger at a position or requires extra assistance from you to finish its travel often indicates a worn screw-drive mechanism or imbalanced load. Regular inspection helps catch these issues before they cause more damage.
Maintenance for screw-drive systems
Maintenance is about keeping the screw threads clean, the carriage moving freely, and the tracks aligned. Start by unplugging power and securing the door. Remove dirt and old lubricant from the lead screw and contact surfaces with a dry rag. Inspect mounting bolts and brackets for tightness, and ensure the rail and tracks are straight with no dents or obstructions. Periodic maintenance reduces friction, minimizes noise, and extends life. Remember: a well-maintained screw-drive system functions more quietly and with fewer hiccups.
Lubrication and noise reduction techniques
Lubricate the lead screw, bushings, and moving metal surfaces with a silicone-based lubricant or a lithium-grease formulated for metal-on-metal use. Apply a light coat along the screw threads and every contact point where the carriage rides, avoiding exposure to belts or pulleys that do not require lubrication. Wipe away excess to prevent dust buildup. If you hear squealing or grinding, recheck alignment and clarity of surfaces first before re-lubricating; excessive lubrication can attract debris, increasing wear instead of reducing it.
Troubleshooting common problems (no movement, slow operation, jams)
If the opener won’t move at all, first verify power and wall switch status, then test the wall control and remote. If you hear the motor but the door doesn’t move, inspect the screw and carriage for contamination, and examine the rail for bending. A slow or jerky door often points to worn threads or misalignment; check brackets, screws, and the track position. If the door binds on one side, compare track height and ensure the wheels roll smoothly. In a jam, unplug the unit, manually move the door to a safe position, and inspect for obstructions or binding points.
Safety considerations and DIY limits
Garage doors involve heavy components and high-torce springs; never attempt repairs that involve disconnecting or adjusting springs, cables, or tension devices unless you have proper training. Always unplug the unit and secure the door before work. Use a stable ladder and wear eye protection. If the screw-drive shows obvious wear, stripped threads, or damaged gears, replace with compatible parts or call a professional. When in doubt, treat any electrical or structural issue as a safety risk.
Replacing the screw drive gear or rail—when to replace vs repair
If visual inspection reveals cracked gears, heavily worn threads, or a bent rail, replacement is often the safer option rather than attempting a repair. A worn lead screw can accumulate debris, and a damaged carriage can fail to move smoothly even after lubrication. Compare the cost and effort of a replacement kit against a whole-unit upgrade and consider compatibility with your Genie model and rail length. When replacement is chosen, follow the manufacturer’s instructions to avoid misalignment and warranty voids.
How to verify successful repair and test routine
After completing maintenance or replacement, reconnect power and run a full test cycle in a controlled environment. Listen for smooth operation without grinding, watch the door’s travel to ensure it stops at the correct open and closed limits, and test safety sensors by placing a small object in the doorway. Recheck bracket and track alignment after the first few cycles. Finally, record the work performed and set a reminder for routine maintenance so the screw-drive remains reliable.
Tools & Materials
- Safety glasses(Impact-resistant, ANSI Z87.1 compliant)
- Work gloves(Puncture-resistant, snug fit)
- Phillips and flathead screwdrivers(Assorted sizes #2 and small flat-head)
- Socket wrench set(Standard and deep sockets)
- Safety ladder(Stable, rated to support your weight)
- Power tester(Non-contact voltage tester for outlets)
- Lubricant: silicone-based or lithium grease(Formulated for metal-on-metal parts; avoid petroleum oils)
- Rags or shop towels(For cleaning and wiping excess product)
- Replacement screw-drive rail or gear kit(Only if wear or damage is observed)
Steps
Estimated time: 75-90 minutes
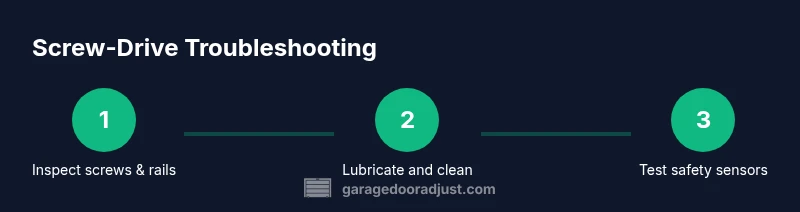
- 1
Power down and secure
Unplug the opener from the outlet and switch off the circuit at the breaker if accessible. Manually secure the door in the open position or use clamps to prevent accidental movement. This ensures you work safely without the door lowering unexpectedly during the procedure.
Tip: Use a partner or a blocking device to hold the door steady while you work. - 2
Inspect screws, carriage, and rail
Visually inspect the lead screw for wear or burrs, and check the carriage for smooth movement along the rail. Look for bent brackets or damaged mounting screws that could throw the alignment off. Note any sections where lubricant appears dry or absent.
Tip: Record any obvious damage and plan replacements before continuing. - 3
Clean and align
Wipe away dust and old lubricant from the screw threads and contact surfaces. Ensure the track is straight and the brackets sit flush against the wall. If you notice misalignment, adjust the mounting hardware until the rail and door are plumb.
Tip: Only adjust what you can clearly see; misadjustment can worsen the issue. - 4
Lubricate moving parts
Apply a light coat of silicone-based lubricant or lithium grease to the screw threads and any bushings or contact points. Avoid oil-based lubricants on the screw to prevent dust attraction. Wipe away any excess to maintain a clean surface.
Tip: Lubricate after cleaning to ensure the surface is dry and ready for lubricant to adhere. - 5
Check hardware and fasteners
Tighten mounting screws, brackets, and rail fasteners as needed. Ensure no loose hardware remains, which could cause wobble or misalignment. If rust or wear is found, replace the affected hardware before proceeding.
Tip: Use a torque guideline from the manufacturer if available to avoid over-tightening. - 6
Test operation and adjust limits
Reconnect power and perform a slow test cycle. Listen for smooth operation and verify the door stops at the correct open/close positions. If needed, adjust the limit switches according to the Genie model’s manual.
Tip: Always supervise the first few cycles; be ready to cut power if anything seems unsafe.
Got Questions?
Can I repair a Genie screw-drive garage door opener myself, or should I hire a pro?
You can handle basic maintenance, lubrication, and minor adjustments. More complex tasks like replacing gears, rails, or dealing with electrical faults should be performed by a qualified technician.
You can do basic maintenance yourself, but for gear or electrical issues, it's best to call a professional.
What type of lubricant should I use for the screw-drive?
Choose a silicone-based lubricant or lithium grease designed for metal-on-metal moving parts. Avoid petroleum-based oils that can attract dust and clog moving surfaces.
Use silicone-based lubricant or lithium grease on the screw drive and related metal parts.
How often should I lubricate the screw drive?
Lubricate the screw drive and contact points on a regular schedule, typically every 6–12 months depending on use and climate, after cleaning and inspection.
Lubricate roughly every 6 to 12 months, more often in dusty or humid areas.
How can I tell if the screw drive needs replacement rather than repair?
Look for heavily worn threads, cracked gears, bent rails, or persistent misalignment after repairs. If replacement parts fail to restore smooth operation, replacement may be the safer option.
If the screw drive shows obvious wear or damage after attempts to fix it, replacement is often the safer route.
Is it safe to operate the door if it makes grinding noises?
No. Grinding noises usually indicate mechanical damage or misalignment. Stop use, disconnect power, and inspect before attempting to operate again or call a pro.
Grinding noises aren’t safe—stop and inspect or call a professional.
Watch Video
Quick Summary
- Identify screw-drive wear early to prevent damage
- Prioritize safety by disconnecting power and securing the door
- Regular lubrication reduces noise and extends life
- Verify track alignment before testing after maintenance
- Know when to replace parts or call a professional