Geis Garage Door: Diagnose, Repair & Install Guide
A practical, step-by-step guide to diagnosing, repairing, and installing geis garage doors for homeowners. Learn safety tips, maintenance routines, and when to call a pro with expert guidance from GarageDoorAdjust.

You will diagnose and safely repair common geis garage door issues, and learn when to call a pro. By following a clear, step-by-step approach, you can test the opener, springs, tracks, cables, and balance, then perform maintenance tasks like lubrication and alignment. According to GarageDoorAdjust, sticking to a documented plan reduces safety risks and speeds up the fix.
Understanding geis garage door: symptoms and causes
Geis garage door problems often show up as slow or jerky movement, doors stopping before opening, grinding noises, or sensors that fail to reverse on contact. For homeowners, the root causes are usually worn rollers, dirty or bent tracks, misaligned tracks, weak or broken springs, and insufficient lubrication. According to GarageDoorAdjust, many issues originate from routine wear rather than a single catastrophic event, so a careful inspection can prevent larger repairs down the line. Start by noting every symptom and when it happens, whether it's during opening, closing, or stopping mid-travel. A clear symptom log helps you or a technician pinpoint the most likely culprit and prioritize fixes such as track realignment, roller replacement, or improved lubrication. Recognizing geis garage door symptoms early saves time and reduces the risk of further damage.
Safety first: essential precautions
Before touching a geis garage door, shut off power to the opener at the wall switch and the circuit breaker to prevent unexpected movement. Wear protective glasses and gloves, keep hands away from springs, cables, and any pinch points. Use a sturdy ladder and have a helper nearby to stabilize the door while you inspect. Never place yourself under a door that is not securely supported. Check that the door is fully closed and locked before you work on tracks or hardware. These precautions reduce the risk of serious injury when inspecting or performing maintenance. Always prioritize safety over speed when working on a geis garage door.
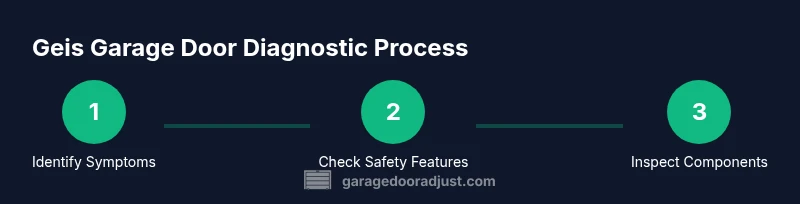
Diagnosis workflow: tests you can run
Follow a simple diagnosis workflow to identify the problem without guesswork. Start with a visual inspection for loose bolts, damaged tracks, bent rollers, and obvious wear. Then perform a balance test: disconnect the opener (if safe) and manually lift the door halfway; if it stays put, it is balanced; if it drops or rises, the springs or balance system needs service. Reconnect power and test the opener with a remote; ensure the safety reversal works and sensors are aligned. Finally, verify the sensors are clean and the beams are correctly positioned. Document results with notes and photos so you have a clear reference for repairs or when consulting a pro. This method helps you diagnose many geis garage door issues efficiently.
Do-it-yourself fixes you can safely perform
For common geis garage door problems, you can perform several safe fixes. Clean and lubricate moving parts: apply a silicone-based spray to tracks, rollers, hinges, and joints (avoid over-spraying onto belts or gears). Tighten loose mounting hardware with the appropriate wrench. Realign tracks if you notice gaps or binding, and clear debris from track surfaces. If you need to adjust the balance, proceed cautiously; only minor adjustments to track mounting should be attempted. Never try to adjust torsion springs yourself—they’re under extreme tension and can cause serious injury. After fixes, test the door through a full cycle to confirm smooth operation and safety features.
When to call a professional and what to expect
If problems persist after safe DIY steps, contact a professional for your geis garage door. A qualified technician will verify safety features, test door balance, and inspect springs, cables, tracks, and rollers, as well as the opener settings. They may perform spring replacement or track realignment if required. A reputable pro will provide a clear estimate, explain options, and outline a maintenance plan to prevent future failures. Understanding the scope of work helps you budget and plan, reducing downtime and risk.
Maintenance tips to extend life
A proactive maintenance routine keeps geis garage doors operating reliably. Schedule a semi-annual check to tighten hardware, clean and lubricate moving parts, and test safety features. Keep tracks free of debris, inspect weatherstripping, and review cables for wear. If your door is used frequently or under challenging conditions, consider more frequent checks. Document maintenance activities and watch for creeping noises or resistance, which can indicate wear that requires attention. A small, consistent maintenance habit reduces unexpected breakdowns and extends the door’s service life. Integrating geis garage door maintenance into your calendar helps maintain performance and safety.
Tools & Materials
- Safety glasses(ANSI-rated; impact-resistant)
- Work gloves(Padded for grip; cut-resistant if possible)
- Stable ladder(Non-slip feet; tall enough to reach the door without overreaching)
- Socket wrench set (metric/imperial)(For mounting bolts and hardware)
- Screwdriver set (Phillips & flat-head)(For hinges and small fasteners)
- Silicone-based lubricant spray(On tracks, rollers, hinges; avoid high-viscosity oils on tracks)
- Towel or rag(Wipe excess lubricant and clean debris)
- Electrical tester (optional)(To verify outlet status if needed)
- Measuring tape(Assess track alignment and door position)
Steps
Estimated time: 60-90 minutes
- 1
Power down and secure the door
Shut off the opener at the wall switch and the circuit breaker to prevent movement. If safe, unplug the unit. Place clamps or wedges to prevent the door from drifting while you work.
Tip: Never work on a door that can move; securing it prevents injuries. - 2
Test safety features and opener alignment
Test the auto-reverse feature and sensor alignment using the remote. If the door doesn’t reverse on contact or sensors are misaligned, address these first before other inspections.
Tip: Keep a helper nearby to observe the door during tests. - 3
Inspect tracks, rollers, and hardware
Look for loose screws, bent tracks, or worn rollers. Clean debris from tracks with a cloth and check alignment by eye; use a level if needed.
Tip: A flashlight helps reveal hidden damage in tracks and joints. - 4
Lubricate moving parts
Apply silicone spray to tracks, hinges, rollers, and pulleys. Wipe away any excess to prevent dust buildup, and avoid spraying directly on belts or torsion components.
Tip: Lubrication reduces friction and extends life but over-lubrication can attract dirt. - 5
Check door balance and alignment
Manually lift the door to halfway and release; if it stays, balance is good. If it rises or falls, spring tension or balance hardware may need service by a pro.
Tip: Do not adjust springs yourself; incorrect tension can cause injury. - 6
Reconnect power and test full cycle
Plug the opener back in and run a full cycle. Observe the door for smooth travel, proper stopping, and safe sensor response.
Tip: If anything feels off, stop and reassess before continuing.
Got Questions?
What is geis garage door?
Geis garage door generally refers to a model line or configuration used in residential applications. This article discusses common diagnosis and maintenance steps that apply to many geis garage door variants, not a single universal spec.
Geis garage door refers to a model line used in homes; the steps here apply to typical models and help you diagnose common issues.
Can I replace broken springs safely?
Spring replacement is hazardous and should be done only by a trained professional. Torsion springs store a lot of energy and can cause severe injuries if mishandled.
Spring replacement is dangerous—do not attempt it yourself. Call a qualified technician.
Is lubrication safe for all parts?
Lubrication is safe for tracks, hinges, and rollers when using silicone-based products. Avoid over-lubrication and never oil belts or torsion components.
Lubricate the moving parts with silicone spray, but don’t overspray or oil the wrong parts.
When should I replace the opener vs repair?
Replace the opener if it cannot perform safety checks, is excessively noisy, or is outdated. If it still operates safely with some repairs, a repair may be sufficient.
If the opener fails safety checks or is old, replacement is worth considering.
How often should I schedule professional maintenance?
Aim for a professional inspection every 1-2 years, or sooner if you use the door heavily or notice rising noise or stiffness.
Have a professional check the system every year or two, especially if you use the door daily.
Watch Video
Quick Summary
- Identify symptoms before disassembly
- Prioritize safety features and balance tests
- Lubricate moving parts to reduce wear
- Avoid risky spring adjustments; call a pro when needed
- Maintain a routine maintenance schedule